It started when my son, the would-be builder, saw a couple of pallets at our neighbor’s house. They were propped up on the side of the road with a “free” sign stuck on. Have you ever seen a 6-year-old drag a full-size pallet for half-a-block? Adorable.
Our neighbor got wind of my son’s scrap-wood obsession and donated even more pallets to the cause. (He even brought them to our house – I have the best neighbors!) Soon, our driveway was practically paved with pallets.
My son had plenty of opportunity to create with his pallets, but about the time I wrote this, I decided enough was enough and confiscated a few for my own use in the garden.
What I had in mind was a simple tool storage system. About five years ago, I used a pallet to screen one of those ugly, dumping ground storages zones on our property from view of the street. That pallet has held up remarkably well, and over time I started to just stick garden tools in it, where they sit happily, until I finally go weed the front garden.
I figured something similar out back would be a good space-saving way to store garden tools during active gardening season.
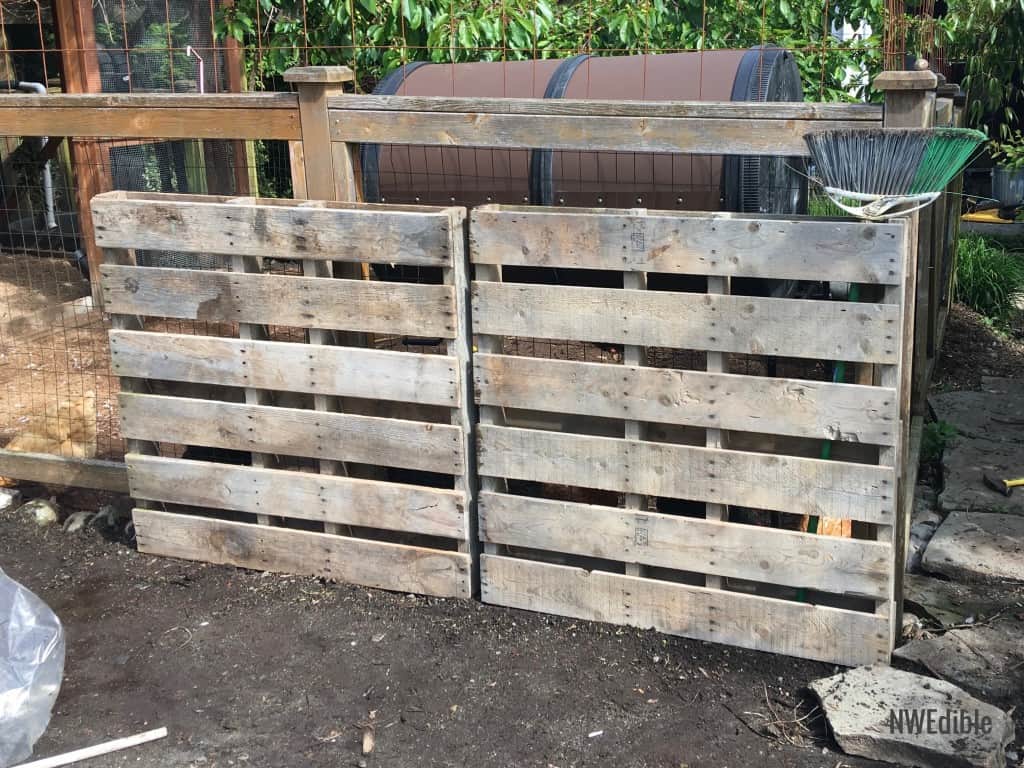
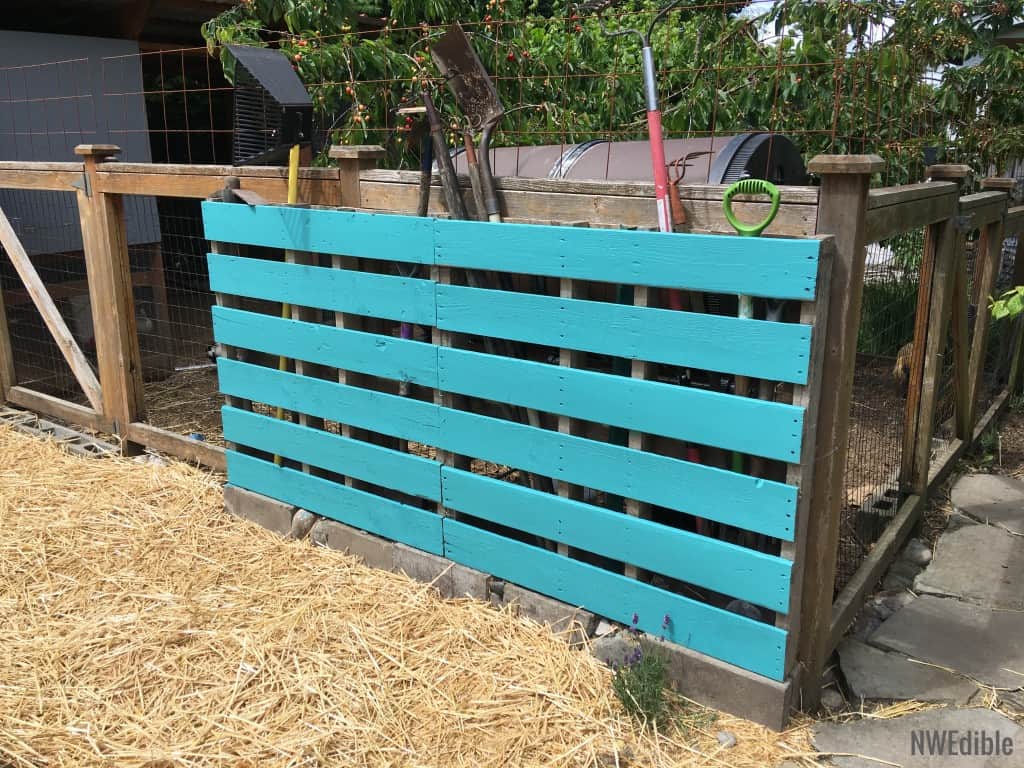
I started by hauling the two most attractive, solid-looking pallets around back, to the path area between my chicken run and the main garden (this photo collage should help get you oriented if you want).
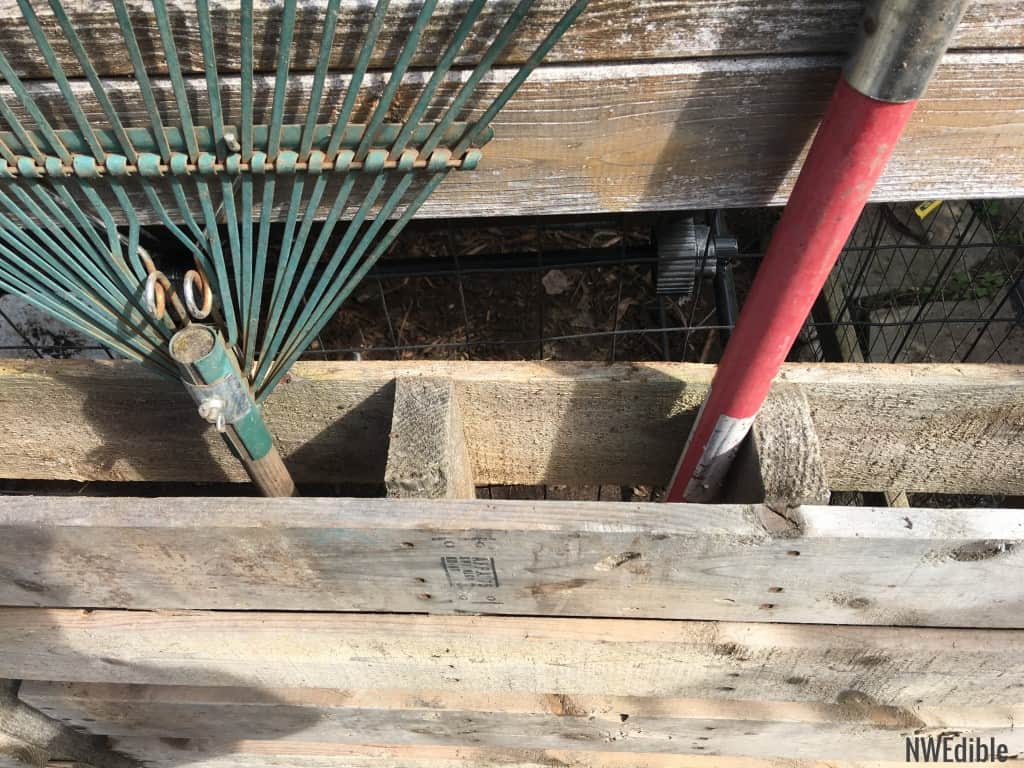
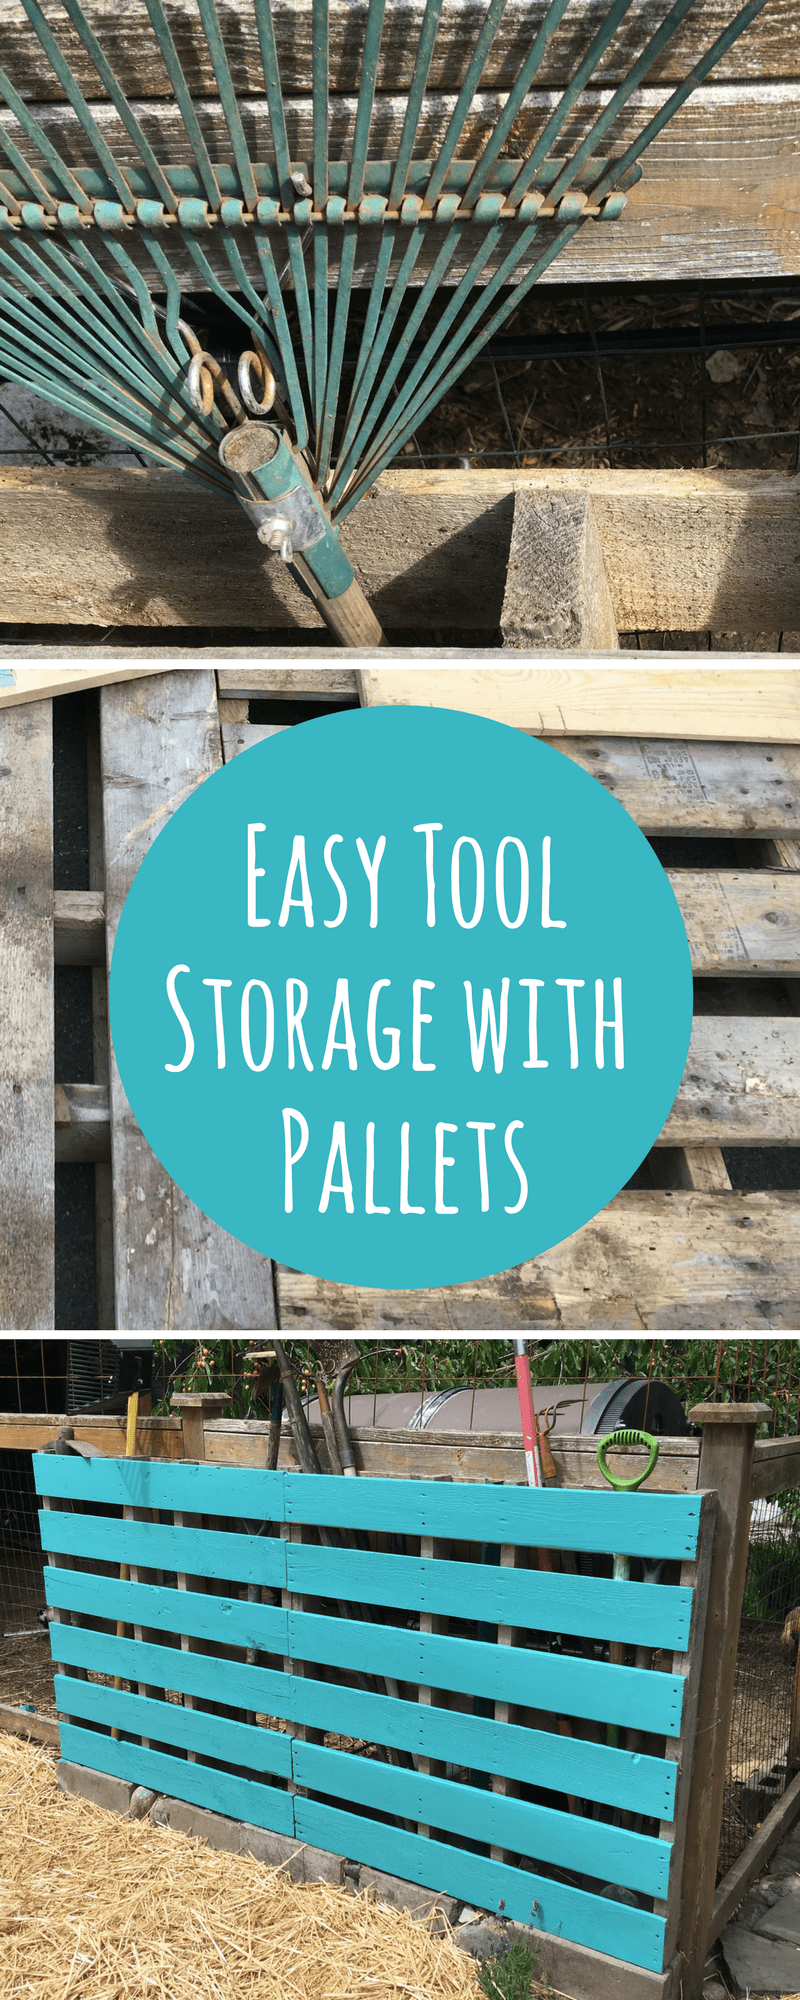
Because of the cross bracing in pallets, there are natural built-in dividers that nicely hold long-handled garden tools. I debating ripping down some 2×4 scrap to make more of these cross braces. If I had more skill with power tools, or owned a table saw, I probably would have. But as-built works fine.
To level the pallets and to get them up off the ground where they would rot far more quickly, I set the pallets on a few cinderblocks. The pallets and cinderblocks were leveled very well. I took quite a while with this, doing it right, but since the fence behind the pallets isn’t level, there’s a bit of a wonky look when you step back. Oh well.
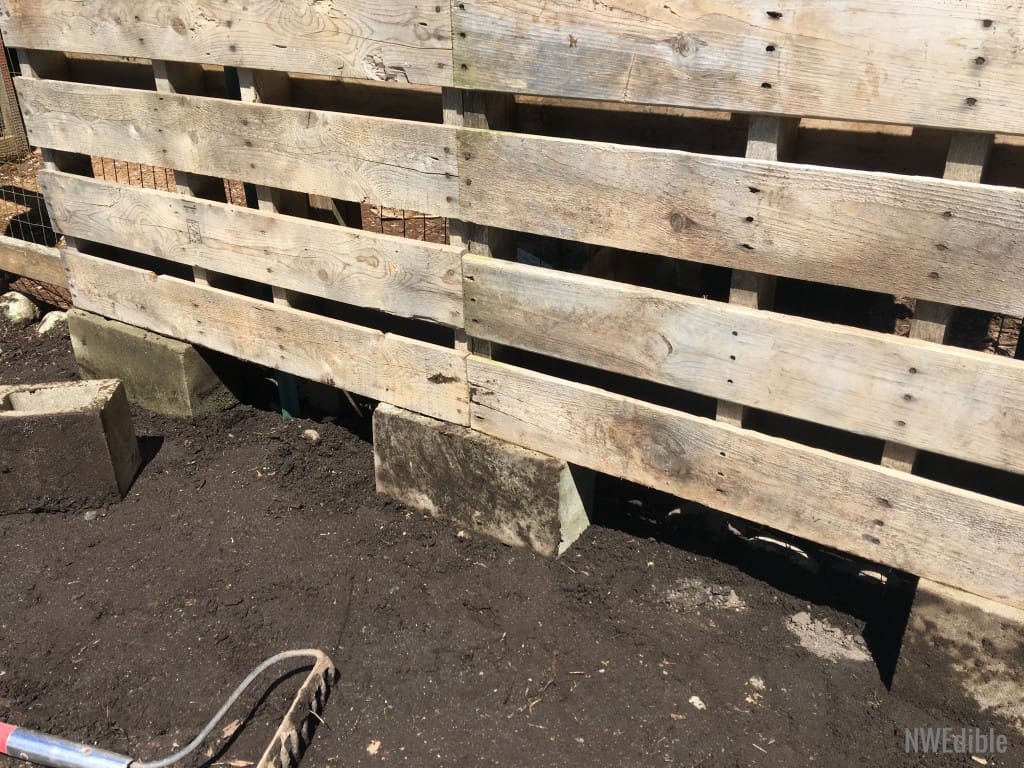
I wanted to secure the pallets in a way that would not permanently affix them to the fence. The fence badly needs to be stained, and that’s on my list for this summer. So I wanted to be able to fairly easily remove the pallets and set them aside when paintin’ time rolls around.
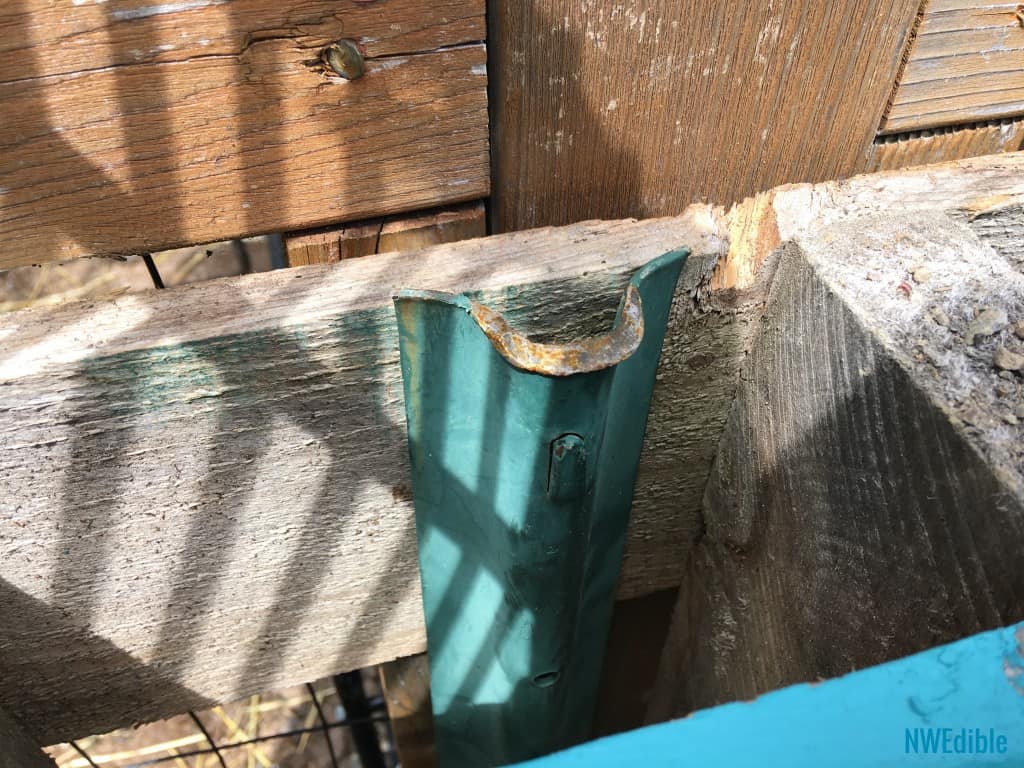
Solution? Hammer in some metal U-Posts! (Like these.) Each pallet got one U-Post, and they were positioned so they pushed the pallets back against the fence as much as possible for added stability.
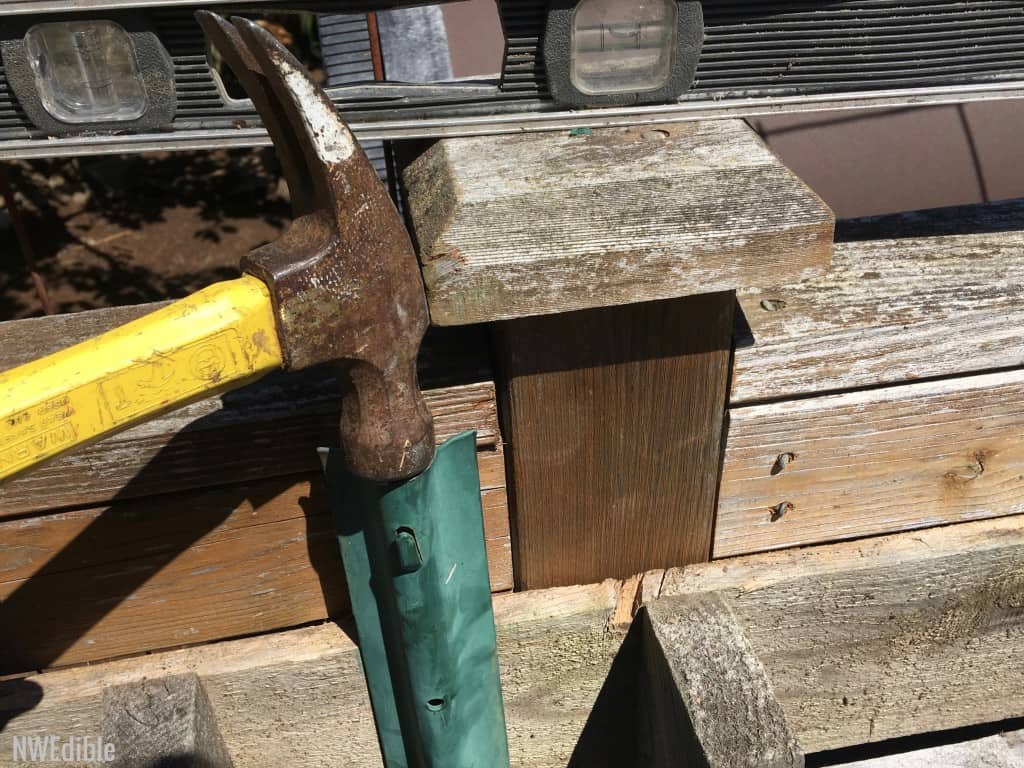
It took a bit but I got the U-Posts level with the pallets eventually. The pallets were tightly wired to both the U-Posts and the fence behind.
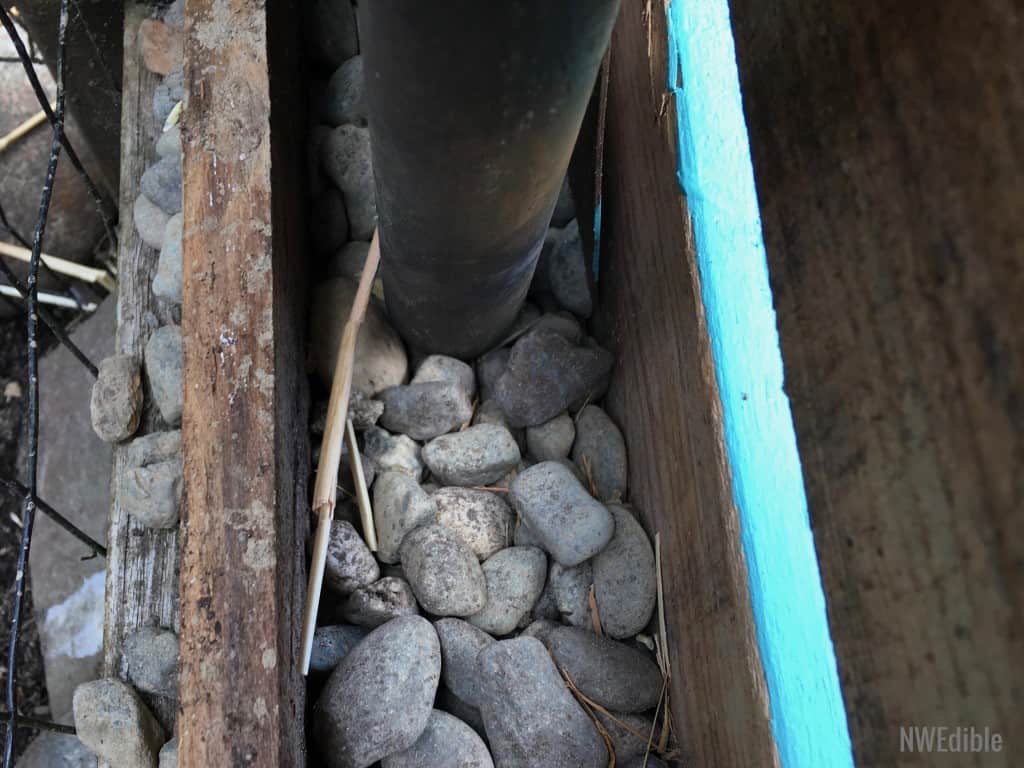
The next part was kinda a pain. I found whole and broken cinder blocks and big rocks, and filled in the gaps at the base, in-between the “real” cinderblocks that hold up the pallets
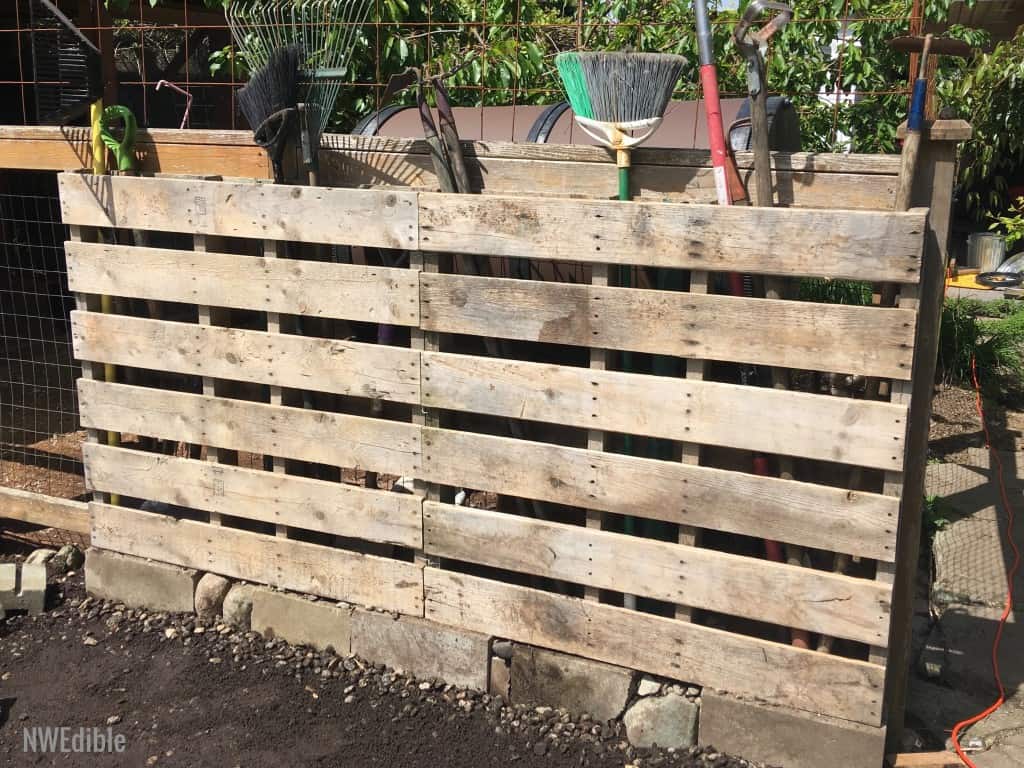
Then I poured a bunch of 1-2″ drainage rock we had leftover from another project down the middle of the pallet, to fill to about half-way up the first “course” of wood. This improves drainage, so the tools won’t end up in a standing puddle if when we get late-spring rains. It also raises up the tools in the pallet so they sit a bit higher.
A bunch of rocks slumped down into the chicken-coop because there were some gaps in my foundation. That was a serious drag. Although I like the outcome of the drainage rock layer, it was tedious to do.
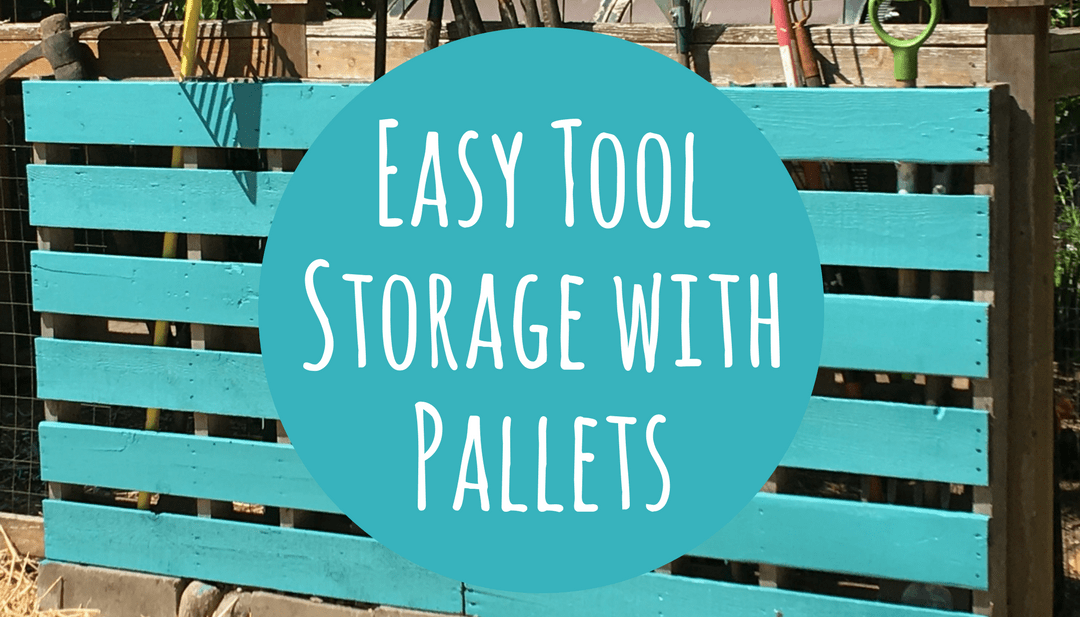
A nice bright coat of paint and my pallet tool storage rack is done! I really like this simple tool storage solution!
Thoughts, Ideas and Suggestions
If you have better woodworking skills than I do, additional divider sections would help more tools stay more perfectly upright.
Some hooks on the front for hand tools would work well.
Someone on social media asked (I think with mild horror) if I leave my tools outside. Yes, yes I do. I’m pretty good about getting the hand-tools I really rely on under shelter, but I leave my long-handled tools lying everywhere during active gardening season. It’s not deliberate neglect, it’s just that I sometimes hop from one thing to another faster than I should. If you take better care of your gardening tools then I do, this might not be a great solution for you.
However, my tool care failures are why I like this set-up, actually. It’s so space efficient that it tucked right in next to my main gardening area, which helps me keep my tools put away and contained, even if they are exposed to the elements.
I think you could do something like this inside a carport or storage shed for year-round tool storage, assuming the roof on your covered area was tall enough to let you lift the tools up and out. Although for tool storage inside, it’s hard to beat nails-in-studs.
Pin Me, Share Me, Save Me For Later
Big improvement over leaving your tools on the ground. A few tool sleeves made of PVC pipe screwed to the front of the rack would hold your small hand tools.
Great idea. Thanks, Erica’s Dad ;o)
We’ve started spray painting the long handled tools with florescent orange paint. We can find them wherever we leave them and protects even the old ones from the elements. I love the pallet idea! Thanks for posting the pics.
Glad you’re back!
I’m the one who asked, on Facebook (and yes, in mild horror *g*) about leaving your tools out. I would have expected it from someone in, say, southern California, but not the PNW, where we’re still expecting Junuary fog and rain (to balance out the NovAugust heat waves). But hey, if it’s working for you, that’s the part that matters!
Thanks for the awesome idea! I’m going to do this at our community garden. This system will be easy for everyone to use. And I like the idea of the PVC sleeves for the hand tools. We can probably make this whole setup with items we already have on hand, no trips to the hardware store and free!
Our entire place is put together with t-posts, zip ties and welded wire livestock panels. Buy yourself a t-post puller. It’s a giant lever that gets posts out of the ground without tweaking them so they can be reused. Now I’m asking myself how to affix a pallet to a livestock panel…
Hey… thats a great idea….but, all garden tools should be kept out of the elements or they will rust or dry out and create splinters on the handles
Great idea !! Funny thing……I have a mini-me version – same teal color and everything – hanging on the side of my barn. I hang smaller garden tools from nails…….short handled spades and shovels, dandelion diggers, trowels, small rakes, and a metal basket is nailed to the barn door collecting about 27 garden gloves and 18 pruners from Costco. ha ha ha. I love Anne’s comment, who says her whole farm is held together with zip ties and T-posts and hog panels. And who here can say they haven’t dragged Free stuff home from the side of the road? right? Hellooooo, free rocks line my garden bed, free curly willow created an arbor, free desks hold a table saw etc.. And my pallett collection is about to become a living wall between my new deck and my neighbor. Yaaah “chick solutions” and free stuff. !!!!!!!
I love this idea of yours. Hey, I love tools and pallets too! I have had to replace enough tools from rot though (for the same reasons you leave them to and fro) to appreciate the idea of protecting them a little from rain. Just nail some 2x4s to the ends and one fastened to the top of those and drape an old shower curtain or tarp or anything from it and they’ll be protected enough! It’s easy to raise the front side when you fetch your weapon of choice and you can decorate it too if you want! Also if you just rub a little oil into the wood each season they’ll repel water. Thanks for such practical and down to earth project ideas. No room for tool snobs in our world!
Hi, we did something similar with our community garden compost bins. The 3 sided bins are built from pallets with an upright “tool” pallet attached to the end. It stores turning forks and the long bamboo poles used to push rough material through our shredder. No more excuses – the tools are right there – that pile gets turned frequently!