In most emergency situations staying in your home, where you have all your supplies and you can be reasonably comfortable, is preferable to leaving. Even if the power goes out, even if you are cold, you’re in a familiar place with resources. Staying put through an emergency is called sheltering in place or “bugging in” in the preparedness community.
However, in some scenarios, the best chance you have of coming through an emergency unharmed is to not be there when it happens. As we saw with both Harvey and Irma, a hurricane threat can prompt planned evacuations. Chemical spills or fast-moving fires might require a very rapid, unplanned evacuation. A tsunami siren might mean you have just a few minutes to get higher and further inland or you will die.
“Evacuation” can mean many different things. It might be a flight off a small Caribbean island, or a quick drive up the road to higher ground or a designated shelter. It could be a Consular Officer knocking on your hotel door in a foreign city and telling you a coup is in progress and you have 10 minutes to pack and get to the airport. It might be a relaxed weekend in a different city or a frantic race out the door with only what you can carry.
Think of your 72-Hour Bag as a highly portable collection of your most essential emergency supplies.
72-Hour Bag Basics
- Pack your 72-Hour Bag now, before you need it. In an emergency evacuation, not only will you not have time to pack – you may not be thinking clearly or rationally. (I frantically packed for a two week trip in 10 minutes once after screwing up on the departure time of the airplane. I forgot to pack clothing. Seriously.)
- You can and should customize your gear for your needs, family situation, location, etc.
- It’s ok to add to your bag over time – get the most critical items assembled, and work on your “nice to haves” as money becomes available.
- Every full-sized family member should have their own 72-Hour Bag. Scale the size and weight of the bag appropriately for different family members.
- If you have small children who cannot carry their own pack, you’ll need to pack supplies for them as well.
- Keep the contents of your 72-Hour Bag organized. I use heavy duty plastic ziptop bags and label each bag with the contents. Works great!
- Review and refresh the contents of your bag every 6 months, test batteries, and swap out aged bottled water and storage food for fresher stuff.
- Memorize the saying, “Set your clocks, check your stocks” and check your emergency gear every spring and fall, when you adjust your clocks for Daylight Savings time.
- I don’t foresee grabbing my pack to go live in the woods while society collapses, so I don’t pack wilderness-type gear. Some people do – you decide what you think makes sense for you.
- Although I would prefer that your 72-Hour Bag be maintained at-the-ready for evacuations and sudden emergencies, once it’s done you also have the basic preparedness supplies you need for at-home power outages, flu season etc.
What Should Be In Your 72-Hour Bag
Here are the general components of a good 72-Hour Bag. You may not need and/or want everything on this list. Or, there might be something you would never leave home without that I didn’t include. Customize for your needs!
1. Start with a good quality backpack
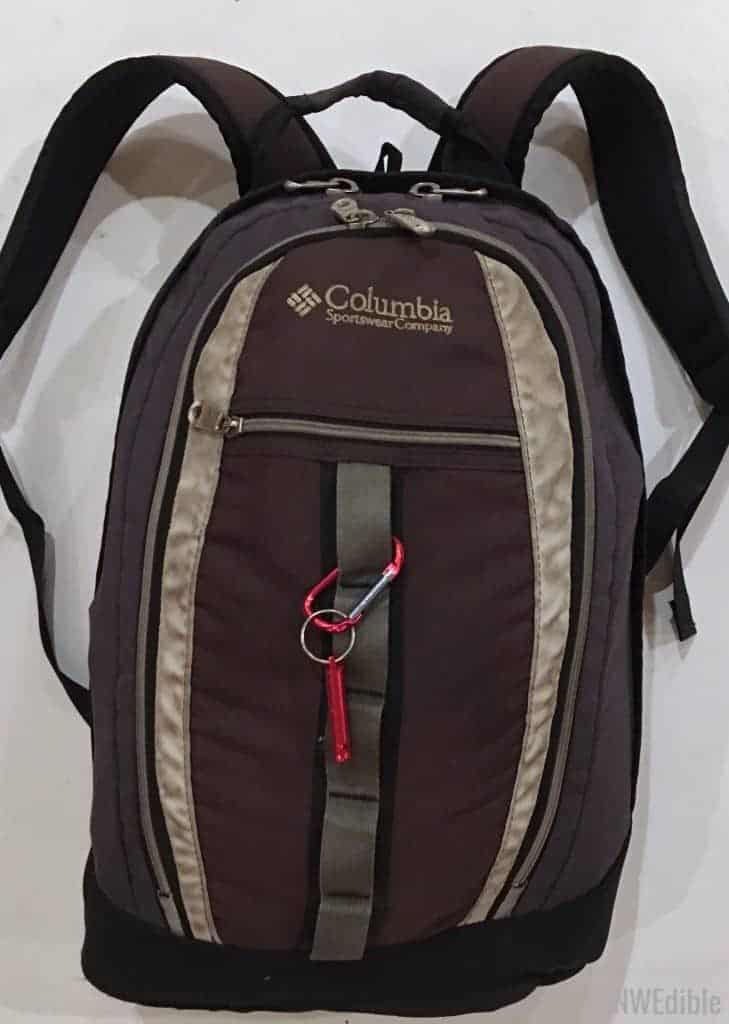
I prefer backpacks for 72-Hour Bags. Some people use totes. Backpacks have the major advantage that you can comfortably carry them if needed for long distances. They are also ubiquitous – no one gives a second glance at someone wearing a backpack.
- I prefer a comfortable, basic academic or laptop style backpack. Get something easy to carry, lift and wear. Make sure the straps don’t rub your neck or otherwise irritate you. I use this backpack everyday and think it’s the greatest thing in the entire world.
- Thrift stores often have inexpensive but good quality backpacks, especially at this time of year when students are upgrading. I bought my current 72-Hour Pack at the local thrift store for $7.
- Your backpack should be sturdy and roomy, but not so large you are tempted to overload it. Ask yourself, “Can I carry this for 10 miles?” If not, you may have too much stuff in there.
- You don’t need anything fancy, like a framed camping backpack or a military pack. Unless you have current military skills to back it up, avoid anything that looks technical, like a camo or a “tactical” backpack. As I told my mom when I insisted she set up a 72-Hour Bag, “If you have to grab this pack and walk to my house, you don’t want to look like you are a 65-year-old grandma with a lot of useful supplies.”
2. Water
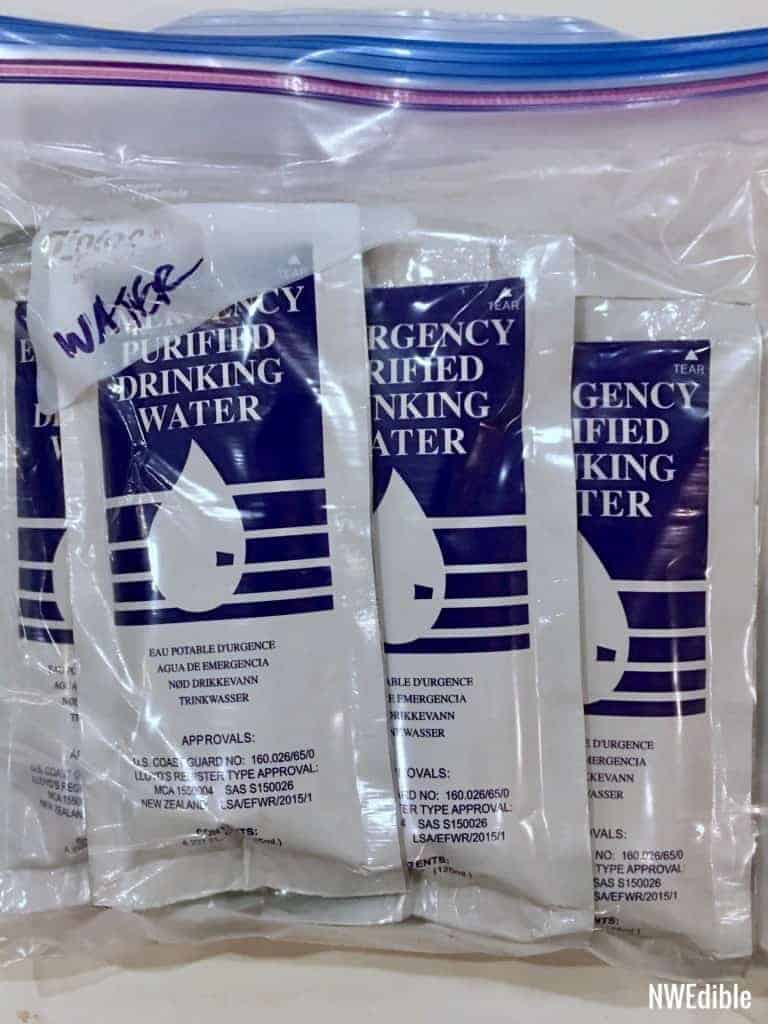
Water gets very heavy, very quickly. If you live in an area where fresh water is likely to be accessible (i.e., not the desert) don’t try to carry all the fresh water you need on you. It may make more sense to pack 16 to 32 oz. per day of ready-to-drink water along with a way to purify more.
- Sealed water bottles don’t really expire. (They do but they don’t.) However, the thin cheap plastic will degrade over time and leak. Swap out any plastic water bottles regularly so your kit doesn’t end up soaked.
- Although they are more expensive, I do prefer emergency water pouches over inexpensive commercial water bottles particularly for water which will be stored in a car. The pouches are BPA free, and will handle freeze-thaw and heat cycles far better than commercial plastic water bottles. They also last about 5 years.
- Water purification tablets or drops are small, lightweight, and an excellent way to treat clear (i.e., non dirty) but possibly contaminated water without boiling. Most chemical water purifiers require a treatment time of up to several hours before the water is safe to drink. You’ll need a water bottle or container to hold water that’s being treated.
- Lightweight water filters and filtering “straws” are effective at removing bacteria and parasites from water. I keep a a small “straw-like” inline filter called the Sawyer Mini in my bag. A similar product is called The Lifestraw.
- Higher volume filters are a good choice for parents who will be responsible for filtering water for their children too. They also typically remove more contaminants than straw-types. If you go camping or hiking you probably are familiar with something like this.
- If you are evacuating by car, it’s ideal to have a case of water or a some bulk storage containers of water handy that you could throw into the car as you leave.
3. Food
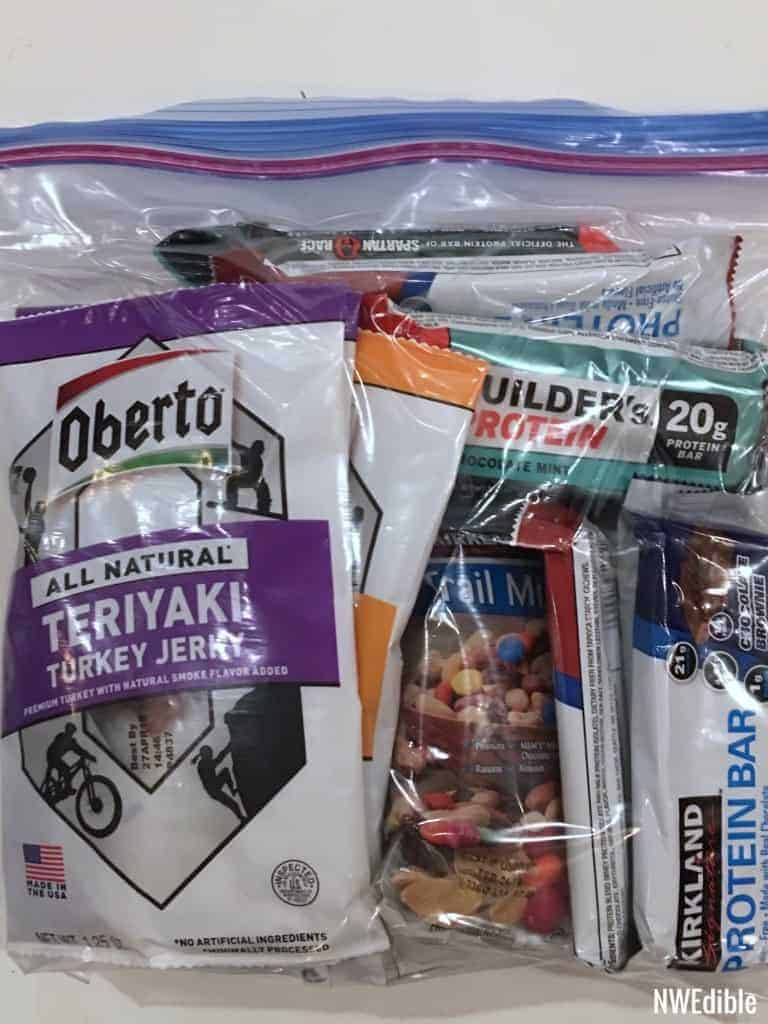
You want lightweight, nutrient dense, portable and shelf-stable food. Ideally, you’ll have about 2000 calories per person per day worth of food in your bag. For three days that’s 6000 calories. Skip food options that require cooking for your 72-Hour Bag.
Some options:
- Granola bars or protein bars
- Nuts, dried fruit, or trail mix
- Jerky, pouches of tuna, or other protein sources
- Individual pouches of peanut butter, almond butter or similar
If you just pack very easy to eat snack foods like this, you won’t need bowls, plates, cutlery, a camp stove, etc. Note that this type of food will require higher water consumption.
If you prefer to have more (or hot!) food options, consider a very lightweight fold-flat stove designed to work with solid fuel tablets. Solid fuel is a better choice than propane or similar fuel canisters in a 72-Hour Bag. Throw in a metal camping mug and you’ve got options like:
- Freeze dried commercial camping food, like Mountain House
- Noodle soups
- Instant coffee, tea, cider, cocoa, etc.
Consider also specialty food needs of children and infants. Will you need formula?
4. Clothing
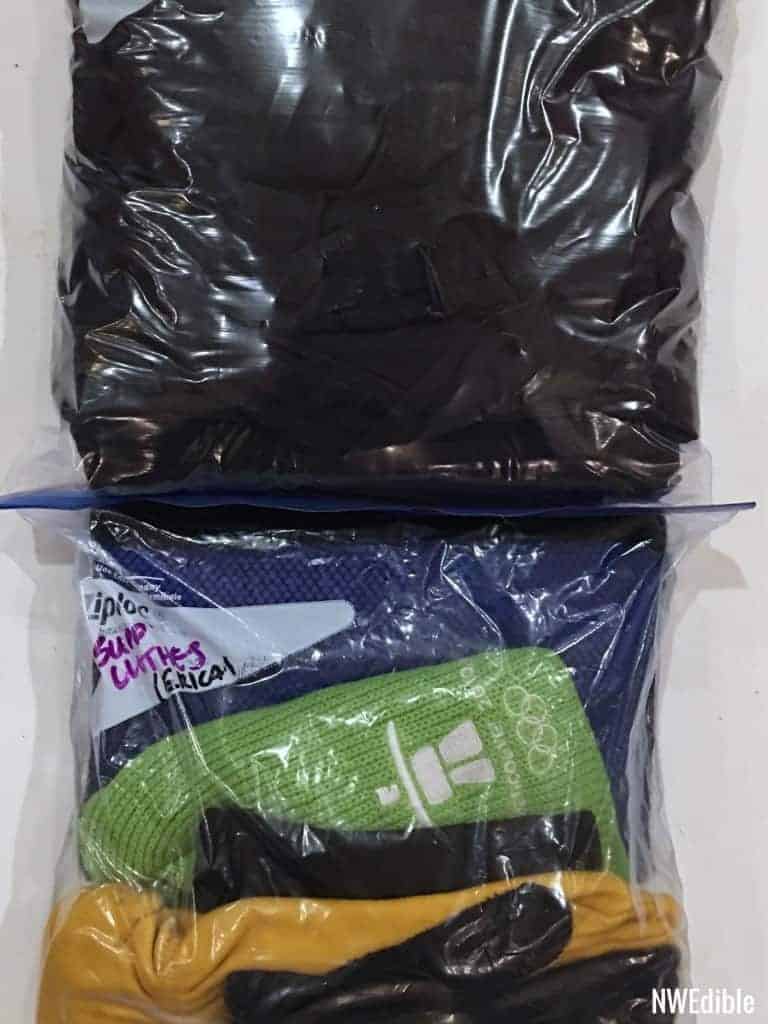
Pack a complete change of clothes that are appropriate to your locale. Rotate clothing seasonally if necessary. If you have kids, make sure to swap out their clothes as they grow out of them. Thrift stores are a good place to look for clothes, or “retire” older, sturdy clothes to your 72-Hour Bag. If you tend to go up and down in weight, pack clothes that will comfortably accommodate you at your “up” size.
I include the following basics:
- An undershirt
- A long-sleeved shirt
- Underwear
- Quick-dry long pants with some rain resistance, like mid-weight hiking pants
- Two pairs of heavy, warm socks
And these supplemental clothes:
- Warm Gloves
- Warm Hat
- Leather work gloves
- Waterproof poncho
- Sturdy, all-weather footwear. Something like an “urban hiker” style boot, or mid-height Bogs are excellent options. If you typically wear sensible shoes this might not be critical for you; if you spend your days in an office downtown in 3-inch heels, make sure you have alternate footwear somewhere you could get to it in an emergency.
5. Warmth or Temporary Shelter
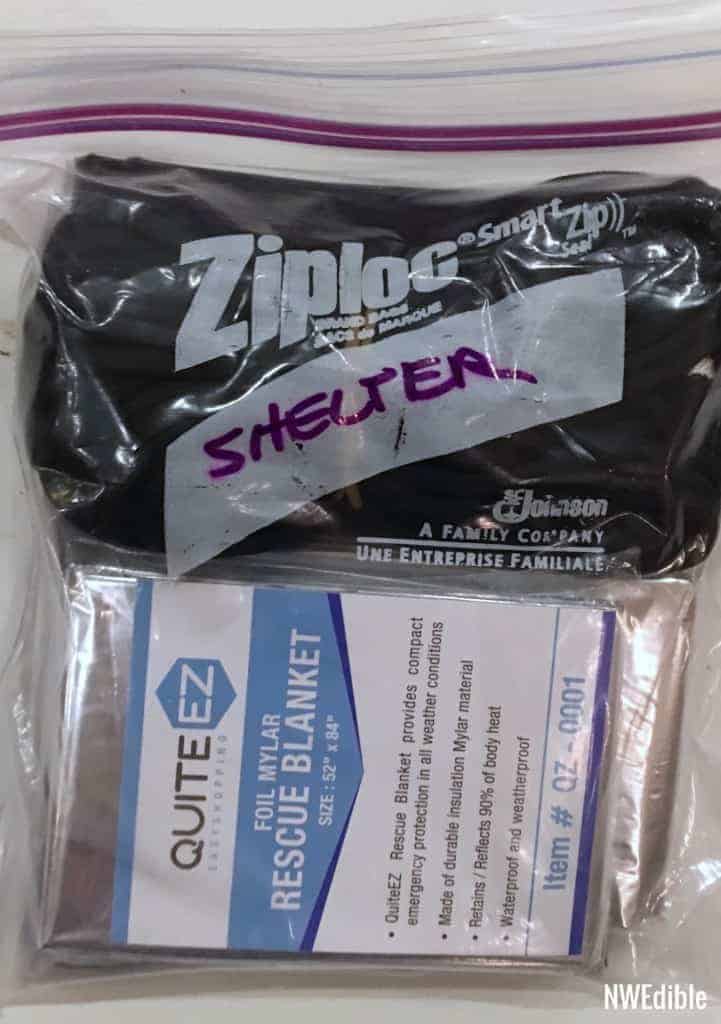
If you have to keep warm away from home, the ideal solution is to go stay with a friend or check into a hotel. An emergency shelter may be an option too, depending on your town and the emergency. However, if you are stuck (for example in your car in a winter storm or forced to sleep rough in transit from work to home) the ability to keep warm is critical.
- Mylar blankets are a basic essential. Wrap yourself in them so you end up looking like a human Jiffy Pop and they will keep your body heat in your body where it belongs.
- Black, heavy-duty plastic trash bags can be used as an impromptu tent to keep rain off, or filled with debris to make a ground bag that will elevate you up off the ground so you can sleep more warmly.
- A more robust (but also more expensive) option is a bivvy sack. This option is basically a sleeping bag made out of mylar, like the cheap space blankets but far more heavy duty.
6. First Aid
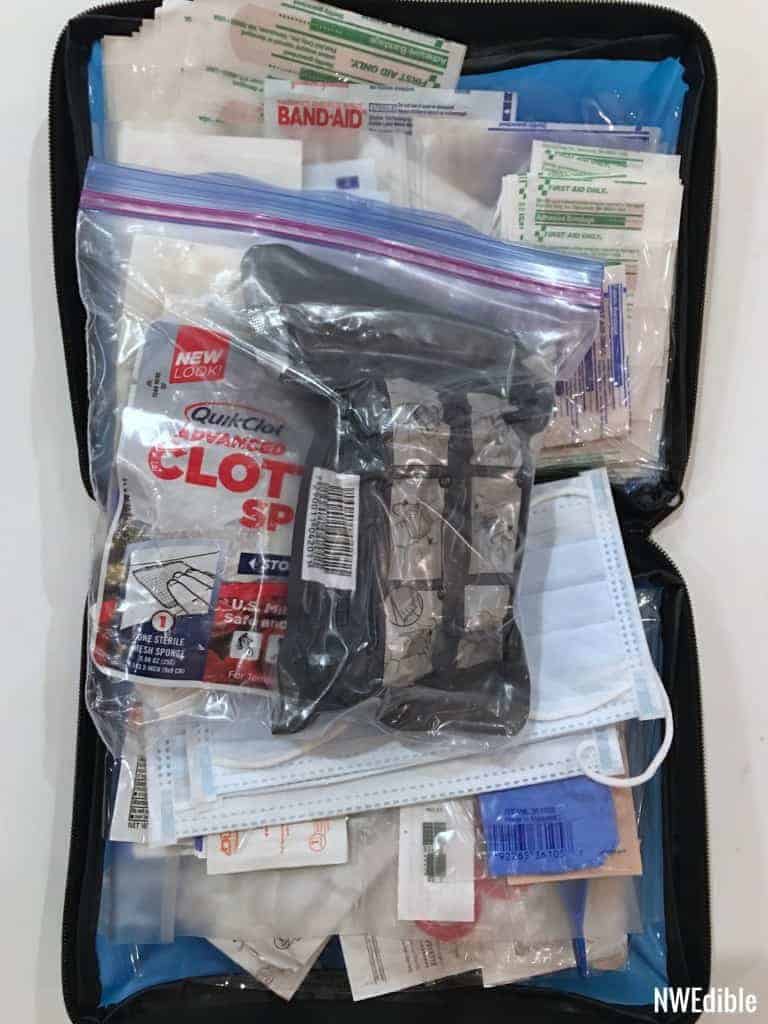
Buy or assemble a basic first aid kit. This is one area where I think it can often make sense to just purchase a kit. Then, personalize it based on your needs, what medicines you do and don’t take, etc. At a minimum you’ll want to include:
- Band Aids in a variety of sizes
- Antiseptic wipes and/or alcohol prep pads
- Antibiotic ointment
- Sting relief cream
- Burn cream
- Antacid
- Aspirin, ibuprofen or other pain killer tablets
- Gauze pads in assorted sizes
- Gauze roll
- Medical tape
- Small scissors
- Eyewash
- Disposable gloves
- Antiseptic gel
- Tweezers
All that stuff should come in any halfway decent First Aid Kit. Then, I highly recommend adding:
- Moleskin
- Wound sealing powder or Quick Clot clotting sponge (I think everyone should keep wound clotting powder on hand everywhere they keep band aids – home, car, everywhere.)
- Compression bandage
- Additional disposable gloves
- A pocket first aid book
7. Hygiene and Health
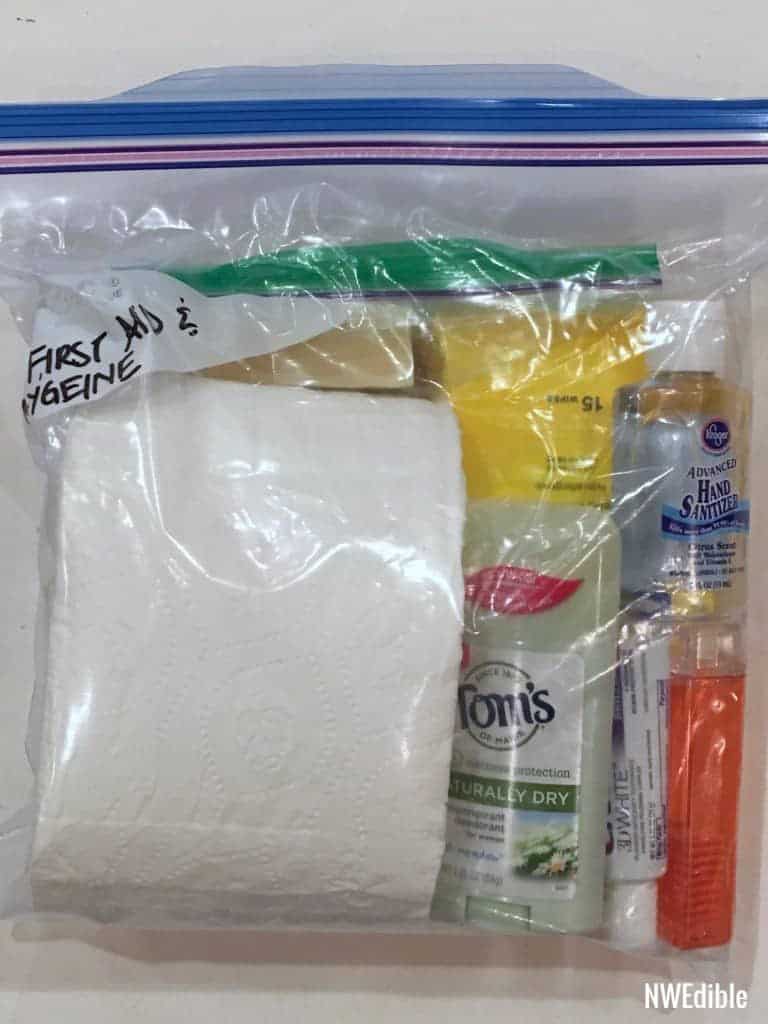
You’ll want this stuff so you can feel human:
- Three days worth of any medications or vitamins you take on a regular basis
- One roll of toilet paper (remove the cardboard center tube to make it easier to flatten)
- Toothbrush and a travel-size toothpaste
- Lightweight, quick-drying towel
- Anti-microbial wipes or baby wipes
- Deodorant
- Soap
- Alcohol-based hand sanitizer
- Insect repellant
- Sunscreen
Other items to consider depending on your situation:
- An N95 mask – this is the kind that filters out small stuff more effectively than a standard paper mask. If you are putting together a kit for kids, some of these filters are adorable.
- Travel clothesline or clothespins
- Travel sewing kit – you might need to repair your 72-Hour Bag!
- Pads, tampons, Diva Cup or similar, or other menstrual supplies
- Condoms or other family planning supplies
- Hairbands or bandana
- Toilet seat covers
- Children’s diapers
8. Illumination and Fire
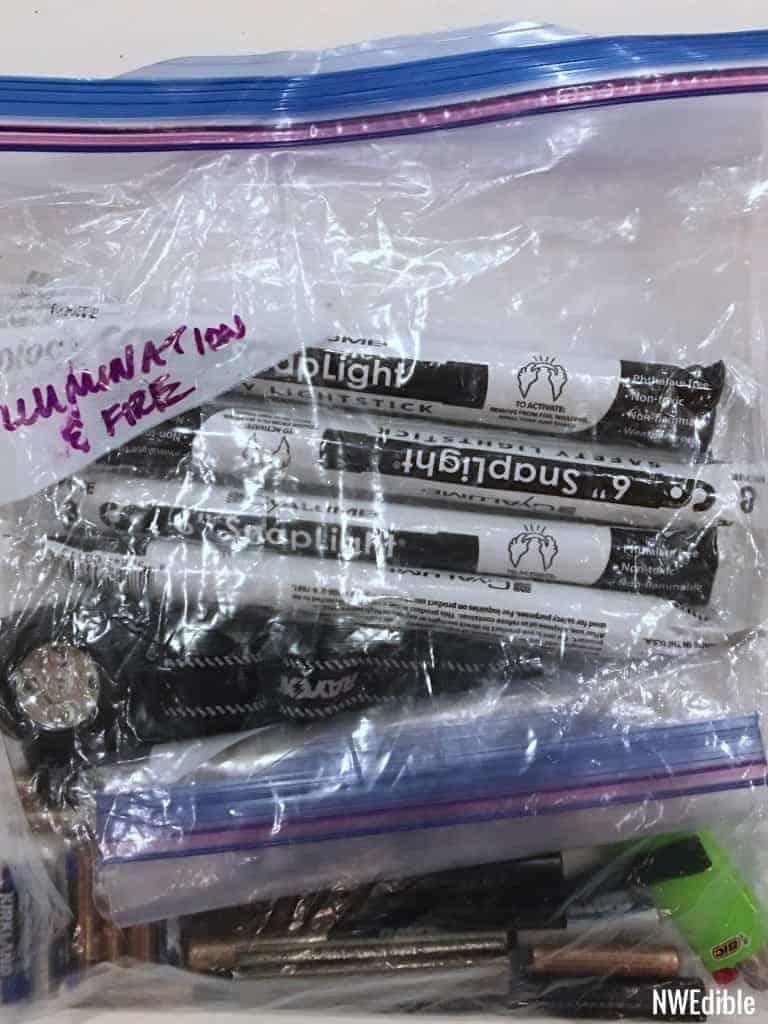
Everything you might need to reliably get a fire going, plus assorted ways to light up your life. I highly, highly recommend including a headlamp. In an emergency situation, in the dark, hands-free illumination is the way to go.
I also recommend standardizing your batteries if possible. If all your battery-operated things take the same size batteries your life will be easier in an emergency, and every six months when you refresh your supplies.
- LED flashlight
- LED headlamp
- Batteries – store them out of the flashlight and headlamps. Pack twice the number of batteries as “should” be needed.
- Glow stick lights
- Bic lighters – my preferred fire starting tool.
- Emergency fire starter fluff (Make your own by mixing laundry lint with melted coconut oil or Crisco.)
- Ferro Rod or Magnesium Fire Starter
9. Communication and Navigation
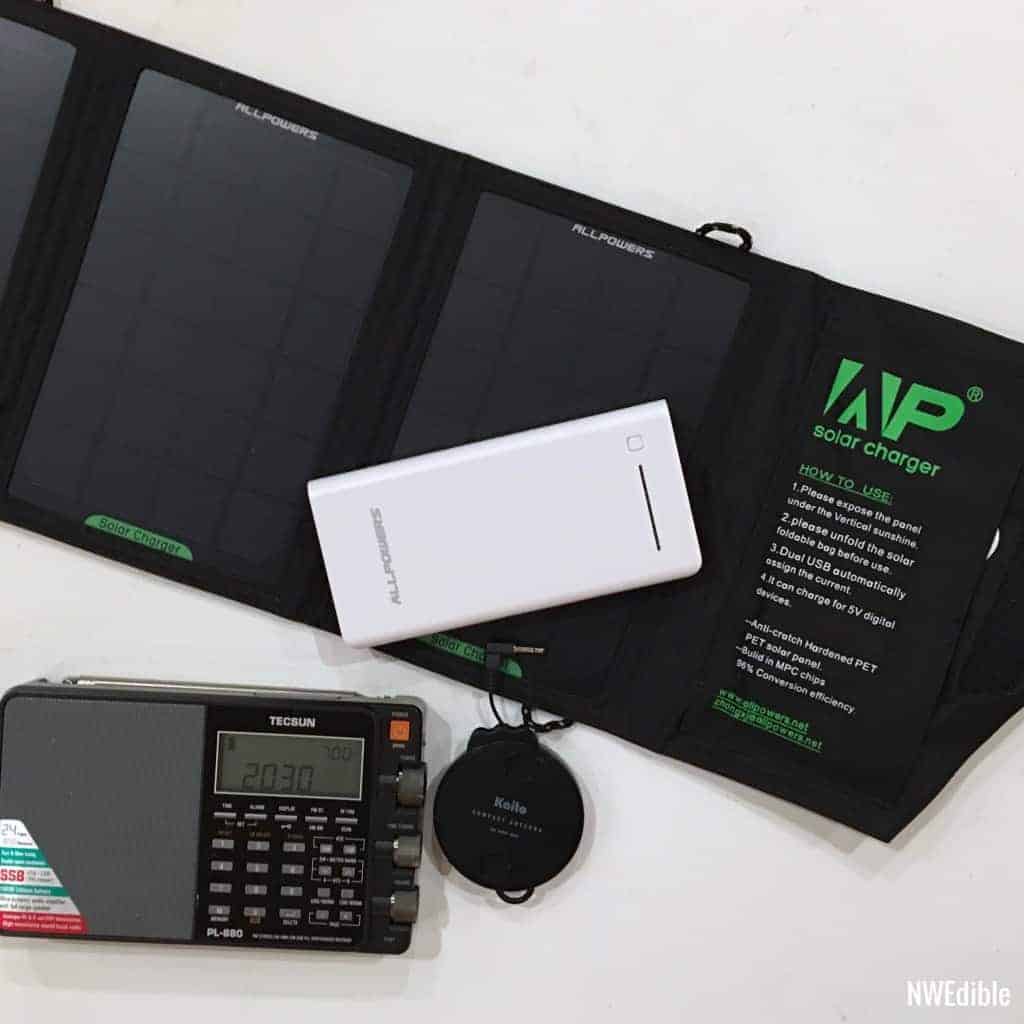
A whole post is going to be devoted to emergency communications in a little bit. Many of our communication tools like a cell phone fall into the category of “Every Day Carry Items” (EDC in preparedness lingo.) Other communications tools are more home based. You’ll have a better idea of how to customize your communication needs once we cover that topic in depth.
Items to consider:
- Emergency whistle
- Non-breakable signal mirror
- Compass
- Your evacuation plan (We’ll talk more about this later in the month)
- Paper maps of your region, or regions you are likely to be in an emergency
- Paper list of family and friends to communicate with in an emergency
- Paper list of contact info for local hotels
- Handheld, handcrank radio to receive NOAA Weather announcements and emergency broadcasts
- Spare USB charging cable for your phone
- Backup battery for phone unless that’s part of your EDC.
10. Tools and Miscellaneous
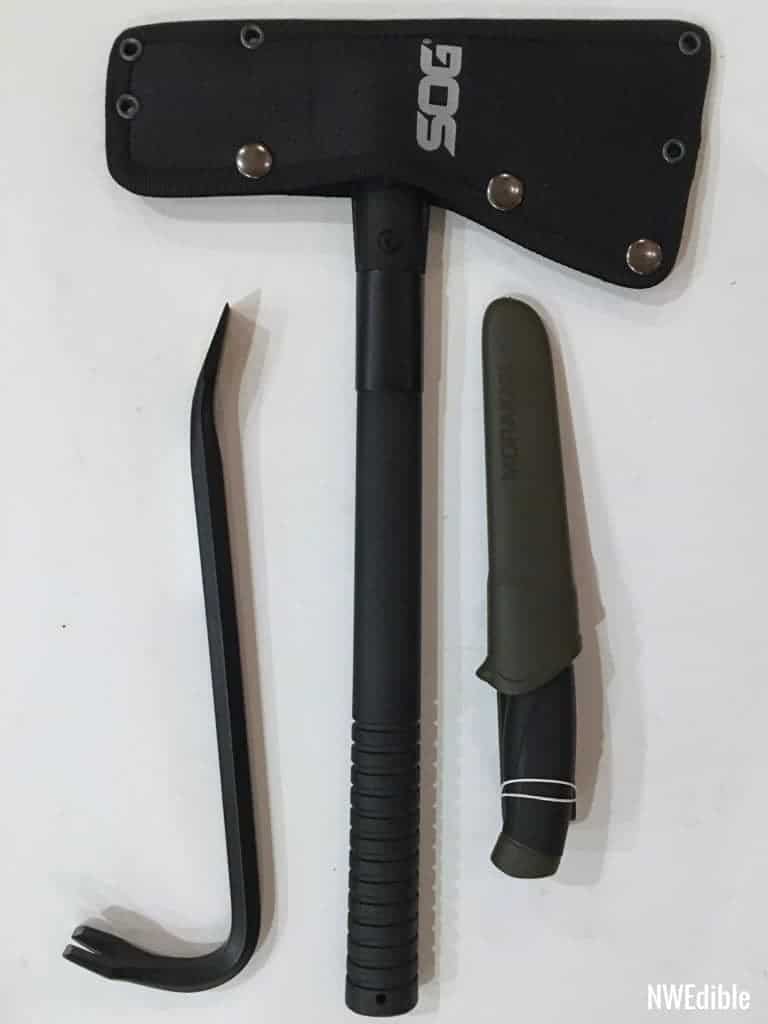
An assortment of tools can be useful in dealing with the aftermath of a storm or other natural disaster.
- Multi-tool – this may be part of your EDC instead of in your 72-Hour Bag. Selecting the right multi-tool is a very personal decision. I recommend an in-person trip to an outdoor or sporting goods store to test a few out if you aren’t sure what you like.
- Fixed blade knife
- Folding Saw
- Mini Crowbar
- Lightweight Hatchet
Small items everyone should have in their bag:
- Paracord
- Fine gauge wire
- Duct tape or other heavy-duty tape
- Playing cards
- Small notebook
- Ballpoint pen
- Black sharpie
- Emergency cash – $10 is great. $100 in small bills is greater. Do what you can.
Specialty Items
- Emergency info on encrypted flash drive. (We’ll talk more about this later in the month)
- Specialty comfort items for children – small toys, coloring books, stuffed animal, etc.
- Photos of family members
- Children’s identification cards (We’ll talk more about this later in the month)
- Any specialty supplies for pets that would evacuate with you.
- A religious text that’s meaningful to you
Get-Home Bag: It’s Just Another 72-Hour Bag
Just as emergencies can force you out of your home, sometimes emergencies can make it difficult to get back to your home.
That’s where a Get-Home Bag comes into play. A Get-Home Bag is simply a 72-Hour Bag that you keep in your car, office, or other place you are likely to be in an emergency. The only thing that’s different is your Point A and Point B.
When stored in the car, the purpose of a Get Home Bag is to help keep you alive in the event you are stranded in your car for some time before help can arrive (such as in a winter storm), or to get you home safely in the event you need to abandon your car and traverse on foot for some distance. Consider adding car-specific items like road flares, jumper cables, etc to a car-based Get-Home Bag.
When stored at an office or other place you are likely to be, the purpose of this bag is to allow you to shelter in place if needed, or to set out for home with more than just the shirt on your back.
Does this mean you might need multiple 72-Hour Bags? Maybe? We deal with that issue by keeping Nick’s 72-Hour Bag in the car, and mine and the kids’ bags in the house. Your individual situation with work, travel, commute, etc. will help inform the right solution for you.
Prioritizing and Shopping For Your 72-Hour Bag Gear
It might take a while to fully stock your 72-Hour Bag. That’s ok! In fact, it’s always kinda a work in progress. Some of this stuff you probably have around your house right now, some will be easy and cheap to get, and some might get added down-the-road.
Start With The Basics
Sadly, a tactical tomahawk shouldn’t be your first purchase. If you are just starting in preparedness, start by filling your backpack with these 10 essentials:
- Water
- A basic first aid kit
- A mylar emergency blanket
- Protein bars or similar
- A good multi-tool with a knife
- A headlamp with extra batteries
- A backup battery for your cell phone
- Appropriate change of clothing for your area
- Heavy duty black plastic trash bags
- A good length of paracord (you really can never have enough paracord).
Where To Shop
- Amazon is really excellent for emergency preparedness supplies, your best bet for the more obscure things like an IBD compression bandage, and generally I find the reviews very helpful.
- Warehouse stores like Costco often have great prices on basic medical supplies, power bars and snack food items, bottled water, heavy duty trash bags, and batteries. I often see items like flashlights and first aid kits there, too. (See more: Costco Business For Preparedness Supplies – Patreon).
- Your local hardware store or a Big Box store like Home Depot or Lowes is a good options for wire, duct tape, crowbars and other tools.
- The thrift store is an excellent resource for clothes. I find high quality seasonal gear like rain pants, snow suits, etc. at my local one, particularly for my kids.
- Dollar stores often carry a wide selection of medical and first aid supplies.
- REI, Cabela’s and similar outdoorsy stores offer most of the items on this list and would be happy to part you from all your money. They’ll also sell you a kayak you don’t need if you aren’t careful.
You can buy pre-packed, 72-hour emergency bags. (Many are terrible – this one at least comes with decent, name brand components.) However, if possible I do recommend taking the time and effort to put your own pack together. You’ll probably save money, and you’ll have a far better understanding of what your resources are in the event you need to use them.
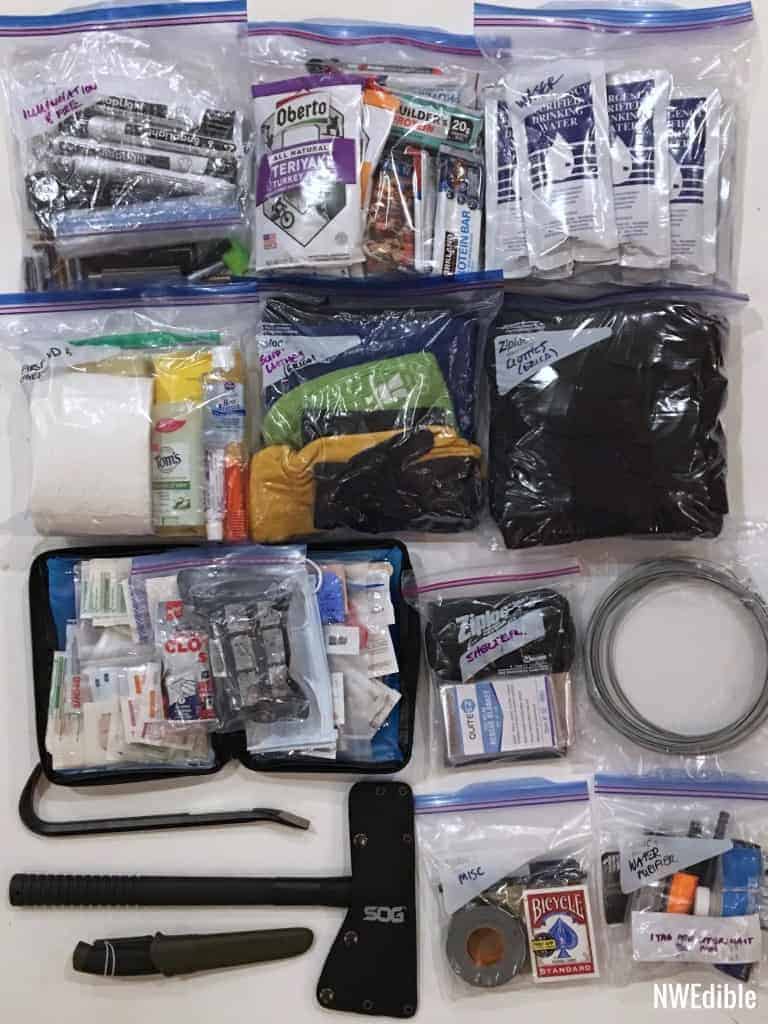
Where To Store Your 72-Hour Bag
Now that you’ve got your 72-Hour Bag put together, where are you going to keep it?
You want all this gear in one, easily accessible place so you can grab it and go. A front closet is great. One friend of mine combines style and sensibility by storing her family’s 72 Hour Kits in an attractive lift-lid bench by the front door. Most of the time, the bench provides a convenient place to sit down and take off shoes, but in an emergency, she knows exactly where her gear is.
In a mom’s preparedness group I belong to, members have come up lots of great solutions for storing their emergency supplies that would work very well for 72-Hour Bags. One mom keeps her gear in a heavy duty tote on the back patio, another in a tote in the garage. One mom picked a bedroom closet because it was central for all family members, another opted to store her disaster kit in a backyard shed.
If you spend a lot of time in or near your car, and break-ins aren’t too problematic in your neighborhood, keeping your 72-Hour Bag right in your car might be your best choice.
Today’s Preparedness 101 Challenge
Get your 72-Hour Bag together! If you already have an Emergency Go Bag, Bug Out Bag, or similar, bring it out, check it, test it, and update it. If you don’t have an emergency backpack, start gathering in what you will need to put one together for each member of your family.
In the comments, I’d love to hear what your critical grab-and-go preparedness items are.
• • •
Preparedness 101: The September Series
- Preparedness 101: What’s Your Preparedness Philosophy
- Preparedness 101: Everyone Has A Zombie Apocalypse Scenario
- Preparedness 101: Assembling A 72 Hour Bag <— You are here
![National Preparedness Month 2017 Logo [JPG]](https://nwedible.com/wp-content/uploads/2017/09/npm17_logo_CMYK_medium.jpg)
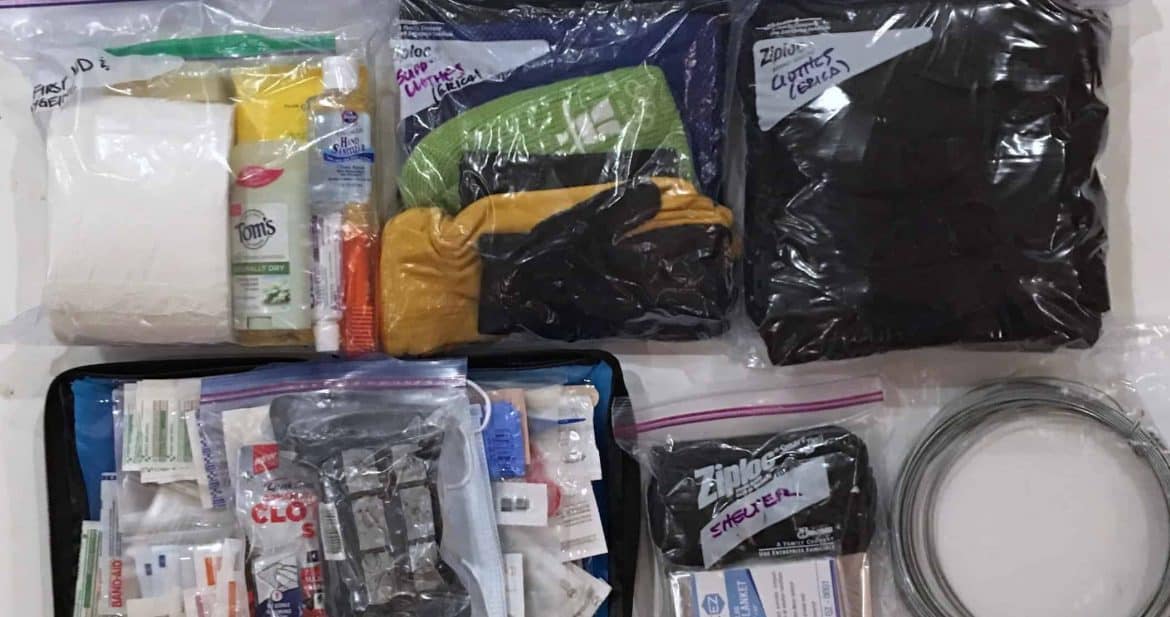
I live in the Puyallup area, and of my more likely “get home” scenarios is if a winter storm rolls in worse than expected and I have to hike it at least part of the way home, so winter base-layers were a must for my bag. Instead of storing them in a Ziploc bag, I opted for a vacuum sealed food-saver bag since I couldn’t keep the gallon Ziploc to stay compressed to take up less space (and I have a knife in my bag). Plus, I’m also set for if the office heater dies in the middle of the day in December. AGAIN.
I like the idea of vacuum sealing clothing. That’s smart. Mine is damn-near busting open the gallon size ziplock bag. I might do that for all our clothing.
Excellent list, Erica. The only additions I have are sunglasses and a wide-brimmed hat, as I live in hot, sunny Texas. We keep our kits in our tornado shelter, along with hard hats for any flying debris.
For our cat, we have one of these disposable litter boxes. It’s compact and has everything we would need to stay away from home for a few days with kitty. https://www.amazon.com/PetSafe-Disposable-Litter-Box-Size/dp/B06XY9D4TY
If we don’t have a tornado bearing down on us and we have 10 minutes or so before we need to run out the door, I have a checklist of things to do around the house – turn off the power, put family photo albums in fireproof/waterproof safe, open the chicken coop (sorry, girls, you’ll have to fend for yourselves for a bit), even grab my pillow to throw in the car, etc.
I agree about the checklist. I think that’s important and, honestly, so reasonable. There are very few situations where you wouldn’t have 10 minutes to throw extra water, fuel, or bulkier supplies in your car….if you know what those things are, where they are, and can get to them easily! Good suggestion on the litter box!
A vacuum sealer comes in real handy for this sort of thing… saves lots of space and really helps protect stuff from the elements….
Good idea. The only thing I’ll say in favor of standard freezer bags is, if you are going to be checking your supplies every 6 months, which really you should, opening and re-doing the dedicated vacuum sealer bags could get expensive. But for stuff that wouldn’t need more frequent rotation I think it’s a great idea.
If you start with a deliberately oversized bag (which can be easiest using stuff from a roll instead of premade bags), then you can just trim the sealed strip off to get the top end open, check everything, and reseal it right there again. You only lose an inch or two of the bag at a time, so it lasts quite nicely. And when it finally runs out of extra space for the current contents – the bags can go like hand-me-downs to hold the next smaller item!
Amazon has sets of vacuum bags that come in various sizes and seal at the top with a zip lock type device. Just a normal vacuum hose sucks the air out and you plug the hole.
You can use them repeatedly. I use them for organizing baby clothes by size.
PRINT-A-BLE! PRINT-A-BLE! 😉
🙂
12 V USB and 120V USB chargers. Adapters for converting light bulb sockets to 120V outlets like this https://www.amazon.com/GE-54178-Socket-Adapter-Outlets/dp/B000TU1W9Y/ref=sr_1_3?ie=UTF8&qid=1505234965&sr=8-3&keywords=light+bulb+socket+to+outlet
or
https://www.amazon.com/GE-54276-Polarized-Handy-Outlet/dp/B002DN6QX2/ref=sr_1_1?ie=UTF8&qid=1505234965&sr=8-1&keywords=light+bulb+socket+to+outlet
Great article.
I love those! What a cool way to add an outlet where you need it.
Great list. I’m older with no kids to worry about but wear glasses along with my husband who also wears hearing aids. I suggest a bed side bag that holds a pair of shoes, hearing aids and glasses. Every night glasses and aids are placed in the same place. First things we’ll need if the knock comes on the door to evacuate, and can be made easily out of a pillow case that hangs between the mattress & box springs. Then keep an extra set of glasses, aids and extra hearing aid batteries in the 72 hour kits. It’s amazing how fast those batteries wear down. Also for those of us who might find the weight a bit to carry, keep the kit in a container with wheels & handle to pull – a duffle or luggage type bag.
SAM splits are a really nice-to-have item in a 1st aid kit. Menstrual or incontinence pads do double duty for soaking up any excess liquid such as blood from a wound.
In my car I also have a potty bucket. You just never know. (In that bucket is a large trash bag with a head hole. Hands are free to do whatever in privacy.
These are several fabulous suggestions Debbie! Thanks!
This has to be the most levelheaded, thought out “bug out bag” post I’ve read – most seem to be laced with at least some level of hysteria.
Also – that mom preparedness group sounds awesome. Is it local? Like a MeetUp I might join? 🙂
Thanks! Glad you like my “style” of readiness. 😉
The mom preparedness group is local, which I think is great. Not sure where you are, but here’s a link to the FB group.
Loved this post. Thanks for the list!! I checked out the Facebook group also, but looks like Edmonds only? Wonder if we have something on the eastside… 🙂
Thank you for sharing this series. My husband and I were just talking about getting an emergency preparedness plan together, especially as we’ve been watching our families and friends evacuating and dealing with all the hurricane disasters as of late. We recently moved back to the PNW and started talking about being prepared for an earthquake. Being a transplant, I really had no idea where to start. So THANK YOU! This is great advice and I will start getting “prepared” pronto!
Glad it’s helpful! In the Pac NW, our biggest risks our earthquakes, windstorms and flooding. I’ll be talking more about other “Home Prep” things to consider as we go on this month, and I think what I do will be pretty relevant for you too.
Just a note: if you keep a multitool as an EDC item, remember to pack it in a checked bag or leave it behind if you are flying! Well, if your multitool has a blade.
(Psst, in the water section: things are dry in the desert.)
That example I gave of messing up a departure time and forgetting to pack clothes? That’s the same trip where I had my favorite folding knife confiscated after I forgot it was in my purse like always and tried to walk it through security. The security guys were actually really cool about it, but…yeah…watch yer blades at the airport.
Thanks for the edit, fixed. (I only read through these thing 90 times before publishing them….and still those sneak through. Ugh. )
This is a GREAT series; thank you, Erica!
Glad you like, thanks!
I’m sure this is going to sound like a really stupid question, but there are some things on this list that I don’t understand the purpose of. Why do I need tools and paracord and wire? What am I going to be doing with these things?
Not a stupid question. I was wondering what I would do with the wire and fixed blade knife, too. I could see using the paracord as a clothesline if you didn’t want to get the travel clothesline, or you could fix your pack if one of the straps breaks. In floods people will tie themselves together, especially kids. I’m picturing my family climbing out of the tornado shelter with rubble all around, and maybe the paracord could be used to tie around a tree limb to pull it off the road or something.
Paracord is extremely strong so it can hold the weight of an adult – useful in many emergency situations. It’s useful in impromptu shelter building to create a ridgeline or hold down gear, haul stuff out of holes or rubble piles, repair broken packs, string stuff together, tie accessory items to a main pack, pull brush or debris from a road, etc. Substitute another rope or similar if you prefer.
Wire and duct tape is the easiest way for most people to do impromptu repairs, and because it stays taught it’s easier to use than rope in some situations.
Mini crowbar and folding saw are mostly about clearing debris – urban or rural – that might be in your way. I can’t imagine being without a knife, but your multi tool might be sufficient.
There are other things other people consider essential like a fishing kit that I wouldn’t include because in an emergency, I’m not going to suddenly know how to fish when I haven’t used that skill in about 30 years.
Bottom line: customize for you, your scenario, your skills and your comfort level.
How about all the medications, pills and such that we take on a daily basics?
First bullet point under health and hygiene.
If you wear glasses or contacts a second set in your 72 hour kit is a must! I typically put my old pair in the bag when I get new ones, as a slightly off prescription or scratched lenses is better than nothing. This really hit home for me about 3 years ago when I broke my glasses (side arm). In an area with a Metro region population over over 200,000 there was no one who could re make my glasses same day! Let me repeat:
**On a completely normal Tuesday there was NO way to get new glasses for at least 24 hours!** Maybe if I went 2.5 hours away to the megalopolis I could have but I can’t really safely leave my house without my glasses- driving is completely out of the question and crossing streets could be iffy. Thankfully I limped my way through with contacts and the one sided broken glasses but I now keep an extra set of contacts at work and home just in case.
Great point. Totally agree.
I highly recommend the Grayl water filter. It only does 2 cups at a time, but it takes about 15 seconds. It takes out EVERYTHING. You can easily fill water bottles 2 cups at a time quickly (I do this in hotels and anywhere the water tastes crappy).
I’ll check it out, thanks for the recommendation.
Paper maps.
Phone numbers.
Emergency protocols (how long to boil water, how much bleach, how high do zombies jump, how much weight will my Paracord hold, etc.)
A booklet on knots. You can practice to pass time, or look up the best knot for your application.
Whatever else you frequently turn to your cell phone for.
If things are bad, our cell phones likely won’t be working. Get that info onto paper 🙂
Can Zombies jump? I thought they just sort of shuffle-climbed piles of their own like crabs.
Depends on the zombie, I think…
Our county emergency management (Marion County, Oregon) has officially upped it to 2 weeks instead of 72 hours. I think it’s mostly a matter of storing more food and water. My personal opinion as an Oregonian is if the county that has the state capital is telling its citizens to have 2 weeks worth, I’d store more if I was further from population centers. (Also,, I love your book, I keep it by bedside-next to my small middle-of-the-night-earthquake kit!)
Sure but that’s for shelter in place preparedness. Month’s not over yet! 🙂
My son and I were stranded in a Winco parking lot waiting for AAA for a couple hours, and used the time to review how well equipped the car was for emergencies. We were pretty pleased to recognize that we had most of what we needed, but chose to add a deck of cards to the glovebox – we were SO bored! Distractions and entertainment options that didn’t rely on cell phone batteries were sorely lacking in our preps.
Yup. Pack of cards in each bug out bag for us, and always a pack of cards in the car. Cheap, small entertainment.
We keep a bag right by the bed, propped between my night table and the wall. On of my big concerns, being very rural, is a night-time house fire. The fire department is 45 minutes away. We could stuff that bag out the window, then use it for a padded landing; we keep spare keys for the cars (wouldn’t want to run back into a burning house for those), identification, diapers for the baby, a change of clothes for everyone, spare glasses, some cash, and such. If we needed to evacuate for other reasons, we could grab stuff from other places (like my purse, for instance), but if we were blocked from getting to the rest of the house (though we keep a fire extinguisher in our bedroom, too), we would at least be able to drive to town and get a hotel for the night.
Spare keys is a great idea!
My 72 hour bag is currently a mix of my diaper bag and my purse. Other than water (we do have filters) and the radio and the ax, we have most everything on this list. There’s only enough food for about two days, but I don’t want to be hauling three days worth of food in my diaper bag all the time–that thing is heavy enough as it is!
Seeing this list, though, really makes me want to go buy flares and glowsticks and hand-crank radio for the bag!
Something I don’t see mentioned yet but worth thinking about depending on your situation – a couple of small items to barter – cigarettes? A couple airplane bottles of liquor? I’m being serious.
Potential addition for those in colder climates are those single use instant heat hand warmers. They get to about 110° and last about 10 hours. They are small and lightweight but make a big difference in being able to get your fingers warm. For example: after you changed a tire in the cold but don’t want to keep the car running because you are conserving fuel.
The handwarmers are dual purpose in your first aid kit as well…. other than obvious uses can help treating for shock….
I have those as well as an instant cold pack in my first aid kit.
Hi there. I’m feeling stumped/overwhelmed by figuring out how to have 72 hours worth of stuff in our main car for 2 adults and 2 kids, our secondary car for my husband, in a to-go bag at our house, and also a standard emergency kit at the house. Has anyone figured this out without having too many emergency supplies making the cost ridiculous?
I would suggest you start small and progress incrementally… You don’t *need* all the stuff in the kit right away, it’s just nice to have it if you need it.
Every bit closer you get to having a fully assembled kit(s) puts you that much further ahead in case something should go south.
Water. Food. First aid.
Thank you! Well put together, many things I had not thought about (Like water!!) Will have to return, my printer isn’t working, but plan to get this into the car ASAP
Amazing write-up!Your article really makes sense regarding the multiple advantages and why it ought to be part of your overall strategy.Thanks to your insights!