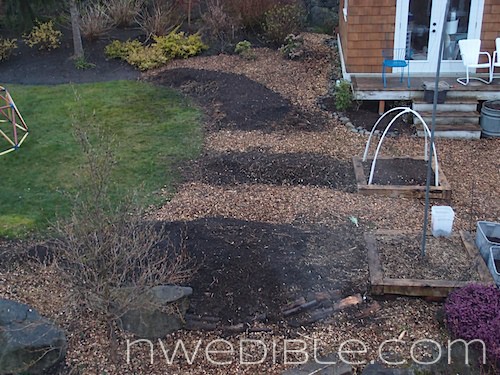
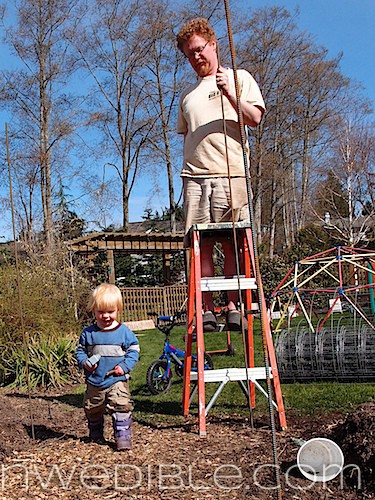
Last April 2nd I took these photos of my newly-constructed Half-Ass Hugelkultur Beds.
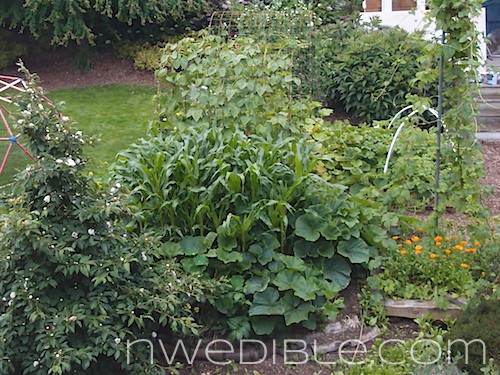
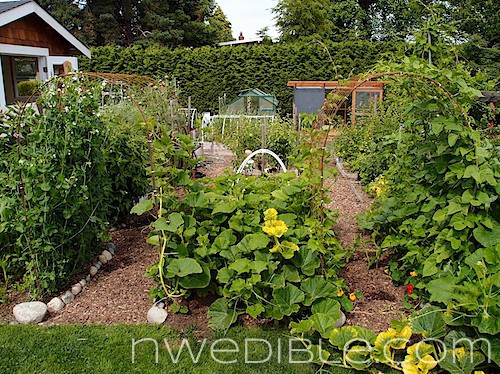
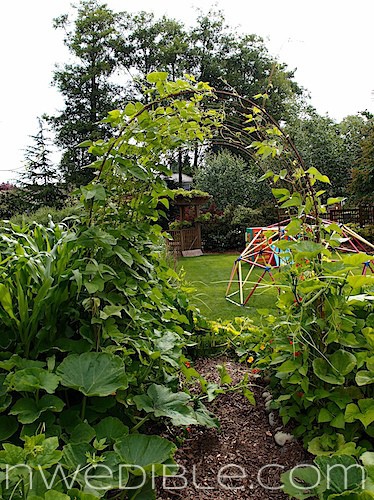
Today, just shy of three months later they look like this.
Can I get a woot-woot for hugels?
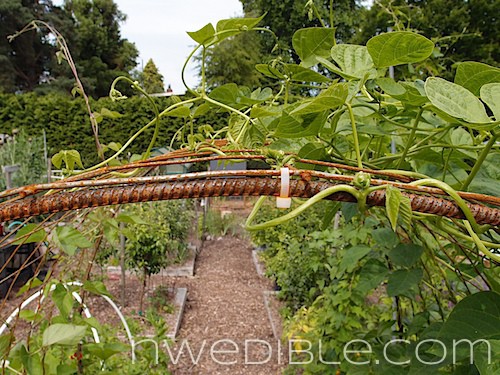
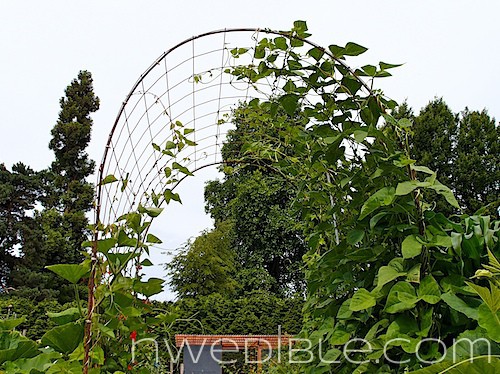
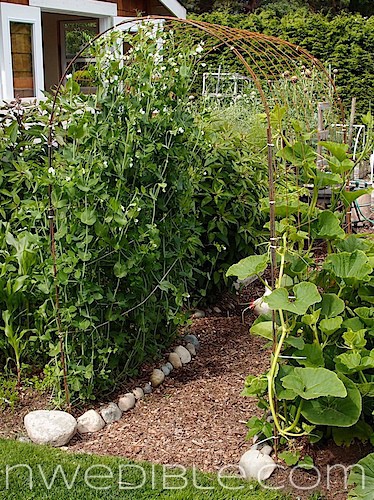
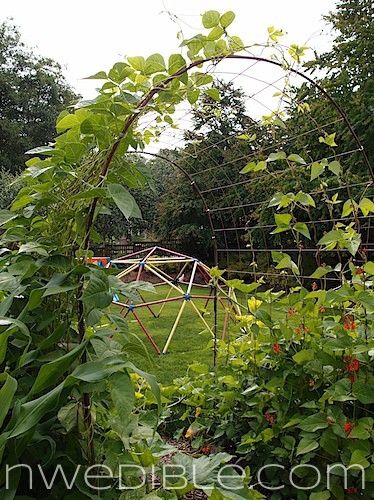
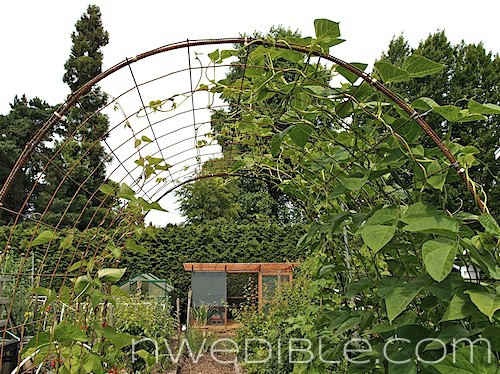
Other than the massive attack of greenery, one of the biggest changes in this planting area are the twin concrete mesh trellises we installed over the paths. The natural rusty-tones of the unsealed concrete mesh blends in to the background, but if you look closely you can see the two trellises covering the walkways and the beans, peas and squashes that are are scrambling to cover them.
Building these trellises was simple and very inexpensive compared to comparable decorative trellises sold in nurseries. We put both up in one-and-a-half leisurely days with “help” from our kids. If we had the benefit of this blog post before we started it would have been a simple one-day project. 😉
Trellis Materials and General Explanation Overview
Each trellis is made from 6 pieces of 3/8″ x 10′ rebar ($3.25 each). Four lengths of rebar are used as straight corner stakes that are pounded into the ground and 2 lengths are bent into hoops that are secured to the corner stakes and form the rounded top of the trellis.
The rebar frame is draped with an appropriate length of concrete reinforcement mesh cut off a 5′ x 150′ roll ($105 total or $.70 a linear foot). The lengths of concrete mesh we ended up needing for our approximately 7′-tall trellises were 17′ long, but this measurement will vary depending on how wide and how tall you make your trellises.
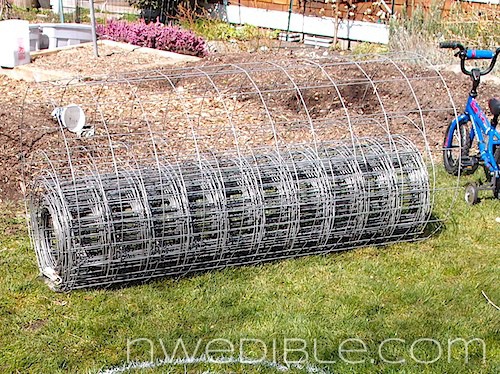
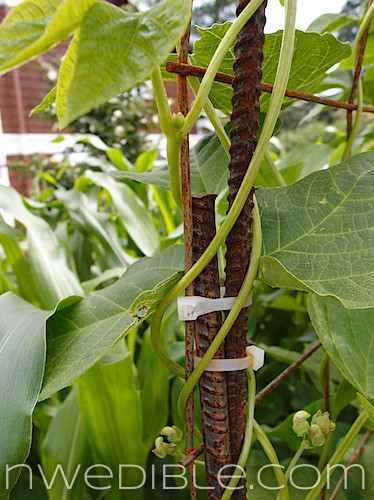
The trellises are held together with plastic 8″ zip-ties ($4 for a 100 pack, enough for two trellises). We had white zip-ties on hand, so we used them, but if I were buying specifically for this project I would get the black zip-ties which are more discrete.
Total cost for per trellis: $33.40. Similar trellises in my local nursery are narrower, less sturdy and sell for about $200.
Step One: Pound Rebar Corner Stakes Into Ground
If you have 10′ lengths of rebar, you’ll be pounding 4 of them 4-5 feet into the ground for a 7′ tall trellis (remember, the curved sections add height). Keep that in mind. Perhaps 8′ lengths of rebar are available in your area? Perhaps you want very tall trellises? Perhaps you want to hacksaw off 18″ before you start? These are just things to consider before you start pounding.
We considered all these things after we started pounding. This left us with little choice but to keep pounding…and pounding. Our trellises are secure.
Place your four corner stakes carefully. Measure across, and across the other way, and diagonally to ensure they are square. Take your time with this, because if your stakes are out of alignment the concrete mesh will not drape over the rebar frame nicely. Our trellis was 4′ wide and 5′ deep (the width of the concrete mesh).
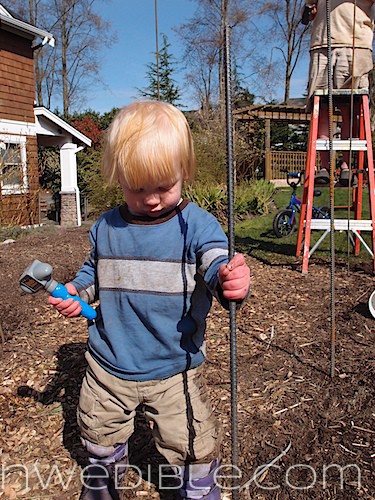
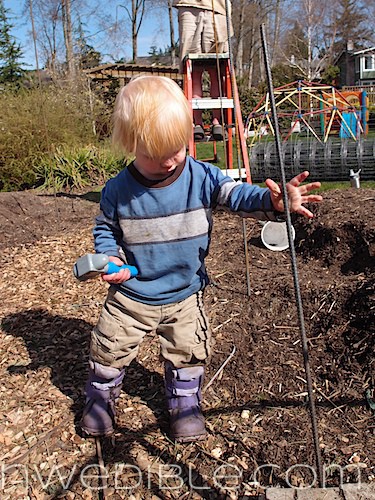
Once you are confident about corner post location, bring in a work crew to pound those rebar stakes into the ground. Make sure your crew comes to the job with their own equipment. We knew we could trust this laborer when we saw his quality plastic Bob the Builder hammer.
Supervise your work crew to ensure the corner posts drive in plumb and true. No tilting! This will be important when you have to drape the mesh paneling over the frame.
Step Two: Bend Rebar Hoops
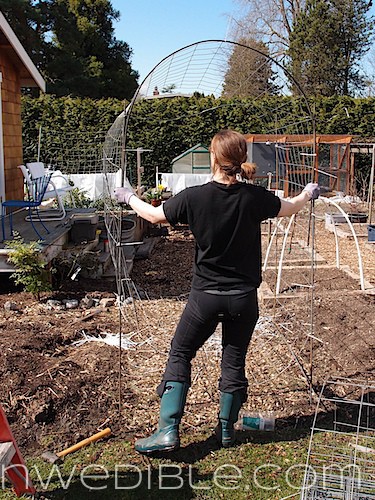
3/8″ rebar can be bent into a hoop shape by hand. It’s a bit of a full-body activity to get everything shaped the way you want it and it can take a bit of tweaking the angles and curves, but it’s not really complicated. Just put your foot in the middle and work the sides up gently until it’s the right shape.
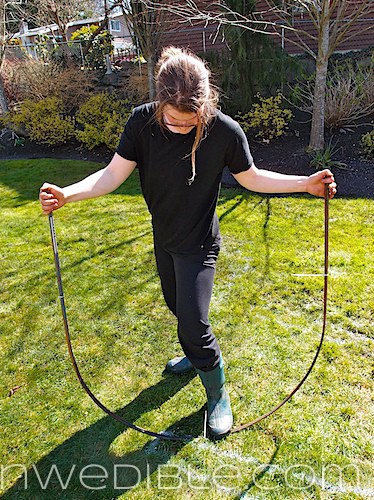
(I have no idea how a picture of me was taken that makes me look like I have no hips or butt. This has got to be the weirdest photo angle ever. In reality have the kind of butt that makes my personal trainer friends use terms like “extended gluteal shelf” and causes 17 year old boys who think they are clever to yell at me from their car: “damn, that’s a lot of butt!” I’m not kidding – that really happened to me about a month ago. Anyway, I digress, back to trellises.)
The point is, put some curve into that thing. And yes, I’m back to talking about rebar now. And make sure the finished width is the same as the distance between your corner posts.
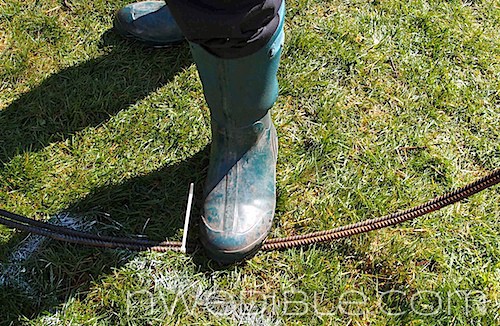
Important Tip! Bend both rebar hoops together. Use a few zip-ties and lash two of your lengths of rebar together. Then work the rebar into a symmetrical bend. You have to do it this way because it will be damn near impossible to get identical bends in two pieces of rebar bent separately by hand. And if your two hoops aren’t very close or identical in shape, your trellis will look wonky when it’s assembled.
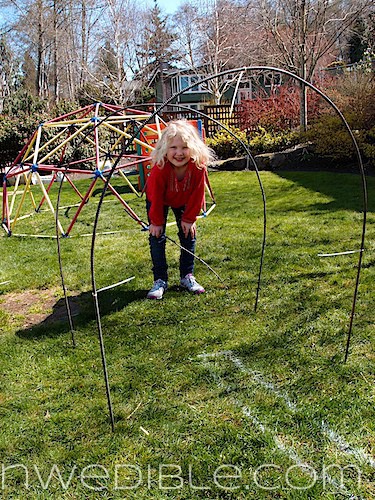
When your two hoops are complete, set them aside to play a round of Giant Croquet. Or not, whatever floats your boat.
Step Three: Attach Hoops to Corner Stakes with Zip-Ties
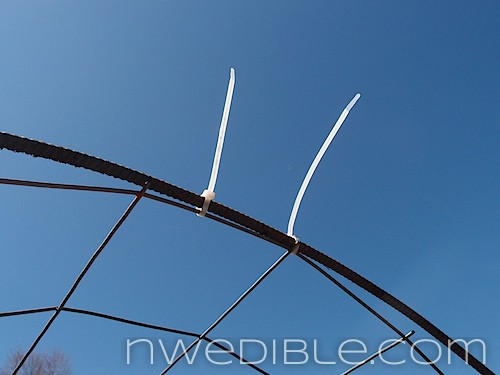
A few zip ties on each side will hold your hoops to the corner stakes. We found the best way to line everything up was by the very scientific “eyeball it” method. When both hoops looked like they were about level, we balanced a scrap piece of wood across the center of the two hoops and put a level across the wood. From there we made any adjustments necessary.
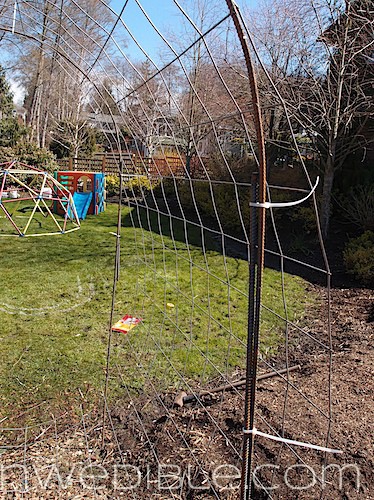
Because the rebar is ridged, you can tighten the zip-ties just shy of all the way snug and they will hold the rebar in place but allow a little wiggle up or down depending on what adjustments you need to make.
When the hoops are in place to your satisfaction, ratchet in the zip ties and throw a few more on for good measure.
Step Four: Attach Concrete Mesh to Rebar Frame.
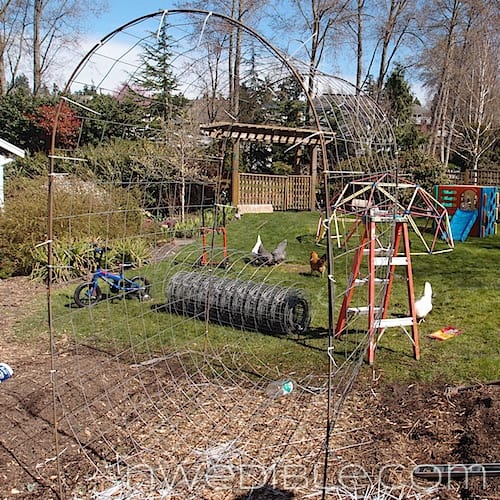
It really helps to have two people to do this bit. Hoist your pre-cut length of concrete mesh up to the rebar form. Try to get it straight and level.
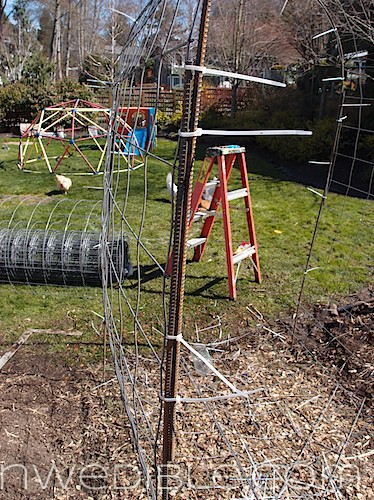
Throw a few zip ties around the mesh and the frame at the top and work your way down from there, attaching the mesh as necessary, every foot or so. Although this photo shows the mesh inside the rebar frame, we found it worked better to sit the mesh on top of the rebar if possible.
Just work your way down. As you attach everything together with the zip-ties the trellis will lock together and become much more sturdy.
We cut our mesh too long and had to go back and trim the edges. Laying on the ground and snipping fairly burly wire is a pain in the butt. Avoid if possible.
Final Details
Go through and snip the tails off your zip ties.
As the trellis sits a bit and all the various metal pieces pull against each other and get hit by the sun and cold and sun again everything kind-of pulls together.
If you want your trellis to be anything other than rust-chic, you should seal it or paint it asap. It will start to take on a patina almost immediately. I happen to like that rusted metal look, but if you don’t you’ll want to protect your metal from the elements.
Concrete mesh is the perfect DIY trellis material. Per linear foot it is super cheap. It’s reusable and long-lasting. It’s strong enough for even large melons and heavy squashes.
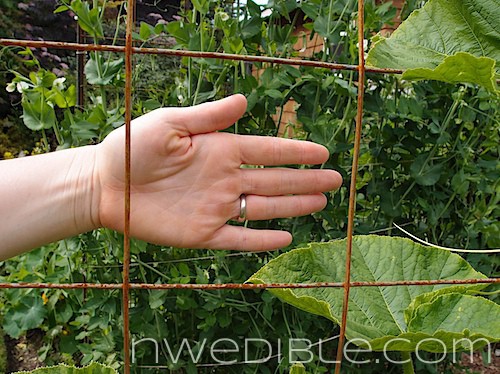
The size of the openings – 6″x6″ for the roll mesh we used, 5″x5″ for the flat panels I believe – are large enough to get your hand through for harvesting tomatoes, cucumbers and summer squashes.
The wire is a good size and texture for climbing vines like beans and hops to run up, and it looks good in the garden.
Trellises like this can help to define a lovely transition from one area of the garden to another. 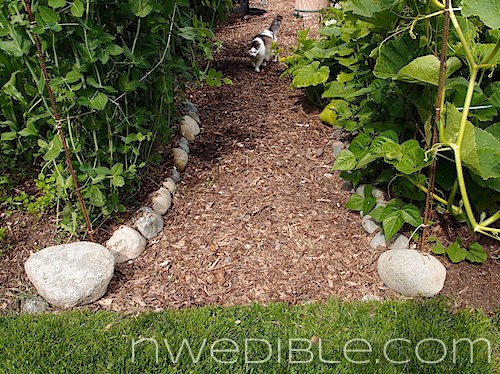
In season, they can even give you something to munch on as you walk through.
We love how our concrete mesh trellises have turned out!
You might want to check out how the gardeners at Grow and Resist and Dog Island Farm are using concrete mesh, too. Have you used this versatile hardware store staple in your garden yet?
204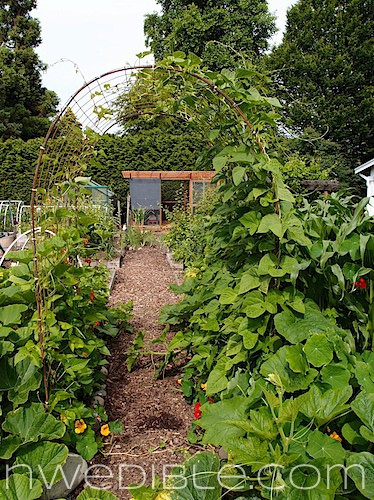
Thank you! This is exactly what I need between my raised beds. I’ll have to start pricing my materials now so we’ll be ready to move when the weather finally cools off enough to work outside (I’m in north Florida, and it’s already in the low 90’s here during the day).
My husband, however, will probably not thank you, since I’ve already extracted from him a promise to help me build two more raised beds AND new compost bins as my Christmas present this year. But that’s what he gets for marrying a gardener (even if he didn’t know I was a gardener when he popped the question seven years ago ;).
Adding this to the list of projects I’m currently not accomplishing. I also have a husband (currently in the midst of building the mother of all dog proof chicken tractors) who will not be so thankful.
And a round of applause of your work crew.
Very cool! Pinning to my Garden board.
If I’d add a lesson we learned on this project it is to have sharp, adequate cutters for the reinforcing wire. We did all the work with an undersized and well worn set of diagonal cutters and in the process probably gave Erica some sort of tendon injury. You don’t need a two-handed bolt cutter, but what we had definitely wasn’t enough.
But a two-handed bolt cutter makes it a lot easier and they are relatively inexpensive at Harbor Freight.
What a great project, and such a cute, funny post. *I* would definitely need two-handed bolt cutters, I have no upper arm strength, unlike Erica, bending steel rebar like Superman.
Totally doing this! Thank you so much for sharing!
Fantastic idea and great tutorial! Thanks Erica & Nick..this project will likely resurface in my new gardens next year!
I heart rebar mesh in the garden. I think I have close to 25(!) 2 ft diameter tomato cages that work amazing and last forever. Plus as an added bonus, you can unhook them, cover them in plastic, and use them as row covers in the spring! And if you happen to have a Shanghai Nights party (doesn’t everyone?), you can wrap them in white construction paper, paint random Chinese symbols on them, and light them up from the inside. Very cool looking at night.
And if those 17-year-olds come by again, I’m sure you’ll be able to launch ripe tomatoes at them … long before anyone else has any ammunition.
We use concrete mesh for tomato cages. We LOVE it! Your trellis is awesome. I asked for one like this this year, but Rick wasn’t that into it. Ah well. I build kind of a teepee for the boys in their hugelkultur our of concrete mesh scraps, but their plants didn’t grow. I don’t really know what happened, but we were bummed. I mean NOTHING grew in the hugelkultur this year. So weird, and I haven’t had time to actually investigate why.
*built
Love this idea! Will be looking to see the best place to use it on our property…thank you for the inspiration!!
Love it! I kinda sorta did something like this last year. Used some long pieces of crepe myrtle wood that I had trimmed earlier in the season where you have the bended rebar. Just bended them between my garden beds to make a hoop to walk through. Let the tomato plants grow on them and was able to walk under the tomato vines. It was a bit rickety, but fun. Your post gives me so many ideas of new ways to try this ~ very inspiring! Thanks for posting.
Thanks for great ideas
So cool! I want to try that for my mini greenhouse next year. I’ve used tomato cages, my fence and an old bent piece of metal to support the plastic over my tomatoes, but this would be WAY better! The water would actually drain!
That looks absolutely wonderful, and requires both youthful strength and a willing partner, neither in my reach. But it is always fun to see what is being done out there. I love your combination of serious information, philosophy and humour. If I could never garden again I would still read this blog.
Thank you for this tutorial! I wanted to erect something similar to span the pathway between my two veggie patches and then use it to grow my beloved corona beans on it. I think I’m too late for this year, but I’ll be ready next Spring!
Great idea. We love concrete wire and use it for rings for tomatoes, beans and climbing melons. But I had never thought of building a trelllis the way you did!
Fantastic idea!
This was great. You made it easy to follow, which is very important for those of us who are trellis impaired. Thanks.
I love the concrete mesh. We’ve bought it by the panels, but I think a roll would be better. In the past I’ve used hardware cloth and needed to cut individual holes to stick my hands through. Also, I’ve just kind of looped it over the raised beds, but I think some rebar would be wise.
Just found your blog and am loving it all!
I bought my rebar but didnt know exactly how to go about this. now im excited to work on mine this spring. dang snow.
We constructed three of these this weekend! Hard work in freezing temps, but they look fabulous! Thank you so much for this idea and for the excellent tutorial. My garden will not only look more impressive because of these, but I get to plant more crops with the added climbing space! 🙂
http://www.flickr.com/photos/jaimeeandbrian/8487298374/in/photostream/lightbox/
http://www.flickr.com/photos/jaimeeandbrian/8486204079/in/photostream/lightbox/
We purchased the 150′ roll of CRW at Lowes for $98. 10′ rebar was $3.25. Bolt cutters from Harbor Freight were $7 (highly recommend these as they made the job so much easier!) and 100 packs of zip ties were $1.99 (on sale). We were able to cut off 2.5 feet from the rebar with a silicon dioxide blade ($5 at Home Depot) attached to a corded power drill. This made pounding the rebar into the ground a bit easier and they still feel plenty sturdy. Our finished trellises are 5′ wide and 7′ tall. Each trellis took 18′ of CRW. With the remaining screen, we built 17 tomato cages of varying diameters so that they can nest inside each other for easier storage during the off season. A weekend of hard labor, but great products to show for it!
Thanks again for the inspiration!
Nice trellises (trelli?). Just one question : the hoops you are bending in one of the pictures are obviously shorter than the final trellis height. Are you attaching the hoops up towards the top of the rebar such that the hoops do not touch the ground? If so,did you find this to be stable?
We overlapped the stakes with the hoops by about 1 foot. Once the CRW is attached they appear to be quite stable.
I love the article, I will make one of these for my garden.
Love this. My only concern is being covered in rust for the rest of my gardening life. Do you find this to be an issue?
Everything I have read says the mesh is strong. Can you tell me if it is strong enough to hold melons and cantaloupe ? Thank you ahead of time.
Just finished four beautiful trellises. Me I’m a 70year old great grandmother and my girl friend is in her 50’s. So we didn’t wait around for a guy to show up…;•D We just did them and to your measurements because it filled the space fine. That way we didn’t have to figure anything. We found it easy and fast! Four in two days. Three hours for the first one and only four hours for all the other three the next day. We cut the rebar half way thru with a hack saw and then bent it and broke it. It was easy. The concrete mesh is harder to cut we started with a hacksaw then moved on to a electric jig saw with a metal cutting blade. That was way easier. The trellises are strong and will hold anything including the overgrown lilac with two inch diameter branches that is leaning on one of them. And that now, thanks to the trellis, one can walk under. Would love to send pics, just tell me how. And thanks again for a cheap but wonderful idea.
Is it strong enough for kids to climb on, since it will be practically impossible to keep mine off whenever there are not plants on it?
Our North Central Texas yard has limited sun, at best, but we’re not planning on cutting down any trees. Is there something shade-tolerant we can use these trellises for?
Thanks so much for this arbor. I have made arbors all over my property. And languishing trumpet vine and roses took off climbing like monkies once the arbors were there.
I used a post pounder to put rebar in ground and a grinder to cut cement mesh.
Here are some photos. Hopefully you’ll get them. Oops can’t figure out how o send.
IMG_1360.JPG
So now that’s been a few years can you give an update on how the concrete mesh has held up? Anything you wish you had done differently? Has the welded joints of the mesh broken?