In about a week you could be eating the best bacon of your entire life. You could be holding in your hand a glistening mahogany slab of perfectly crisped pink, tender, juicy meat streaked through with succulent fat. You could be proclaiming to the world: “Behold what I have made! It is bacon and it is sublime!”
Instead of some lame fruitcake, you could give people what they really want for the holidays: gourmet, handcrafted bacon, straight from your own kitchen. And here’s the secret I can now confidently reveal: making your own bacon at home isn’t just possible – it’s simple.
So, join me, if you will, in an exploration of how to make the best bacon of your life. There will be a few detours and footnotes to talk about some food sciencey-stuff, but if you want to get right to the meat (hah!) of the matter scroll down for the printable recipe.
Ready? Ok! Let’s make bacon!
What Is Bacon?
You know what bacon is, right? Or do you? In the United States, bacon is, by USDA definition, the cured belly of a pig. You rub a section of meat from the belly primal of a pig with a cure – salt, sugar, usually pink salt (more on that later) and seasonings of choice. After curing, bacon is smoked.
But all around the world people cure pork, and they don’t all stampede towards the fatty belly for a sweet-smokey meat kick. This post will teach you how to make American-style slab bacon from the belly of the pig.
Slab bacon is a delicious place to start, but check out this chart which shows some common bacons and bacon-like cured meats. Notice that pretty much every part of the pig can be made into something in the bacon family. Bacon doesn’t end with the belly!
What Do You Need To Make Bacon At Home?
Making bacon at home isn’t hard, it doesn’t require magical meat knowledge or a lot of fancy equipment. But it does require about a week’s time, a pork belly, one weird ingredient called Pink Salt, and a way to smoke your bacon. So while this project is totally, completely worth it, it helps to plan ahead.
1. Pork Belly
Getting a pork belly is not as straightforward or as cheap as you might think. I bought naturally raised happy-hippie pork belly through the wholesale vendor I’ve been working with since my catering days and it cost me $4.70 a pound. I bought three whole bellies, each between 10 and 12 pounds. That is a lot of bacon but I’m not a girl who backs down from a challenge.
If you buy your pork as a whole or half-animal directly from a farmer, ask the butcher to leave the belly whole. For the love of bacon, do not let them grind it!
Any good independent butcher will be able to order you pork belly (if they can’t they aren’t a good independent butcher) but depending on local demand may not have slabs of proto-bacon in stock. Asian and Latin-American markets tend to be a better source of pork belly that your typical suburban supermarket.
Previously frozen pork belly can be used to make bacon but your end product won’t be quite as moist.
2. Pink Salt
See full explanation below in the footnote. The TL;DR version is: pink salt is a special curing salt that ensures you don’t make Botulism Bacon. Order it online. This is what I use.
3. Smoker and Woodchips
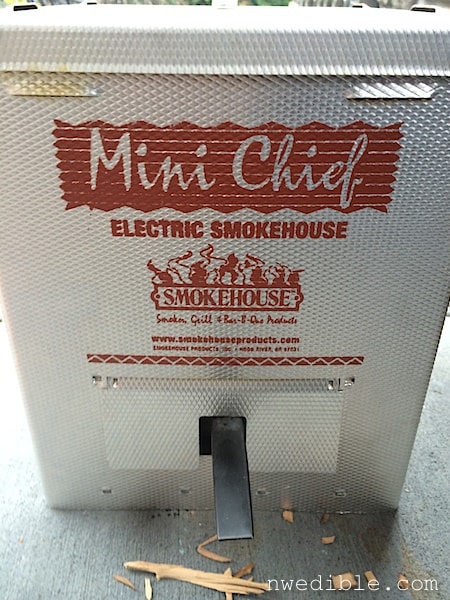
For the smoker, I used a small “Little Chief” Electric Smoker given to me years ago by my sister and brother-in-law. (Guess what favorite cured meat they are getting for Christmas?) The smoker I have is a bitty thing – I have an older version of this model – and if you’re willing to invest a hundred bucks in a smoker I would recommend something more substantial. We are so overwhelmed by the awesomeness of homemade bacon that we are looking at upgrading to this smoker for Christmas.
But if this is your first time making bacon, you probably don’t want to invest in dedicated smoking equipment. You can rig a charcoal, Weber-style grill as a smoker. (See excellent instructions here, but note that for our bacon we want to keep the temperature at around 200-225 degrees.)
You can also build your own smoker out of, among other things, flower pots (clean ones, without flowers in them). Full instructions on building a flower pot smoker here. I’ve never done this, but it looks fairly legit.
You can also stovetop smoke your bacon. Check out this process for making a stovetop smoker at home with stuff you probably already have on hand. But – fair warning – indoor smoking will leave your entire house smelling like a campfire. For days. And unless you have some serious industrial ventilation in your kitchen, you might want to temporally silence any smoke alarms in the house. (Put those batteries back in, though!) Stovetop smoking works best to impart an initial smokey flavor and color, and you can finish cooking your bacon in a 225-degree oven. It’s not exactly the same, but it’ll do in a pinch.
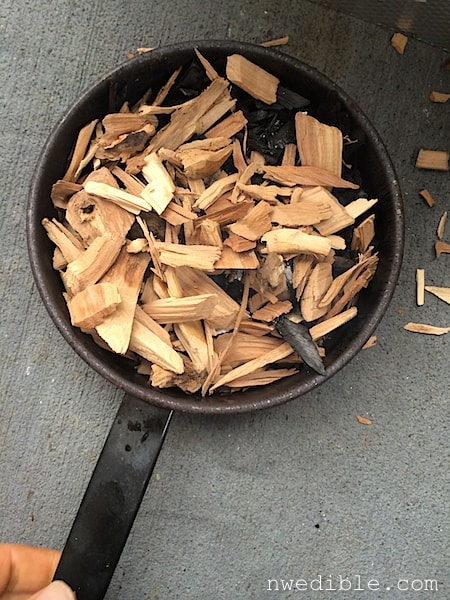
For wood, I used bags of hardwood apple chips I picked up at the grocery store, like these. They aren’t too expensive. A $5 bag smoked two complete pork bellies, or about 20 pounds of bacon. You can use other types of smoking chips or chunks – alder, mesquite, etc. – depending on what your smoker set-up is, just make sure you are using fully dried hardwood chips designed for smoking. If you use any old woodchips from the muni tree grinding service you’ll get nastiness.
Making Bacon At Home: Step by Step
I’ve broken this down into lots of steps with lots of pictures, but don’t let that intimidate you. Each step is super easy.

1. Get To Know Your Pork Belly
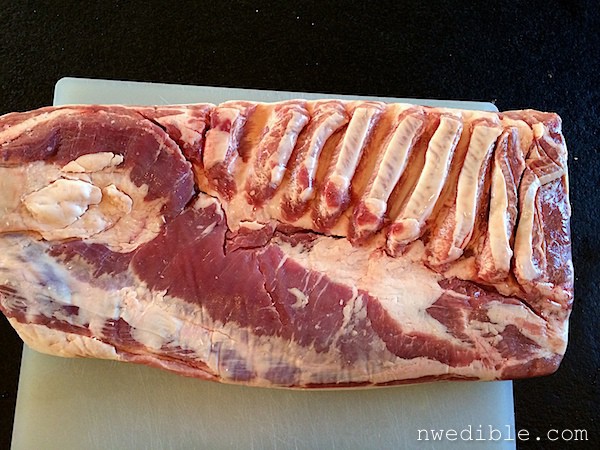
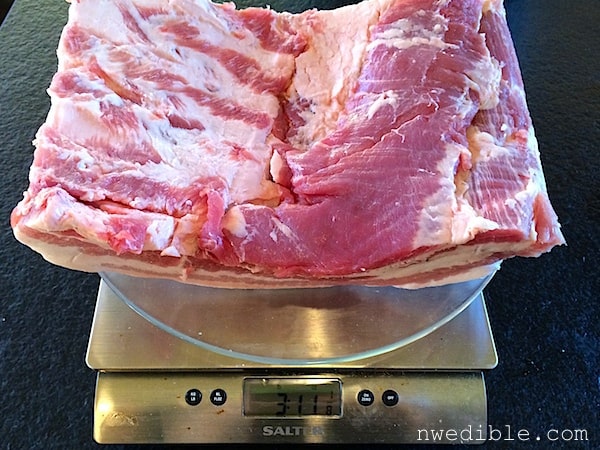
Here’s a pork belly, fat-side up.
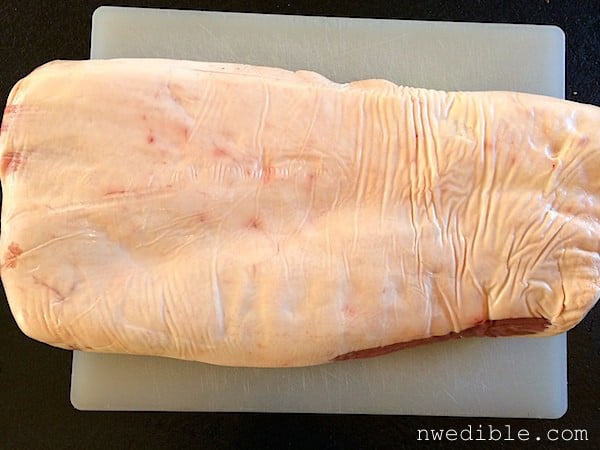
Here’s a pork belly, skin-side down. You can see where the full belly was cut off the ribs (those little fingery looking lines in the belly).
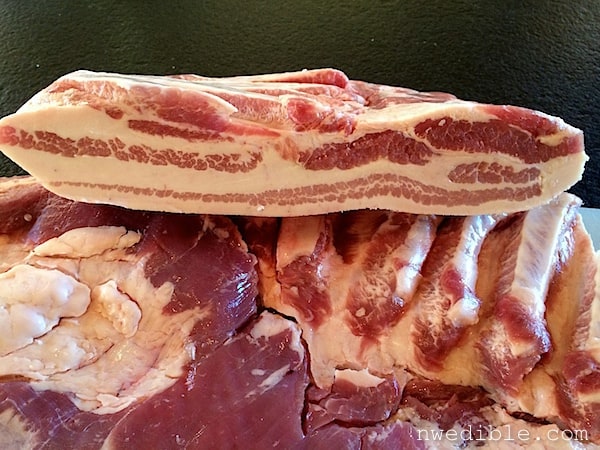
Here’s a pork belly in cross-section. Ah, now the bacony potential becomes apparent!
2. Trim Belly As Necessary
If you belly came with skin-on, carefully trim away the skin, leaving as much fat as possible. Mine came skin-off so I didn’t have to do this step.
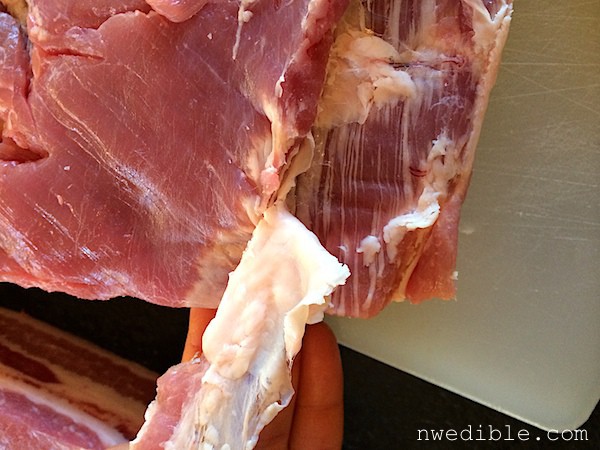
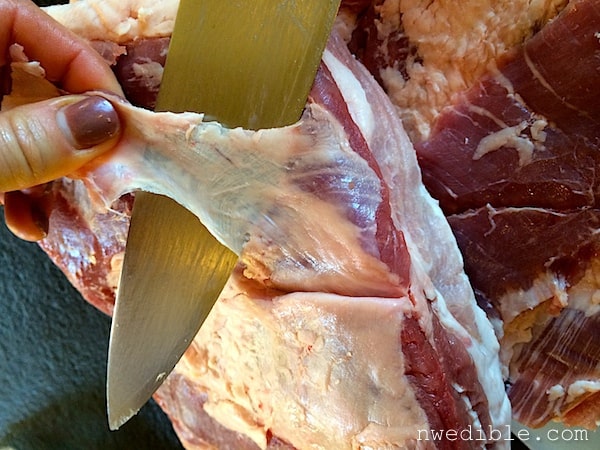
Trim off any particularly thick membranes on the underside of the belly where the ribs connected. Smoke typically doesn’t permeate thick membranes like that, and they don’t break down with cooking, so they are like eating a rubber band. Below-right on this photo shows the belly before trimming; top-left shows it after trimming.
3. Cut Belly into Manageable Size Pieces
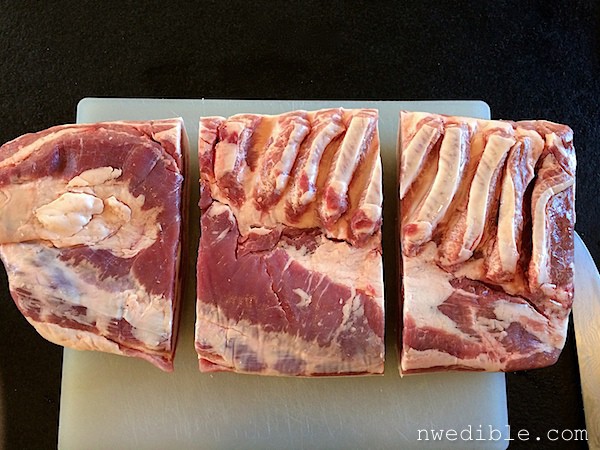
You could cure and smoke a whole belly, but you’ll need more specialty equipment. Cutting this 12-pound belly in thirds gave me pieces just the right size to fit into gallon-size ziptop bags. That’ll make life easier at cure time.
It’s important that your cure be properly calibrated to the amount of meat you are curing. The recipe in this post is designed for 4 pounds of pork belly (give or take a few ounces). If you cure a different amount, you must adjust the cure amounts accordingly.
4. Prepare Cure
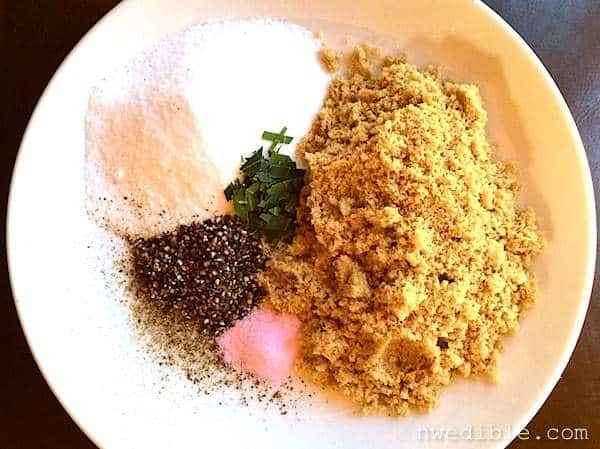
Combine all cure ingredients in a bowl and mix well. Measure carefully and be particularly precise about the Pink Salt.
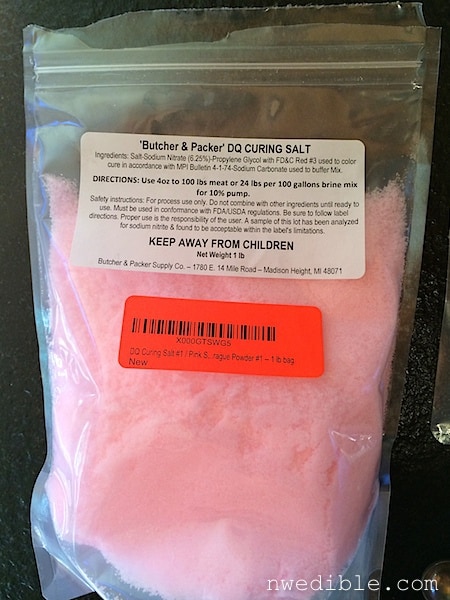
This is how the Pink Salt comes packaged.
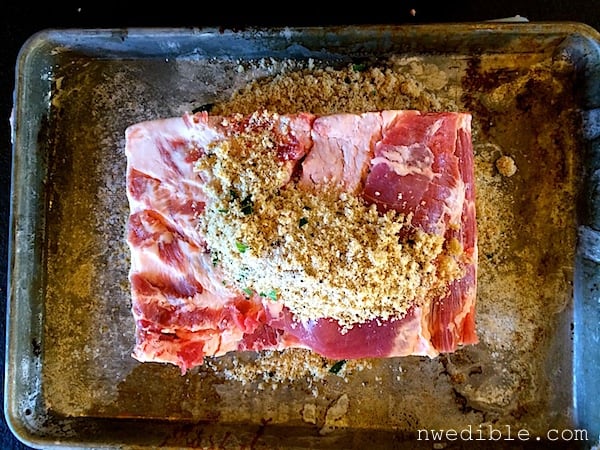
5. Rub That Cure On Yer Meat
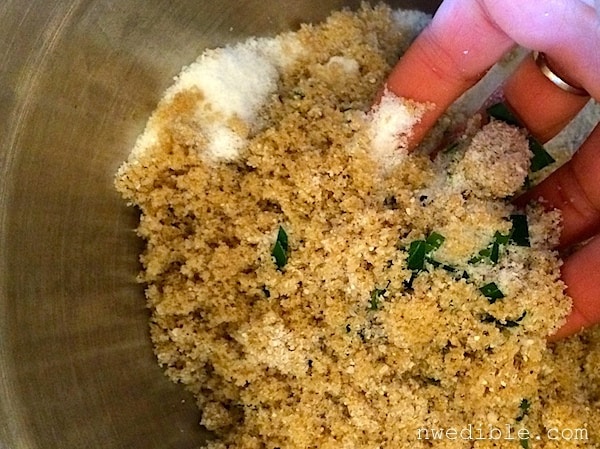
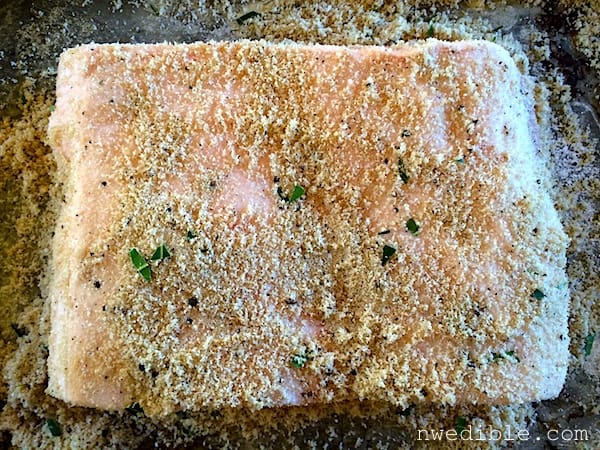
Really get in there and work the salt and sugar and spices into the belly. Give it a little massage and talk sweetly to it. This belly is going to be your bacon, after all.
6. Bag, Wait, Flip, Wait
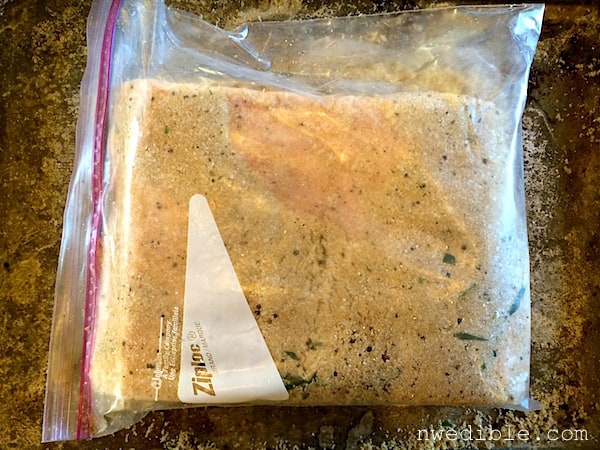
Put your cure-rubbed pork belly in a large, heavy-duty ziptop bag. If any cure fell off the belly, throw it in the bag, too. Squeeze as much air out of the bag as you can without doing something gross with a straw, and seal it well.
Now, put your curing belly in the refrigerator. Soon, the salt and sugar will mingle with the juice from the pork and form a thick kind-of brine around the belly. Every day, more or less, turn the belly over so that all sides have equal time with the cure. This is why the ziptop bag is so great: you just flip the whole thing over without opening it. Give your pork belly seven to ten days to cure. After a week it should feel quite firm, but still pliable if you bend it. If it still feels soft, you can cure it for another day and check again.
7. Rinse Your Cured Pork Belly
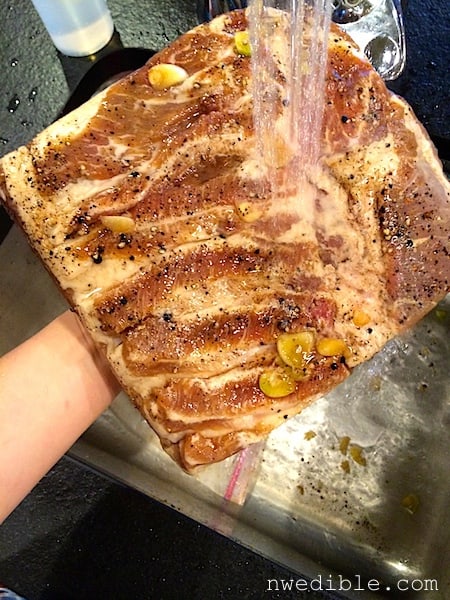
After the pork belly is sufficiently cured, remove it from the bag and rinse it well. Some peppercorns may be stuck into the fat a bit and that’s ok, but do try to get most of the cure off the meat. This photo is from another batch of bacon I made with fresh garlic. Ignore the garlic hunks.
8. Check Pork Belly Flavor
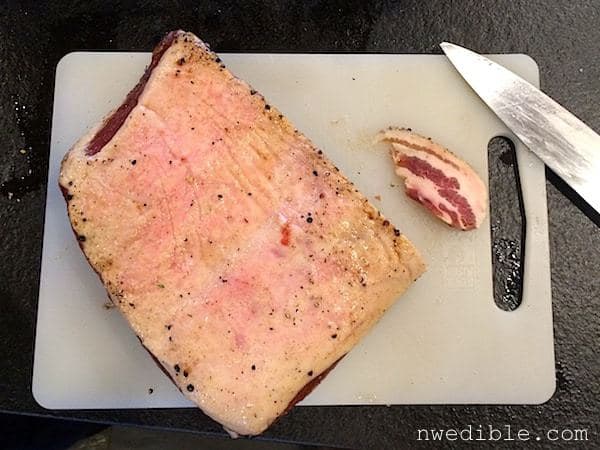
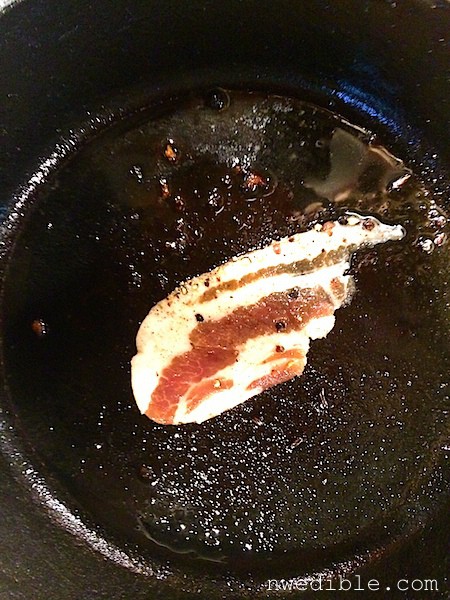
When you are still getting the hang of how cured you want your bacon, it’s a good idea to do a taste-test before smoking. Although the bacon is cured at this point, it’s still raw, and, for a number of food safety reasons, I recommend cooking it before tasting. Just cut off a small sliver of the bacon and cook it gently.
If your reaction to the bacon is, “Wow, this tastes a lot like really good bacon!” then – excellent! – proceed to the next step. If your reaction is “Did I just eat a salt-lick?!” then your bacon may be slightly overcured. Remember you want something very flavorful, but if it’s excessively salty, you can fix it! Just soak your belly in cold water for a few hours and do the taste test again. The excess salt should be tamed.
9. Dry The Belly To Form A Pellicle
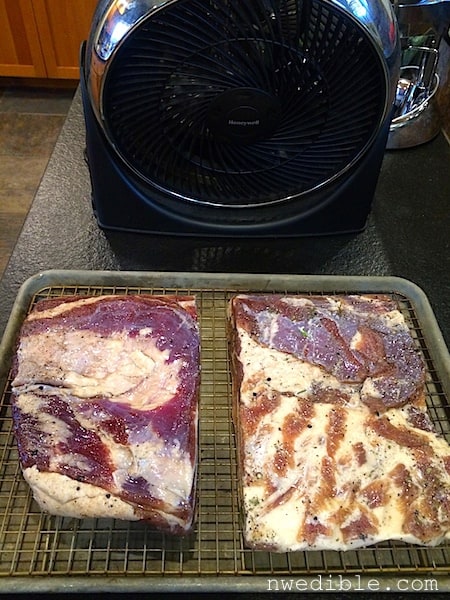
Here’s a fun fact about me: one of my favorite words is pellicle. A pellicle is the dry, tacky skin on meat or fish necessary for good smoking. Basically, moist meat doesn’t take smoke color or flavor very well, so before we smoke our bacon we have to dry it out.
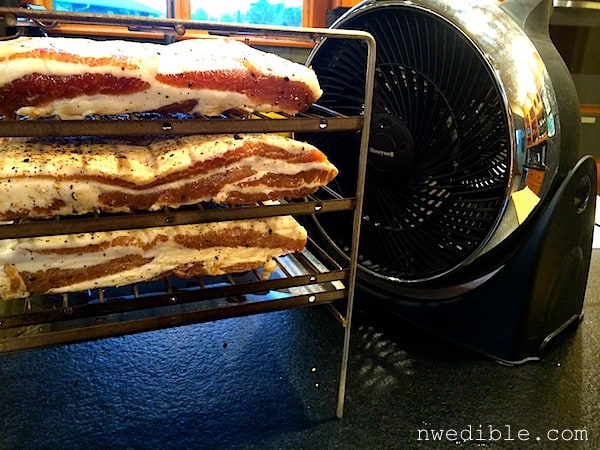
The easiest way to do this is to put the bacon on a cooling rack over a sheet pan and pop in the refrigerator, uncovered, overnight. But I was impatient so I invoked a fan. It took about an hour to fully dry the meat with a fan assist like this, but don’t rush it. You want that nice, tacky-dry surface. I dried one batch on a cooling rack, and another right on the smoking rack that came with my Little Chief Smoker.
10. Smoke Your Bacon!
Okay, here’s where the magic happens. Prepare your smoker, grill, or whatever you are using to smoke your bacon. Get some nice hardwood smoke happening and then load your bacon. Keep the temperature in your smoker between 200 and 225 degrees as much as possible. Periodically check the chips and top up if necessary, but also pay attention to how much smoke color and aroma your bacon is developing. You may want to ease back on the smoke towards the end. I did.
11. Check – Is Your Bacon Done?
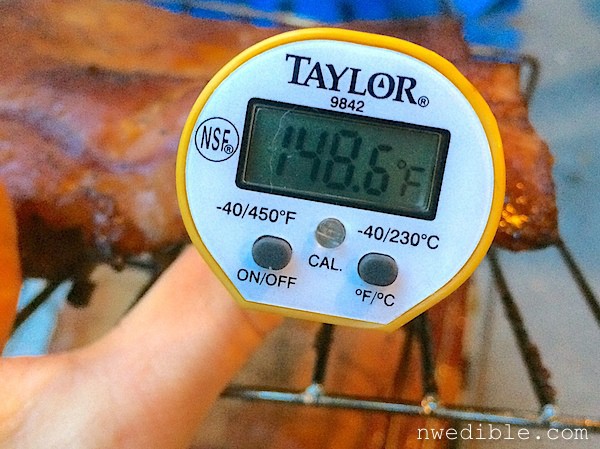
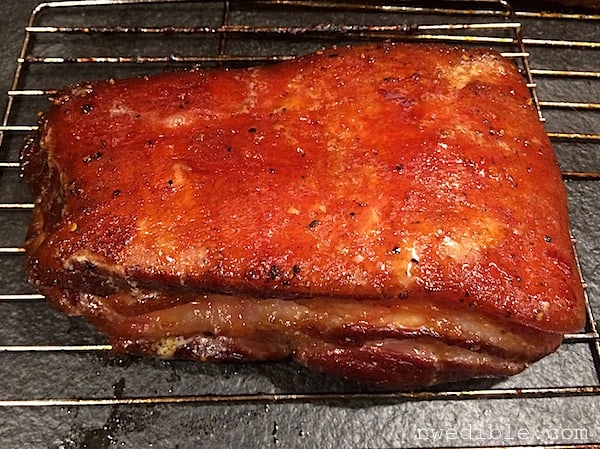
Bacon is done when the internal temperature is 150-degrees F (this bacon slab got there just after I snapped the pic below) and the bacon looks like lacquered love. In a good, efficient smoker this should take about two hours. In my smoker it took more like four hours.
Sidenote: Why 150-degrees?
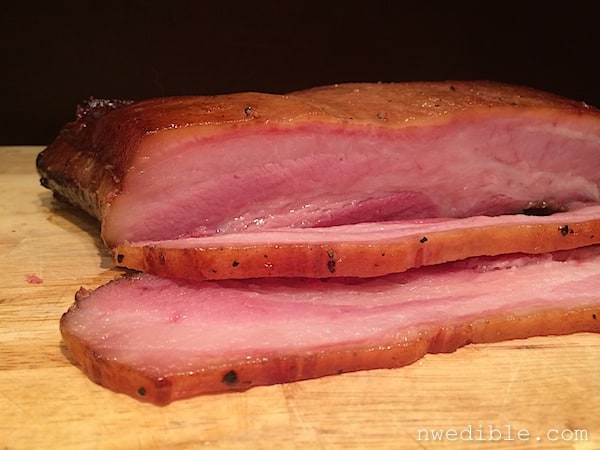
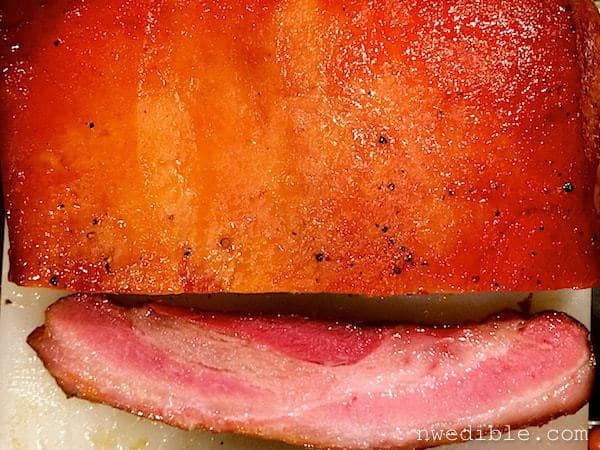
At 150-degrees internal temperature, the bacon is glistening and lovely and the meat is fully cooked. However, very little of the fat has melted – most is still intact, so when you slice the bacon for later pan-frying, it looks like this:
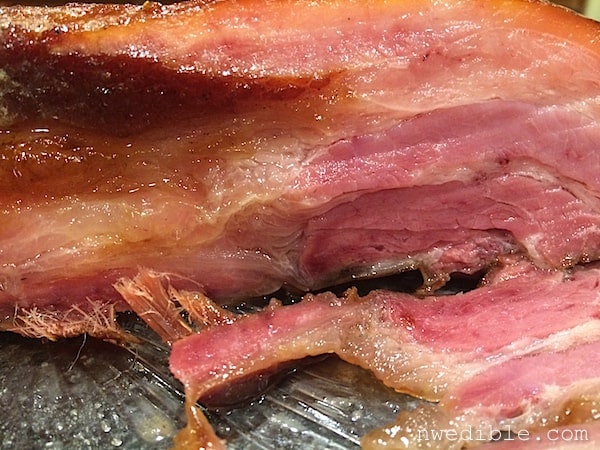
I overshot on one of my bacon slabs and didn’t end up pulling it out of the smoker until it had an internal temperature of 180-degrees. That’s a big difference! The result was that the fat layers were starting to liquify and the meat was taking on a slow-braised quality, like this:
Now I don’t want you to get the wrong idea – this bottom example bacon was still unbelievably delicious. Even bad bacon, as they say, is pretty good, and this was still worlds better than anything store bought. However, this shows why 150-degrees is our bacon temperature sweet spot.
12. Eat Your Bacon
At this point, your bacon is fully cooked and you can, if you desire, start eating it. However, if you are a typical American bacon eater, you will probably want to pan-fry or oven roast a few slices to crispy, chewy perfection.
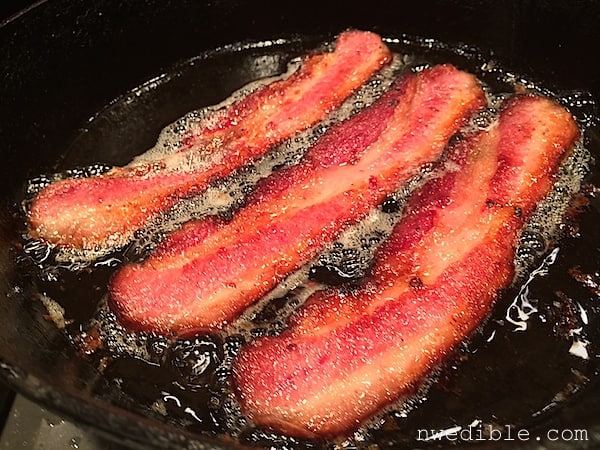
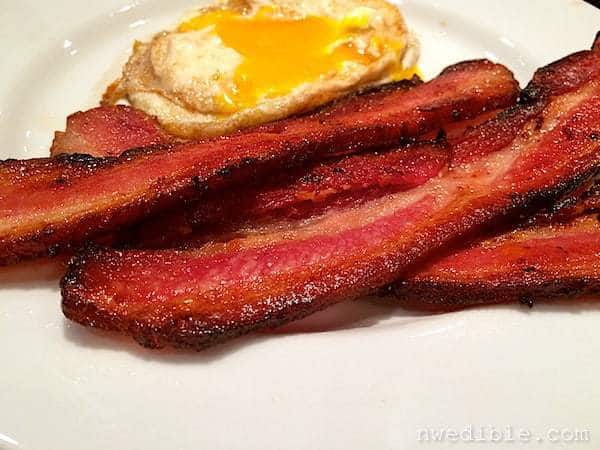
Slice as you desire – as thin as I could confidently slice made hunking thick-cut bacon slices of magnitude. Cook this bacon gently – give it time over medium or medium-low heat and it will reward you.
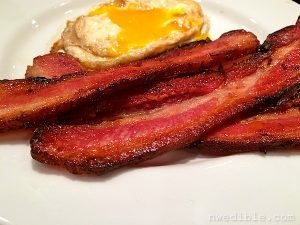
No joke: best bacon I’ve ever eaten. Seriously, what are you waiting for?
Printable Recipe For The Best Bacon Ever
You Can Make Bacon At Home!
Recipe adapted from America’s Test Kitchen DIY Cookbook. I cut a 12-pound pork belly in thirds so I could trial three different cures. This gave me three pieces of pork belly, each about 4 pounds. All the cures were fantastic, but we most enjoyed the Traditional cure. Start with the cure from Basic Bacon and explore and play around. Find your own favorite homemade bacon flavor!
Ingredients
Bacon #1: Basic Bacon
- 4 pound pork belly
- 1 cup brown sugar
- 1/2 cup kosher salt
- 3/4 tsp pink salt
- 1 tbsp cracked black peppercorn
Bacon #2: Traditional Bacon
- 4 pound pork belly
- 1 cup brown sugar
- 1/2 cup kosher salt
- 3/4 tsp pink salt
- 1 tbsp cracked black peppercorn
- 2 fresh bay leaves, sliced
- 1 tablespoon minced fresh thyme
Bacon #3: Spiced Bacon
- 4 pound pork belly
- 1 cup brown sugar
- 1/2 cup kosher salt
- 3/4 tsp pink salt
- 1 tbsp cracked black peppercorn
- 1 tbsp Garam Masala
Instructions
- Prepare pork belly by removing any skin or tough connective tissue and, if necessary, cut belly into 4-pound slabs.
- Combine cure ingredients and rub cure on belly, working cure into meat. Transfer belly and any extra cure into to a gallon-size ziptop bag.
- Refrigerate belly for seven to ten days, flipping belly once a day, until meat is fully cured and firm but still pliable.
- Rinse cure off belly, and dry well. Allow meat to form a pellicle by drying overnight in the refrigerator uncovered or setting meat on a rack in front of a fan.
- Prepare smoker. Smoke belly over hardwood smoking chips at 200-225 degrees for about 2 hours, until internal temperature of pork reaches 150-degrees F.
- Wrap bacon well and refrigerate for several weeks, or freeze for up to three months.
- To serve, slice thinly and pan-fry over medium or oven-roast slowly.
Footnote: Pink Salt, Prague Powder, Nitrites, Etc.
Pink Salt, also called Prague Powder, InstaCure or DQ Salt is a curing salt. You don’t use it for flavoring or seasoning – you use it to preserve meat and a little goes a long way.
It’s called Pink Salt because it is dyed pink so no one mistakes it for table salt. It is not the same as Himalayan pink salt! I saw a website telling people they needed to use Himalayan Pink Salt to cure their meats and I almost choked on my slab of pate. Not the same thing! So, to emphasize: Himalayan salt – or any other fancy boutique finishing salt of any color at all – is not what you need here.
There are two standard formulations of curing salt.
Prague Powder #1 (also called InstaCure #1) contains table salt and 6.25% sodium nitrite and is used for sausages, cured meats, pates, deli meats, etc that are cooked – smoked, baked, roasted, canned, whatever. Basically any cured meat that isn’t long-aged like a dry-cured salami. This is what we use when we make bacon. You can get it here.
Prague Powder #2 (also called InstaCure #2) is used for long aged dry-cured meats like prosciutto and hard salami. It has table salt, sodium nitrite (6.25%) and sodium nitrate (1%). The nitrate acts as a kind of slow-release preservative for very long-cured meats. We don’t use it to make bacon or other short-cured items.
Nitrites? Are You Ni-Trying To Kill Me?!
“Wait!” I hear some of you saying, “Nitrites! Oh my God, evil toxic additives.” Hold on a second – before you slam your laptop lid in disgust, let me break down my position on Pink Salt for you.
Remember our old frienemy Mr. Botulism Toxin? (See: How Not To Die of Botulism) Did you know that botulism was first described “as a ‘sausage poison’ and ‘fatty poison’, because the bacterium that produces the toxin often caused poisoning by growing in improperly handled or prepared meat products.” (Wikipedia, emphasis mine.) Even botulism’s name comes from a cured meat product: botulus is Latin for sausage.
Sodium nitrite in the form of pink salt, when used according to established standards, prevents the growth of C. Botulinum and the development of the botulism toxin in cured meats. That’s why it’s in there. As an added bonus, the nitrite enhances color, flavor, and texture in the cured meat.
Okay, so on one hand we have this established risk of botulism growth in improperly cured meat products. On the other hand we might have the potential risk of nitrites. So we have to ask ourselves, what is the risk from nitrites when used according to established guidelines? I believe the answer is – little to none, but of course this is something you should investigate if it concerns you. For more info, I recommend The “No Nitrites Added” Hoax by Micheal Ruhlman. I am, personally, firmly in the pro-Pink Salt category.
Related Stuff…
(These are affiliate links. Purchases made through these links cost you nothing extra but allow me to bring you more giant step-by-step cured meat tutorials. Full financial disclosure here. Thanks for your support, guys, I love ya more than a homemade BLT in late August.)
America’s Test Kitchen DIY Cookbook. This book is fabulous. If you are the kind of person who reads all the way to the end of a three-thousand word primer on homemade bacon, you should go buy this book right now. It has all kinds of fun DIY Kitchen projects, from bacon to crackers, granola to jam, cheese to pate. And every recipe I’ve made from here (eight at last count) has turned out spectacularly well.
Charcuterie: The Craft of Salting, Smoking, and Curing and Salumi: The Craft of Italian Dry Curing, both by Michael Ruhlman. If you want to go deeper into cured meats, you would be hard pressed to find a more enthusiatic guide than Ruhlman in these two books. Also check out his excellent personal website.
Pink Salt. Remember, you want Prague #1 for bacon and everything that isn’t long-dried. This link goes to the same pink salt I use.
Wood Chips. I like Applewood because they are mild and have a fruity note that complements pork wonderfully. But play around – there are lots of different kinds of smoking wood.
Dedicated Smoker. If you have the room and the funds, there are a lot of options out there. I am leaning to upgrading to this Masterbuilt Electric Smoker because it gets excellent reviews, is electric (easier for me than propane) and hits a good value-conscious price point. I definitely recommend looking for adjustable temperature controls and an auto-shut off timer. Those are two features I really would have liked.
82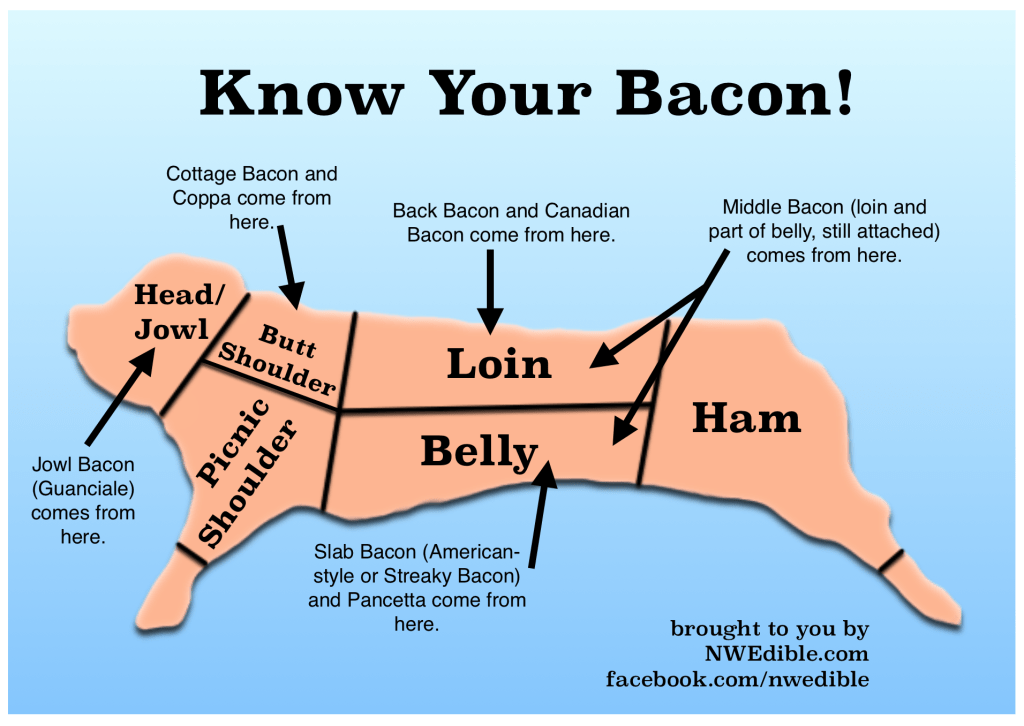

Hi Erica
Have you ever made Turkey Bacon? I am having the hardest time trying to find a good recipe and was wondering if you could assist me. Love your recipe and wonderful instructions above but we do not do pork on our farm. Hoping you can assist.
Sincerely
Michelle
I make a no pink salt bacon from an Alton Brown Scrap Iron Chef recipe. I make sure to keep the bacon under or above botulism temps for any lengthy period. You have to wonder why if Pink salt is OK why do they have a big warning on the side say “keep away from children”. Why put it in your body if you don’t have to?
my smokehouse-4’x6′,x7.5 ‘ tall-made of rock and 2’x4,s’ covered with sheet metal with an external fire box.Only good wood available is kiawe {aka mesquite}. just smoked two entire pot belly pigs using your basic bacon recipe. The results were fantastic. Held the temp at about 165 for 8 hours. Smoked even the leg bones which were like candy after slow cooking on the grill. Have Smoked a lot of meat over the years, but a pot belly is a very different creature having been bred to supply a big wad of fatty meat to fry your veggies in rather than for bacons,chops,hams and roasts. The next big in the smoker will be a european style hog and every scrap of this 275lb fat beauty is going into the smoker using your recipes. have you ever had smoked pork chops or pork loin or chewed on smoked pork legs. OH MY!!!Terr
Hi Erica,
Do I need to drain the liquid from the ziplock bags every couple days during the curing time, or is it fine to leave it?
Thanks!
Cheis
Hi Erica,
I made the bacon and it cam out GREAT. Thanks for the inspiration. See my adventure (an ultimate BLT) here – http://epicnormallife.com/homemade-bacon/
Thank you for the great info! I’ve spent hours researching how to make homemade bacon since we just bought a smoker. Your recipe was the perfect starting point. I started the curing process last night and can’t wait to try the final product! That being said, I’ve already noticed liquid accumulating in the bottom of the bag after just 12 hours. Is it necessary to drain that out periodically? And if so, do I need to add more cure? Thank you!
Hi Erika – just wondered if you ever upgraded to the Masterbuilt smoker, and if so, what are your thoughts? I see it’s currently on sale at Amazon, but before I get trigger happy, thought I’d see if you purchased one yet. Thanks!
This is a great recipe for bacon. The only thing I can say, is you do not necessarily need pink salt, especially if you are going to freeze the bacon afterwards and only take out as needed.
I do a 50/50 Kosher salt/Sugar mix and the sugar mix is 50/50 dark brown sugar/maple sugar. Then in my cure I add black pepper.
Almost definitely stop the smoke before its done or it can be overwhelming.
Another one of my personal tips is to boil down 100% pure maple syrup with a shot or 2 of Kentucky bourbon to about 50%. When I check on my bacon and decide I had enough smoke, I paint one side of each slab with the boiled down syrup and let it cook and soak in for the remainder of cook time.
Enjoy! Even the mistakes are fun to eat!
Scientific studies have been done that have proven that meats actually absorb smoke better if the meat is not dried first. It is best to throw your meat on the smoker immediately after you rinse the curing solution.
Very nice and informative article here. That helped me a lot. I would like to share with you a great service to fill a form online. Just look at the service
https://goo.gl/acVV25. Its pretty easy to use. I think you can get a free trial if you ask for it.