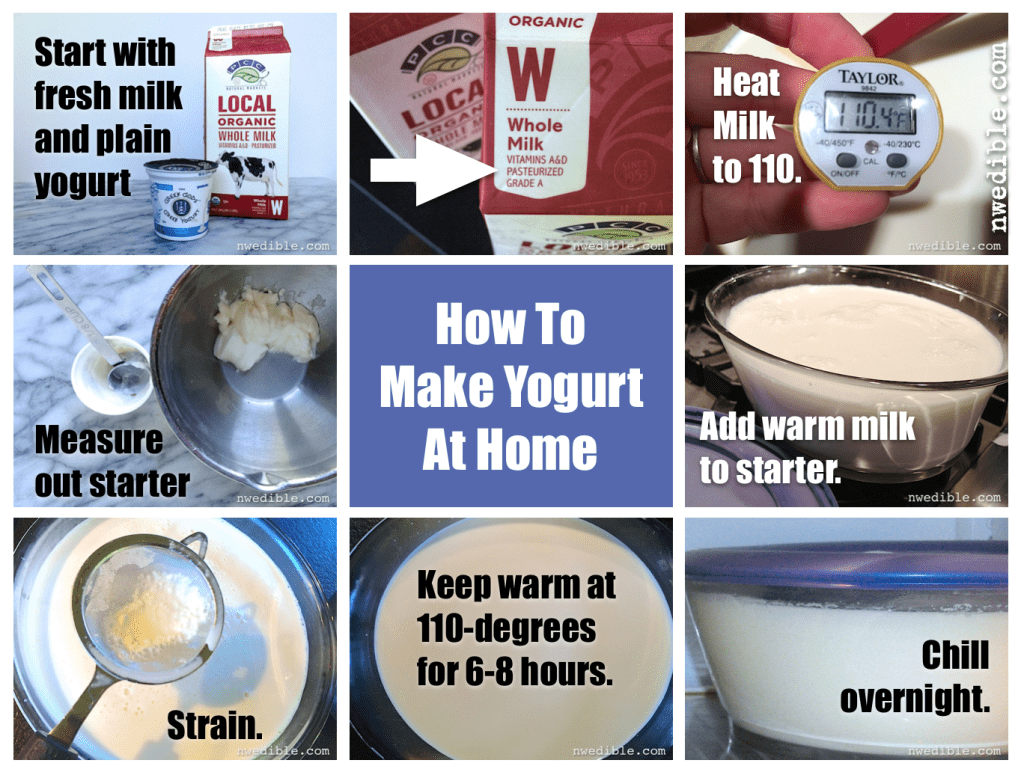
I recently chatted with my friend Margaret Roach on her radio show, A Way To Garden, about yogurt making. One of the things we discussed was if home yogurt makers can skip the traditional step of heating the milk to 180-degrees and then cooling it back down to 110-degrees for culturing.
As it turns out, yes. Sometimes. But first, a little background.
Yogurt making is insanely easy once you get the hang of it. Fresh milk is inoculated with thermophilic (heat-loving) beneficial bacteria. The bacteria culture the yogurt by eating milk sugars and making lactic acid. As the lactic acid builds up in the milk, the pH drops until eventually the milk proteins coagulate into the soft, tangy curd we know and love as yogurt.
Those beneficial yogurt-makin’ bacteria are a bit like Goldilocks. Too hot and they die, too cold and they don’t work fast enough to protect the milk from spoilage organisms. They are happiest at around 110-degrees. That’s their “just right” zone. The only real trick to yogurt making is figuring out how to keep the inoculated milk at 110 degrees for several hours. On her show, Margaret and I discussed several methods to keep the yogurt at the right temperature, so take a listen if you don’t have your personal yogurt mojo dialed in yet.

Okay, back to that question of heating milk intended for yogurt making to 180 degrees. There are two reasons why milk is traditionally scalded – brought to a simmer – before being made into yogurt.
The first is to kill off any wild bacteria, yeast or mold spores that might have fallen into the milk. This is important because you want your preferred lactic-acid bacterial strains to do the culturing of the milk, not get outcompeted by various mystery microbes.
The second advantage to the heating stage is that the most abundant protein in the whey of in milk – lactoglobulin – fully denatures and unfolds at about 172-degrees. This allows those proteins to bind to some of the other proteins in milk, called caseins. Ostensible result: a firmer, thicker yogurt curd.
Since I last demonstrated yogurt making on this blog several years ago, I’ve refined my own yogurt making technique and one of the things I’ve stopped doing is first heating the milk to 180, then chilling it to 110.
Here’s why.
I start my yogurt making with fresh, store-bought, pasteurized milk. When milk is commercially pasteurized, there are a few combinations of time and temperature that can be used, and the most common of those is called High Temperature, Short Time (HTST) or “flash” pasteurization. In HTST pasteurization, the milk is brought up to between 160 and 165-degrees for about 30 seconds. This creates a milk that is reasonably sterile, which means we can ignore the first reason to heat the milk.
So that leaves the issue of the thicker curd. I wondered if heating the milk really mattered that much, so I did an experiment where I made two batches of yogurt with the same milk and same starter.
For one batch I followed the traditional method of heating the milk up to 180 then chilling it to 110 before adding the culture. The second batch I simply warmed the milk to 110 then added the culture directly. Both batches were cultured for about 8 hours before being chilled overnight.

There were some minor differences in the final yogurt. The scalded-milk yogurt was a bit thicker, but not in any kind of dramatic or show-stopping way. And I actually preferred the texture of the un-scalded milk yogurt. It had a silken, very smooth texture that made the scalded-milk yogurt seem just a bit coarse in comparison.
So why was the difference in final yogurt thickness so minor, when every yogurt recipe seems to say that the initial 180 heat is somehow essential to making good yogurt?
As I see it, there are two possible reasons.
It’s possible that the HTLT pasteurization heat-chill cycle does enough to denature the lactoglobulin to make scalding the milk unnecessary.
It’s also possible that, when compared to the acidulation of the milk that takes place as the lactic bacteria culture the milk, the denaturing (or not) of the lactoglobulin just doesn’t make that much difference. Sometimes things are done just because that’s the way they’ve always been done and they become dogma. Starting with scalding the milk might just be yogurt dogma.
One more note about how I make and use yogurt that affects my decision to skip that heat-cool cycle: I strain almost all my yogurt to make a rich, Greek-style product and provide me with whey for breadmaking.
Lactoglobulin is one of the proteins in the whey, or the liquidy part of the famous “curds and whey” equation. Since I strain off a fair bit of the whey from my yogurt curd, any minor difference between scalded milk and non-scalded milk yogurt just doesn’t seem to matter.
Cutting out that heat-cool cycle has made my DIY yogurt making far faster. Instead of shepherding milk gently up to 180 degrees without allowing it to burn, then stirring it to speed chilling back down to 110, I just warm it to 110 over medium heat. One or two stirs at this gentle heat is enough to keep the milk at the bottom from scorching.
This streamlined process cuts the hour-plus commitment of yogurt prep down to a quick ten or fifteen minutes plus inactive culturing time.
If I were starting with milk of unknown quality or raw milk, I would certainly still scald it before starting yogurt making, but if you start with freshly opening, pasteurized store-bought milk and plan on draining your yogurt anyway, you can reliably skip the scalding step.
What about you guys? Do you heat your milk to 180 degrees for yogurt making? Why or why not?
940
I have just began to make yogurt and I will certainly try this “no scalding” method. I have been making kefir from grains for several months and I am wondering about inoculating the warm milk with some ready to drink kefir. What do you think?
Dang…just overboiled milk reading these great post about hearing milk to 180!!
I’m am laughing at my self!
*heating*
I make yogurt from the shelf stabilised whole milk they sell readily where I live, it’s easier for me. Anyway, a friend of mine gave me a yogurt maker a few years ago and it fits inside an enormous aluminum pot I happen to own (think 5 gallon bucket size). So I can make 3 liters of yogurt at a time inside it now. I cut put a notch for the cord at the top, so the lid fits on snugly… anyway. I cut open a carton of said milk, dump it into a 1 liter clean glass pickle jar, stir in two heaping tablespoon dollops of yogurt from previous batch or a yogurt icecube (I make a head and freeze yogurt in icecube trays and store for later), set my maker for 7 hours and set the jar( or 3 depending on how many I need) and press start, replace lid and walk away. I usually start in the morning and by end of day they are finished. I cap them and place in the fridge overnight. Done. One jar, no stove, no added utensils to wash and it comes out great!
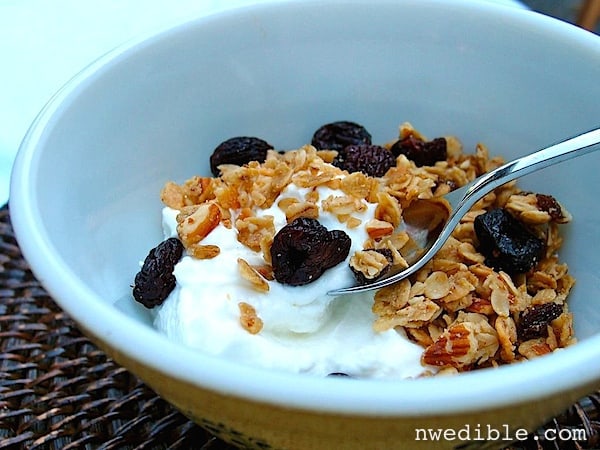
To the original question: Do you need to heat milk to 180F (or 172F) prior to making yogurt; my answer is no. Firstly, it’s likely to have already been heated to 160F – 180F when pasteurized, making reheating redundant. Secondly, even if the milk has only been batch/vat pasteurized to 145F or so the method below makes a thick, creamy yogurt with much less fuss and much less effort than utilizing the 180F step. My method starts with organic, whole, non-homogenized milk in a BPA/BPS-free plastic container, usually 1/2 gallon. I’ve researched all the reputable, organic retailers in my area and they all use a quality plastic product to sell their organic milk. Pour out 3-4 tablespoons of milk and pour in 3-4 tablespoons of your favorite plain yogurt (that has an active culture). Shake. Place in a 121F sous-vide water bath for 6-12 hours. (If no sous-vide water bath, you really should buy one and explore: from food to beer to yogurt to cheese to perfect poached/boiled eggs to sterilizing egg whites for the perfect whiskey sour, a sous-vide water bath is indispensable.) If no sous-vide then any of the above methods to keep the temp between 110-120F. The longer the thicker (to a point) and sourer. Refrigerate. You now have a half-gallon of super thick yogurt that usually has to be squeezed like toothpaste to get it out. With each new 1/2 gallon I usually squeeze out a giant dollop to mix with granola then pour in 8-16 oz. of pureed fruit +/- sugar to make a drinkable fruit yogurt. That’s my go to refreshment after most activities.
I just added the same suggestion about sous vide! Great minds think alike!
It’s really a nice and helpful piece of information. I’m satisfied that you simply shared this helpful info
with us. Please stay us up to date like this.
Thank you for sharing.
If any of you have a sous vide setup, it’s even easier to make yogurt! I use a large plastic container, fill it with enough water to cover jars and set the water temp at 110 degrees. I let it heat up while I’m preparing the yogurt. I put the yogurt in the jars and screw on the lids then gently place them in the water bath. Make sure they aren’t touching. I put foil over the container to keep the water from evaporating. Since the temp of the water will only vary +/- .1℅ of a degree, it’s perfect for making yogurt. Perfect steaks too!
I heat the raw milk until about warm to the touch as I don’t have a thermometer, then added old yoghurt. I noticed it gets firmer the longer it stays in the fridge.
Someone posted this method to the Instant Pot community group and I AM. SOLD. Best yogurt to date, such silky texture just as promised and so easy!! Thank you.
If you are interested in topic: make money reviewing beauty products – you should read about Bucksflooder first
If you are interested in topic: earn rupees online
in india – you should read about Bucksflooder first
cartierbraceletlove I made these cookies earlier today and they are officially one of my favorites!!! The dough was easy to put together last night and I was able to bake them while my ten month old took a nap. They were SO delicious – crispy edges that were just right and (just like in the title) a perfect soft and chewy center. These will be great to add to my list of cookies to gift to friends. They looked like they came from a fancy cookie shop☺. Thank you again for sharing such wonderful recipes! They have been some of the best I’ve tried anywhere! Looking forward to trying more of them in the future!!!
bracelet cartier vis faux http://www.bestleve.com/
What a brilliant answer to the yogurt question, clear, concise and informative. How refreshing to have a searched question answered so well.
Well after spending the last hour or two standing over a pot of milk, and THEN reading this I will make the next batch with out the 2 hour prep and see. I wondered as I was making it why pasteurized milk would need to be reheated. Sometimes a little research saves much labor and time. I will let you know how my batch turns out and the subsequent one following your method. I too am making the greek style yogurt so I will be up in the middle of the night for the straining process completion. SIGH…… Thanks for your kindness in sharing your experience.