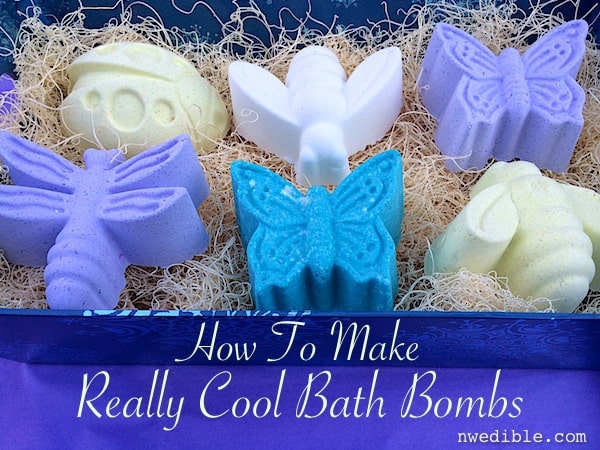
Bath bombs are so cool. Basically, you’re doing a chemistry experiment in the name of Spa Day. How could anyone not like that combo? They also make great gifts (hint! hint!) and kids love them. Since I started this Bath Bomb making experiment, my son has refused to take a bath without one.
Bath Bombs aren’t all that cool until they hit water, and then they start fizzing like crazy and create a fun, foaming bath experience as they dissolve. The reason for this is an acid-base reaction.
You know when you were a kid how you made volcanoes by pouring vinegar into baking soda and creating faux lava? Well, the same thing is happening with these bath bombs. Citric acid provides the acid component and baking soda provides the base. They don’t react until they get wet and then – ta da! – bath bomb fizz power galore.
The stuff that dissolves into the bath water makes for a nice, soothing bath. The citric acid and baking soda pH neutralize as they fizz, the cornstarch is soothing to dry skin and rashes, and the Epsom salt (pure Magnesium Sulfate) helps relax muscles and restore Magnesium levels in the body.
Combine these ingredients with a few drops of essential oil and some food coloring if you want to personalize your bath bombs. I like lavender and chamomile essential oil for a relaxing vibe and eucalyptus or lemongrass for something more awakening.
The Two Tricks to Making Bath Bombs.
Trick # 1: Getting the dry mix wet enough to be moldable without activating the acid-base reaction. I found that stirring the dry mix constantly with a whisk in one hand while dribbling in the water with the other hand worked the best. If any part of the dry mix starts to fizz up, just mix that area quickly until is stops. As soon as the dry mix holds together when you squeeze it tightly, stop adding water. Martha Stewart says you should get a spray bottle and spritz the dry mix, but that’s more fussy than I can handle.
Trick # 2: Molding the bath bombs. I tried a few options for molding these – silicone ice cube trays, portion scoops, etc. – and didn’t have the best luck. Nothing that deflected under pressure – like silicone – worked that well. I tried those plastic Easter egg shells (anyone with kids has these lying around) and was able to mold dome-shaped bath bombs that worked pretty well.
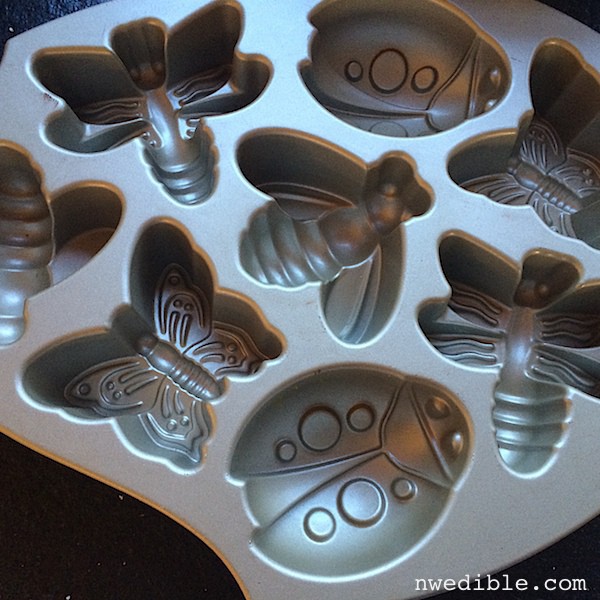
Then I thought – everyone has a muffin tin, so I should see how those work as molds. And then I remembered that I own a pan designed to make adorable mini-bug-shaped cakes. (I had an employee discount at Willimas-Sonoma and an impulse control problem a few years ago, what can I say?)
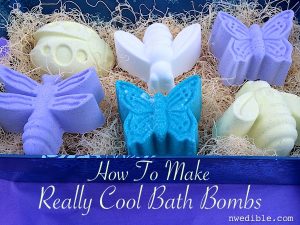
Bath Bombs turned into way more cool Bug Bath Bombs.
I was pleased to find that the bath bomb mix packed very well into the mini-bug cake pan, and, after a little practice, the molded bath bombs came out of the individual bug shapes pretty reliably. Winner!
Step-by-Step: DIY Really Cool Bath Bombs
The photos for this tutorial were taken over a few batches of bath bombs, so the color of the demo bath bombs will change.
Get Your Stuff
You’ll need citric acid, baking soda, Epsom salts and cornstarch.
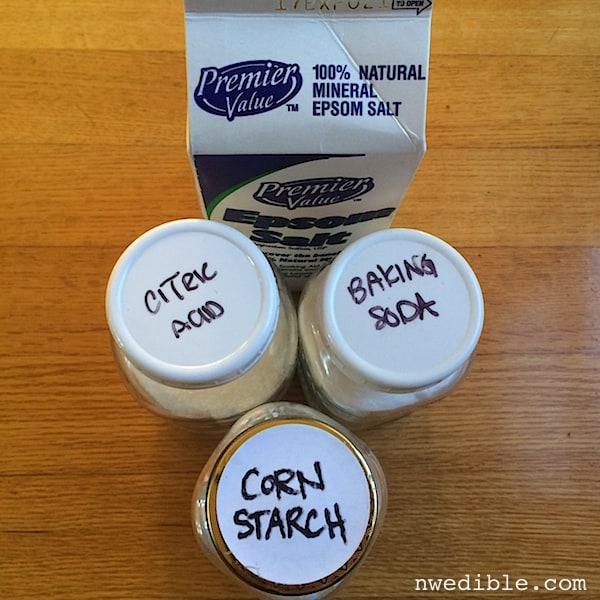
You can get the citric acid in shops that cater to brewers or cheesemakers or in the canning section of very well stocked supermarkets. You can also order it online. This is what I use. If you want to color and scent your bath bombs, you will need food coloring and essential oils.
If you have an objection to corn starch, I tried a batch with half corn starch and half potato starch and, while it seemed to require more water to stick together, it worked. So play around.
You’ll also need something for molding your bath bombs. My mini-bug cake pan turned out cool bath bombs, but use that as an inspirational starting place. Look around your house and I bet you have a great bath bomb mold kicking around too. This is the specific pan I used.
Make the Bath Bomb Base
In a large bowl, mix together the citric acid, baking soda, cornstarch and Epsom salts.
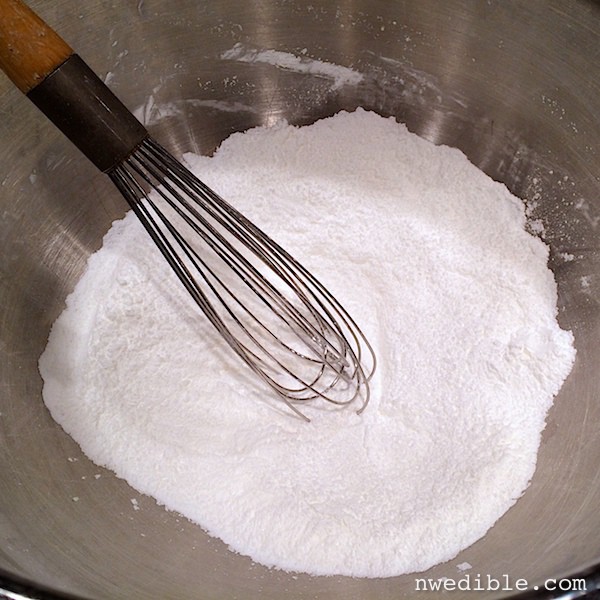
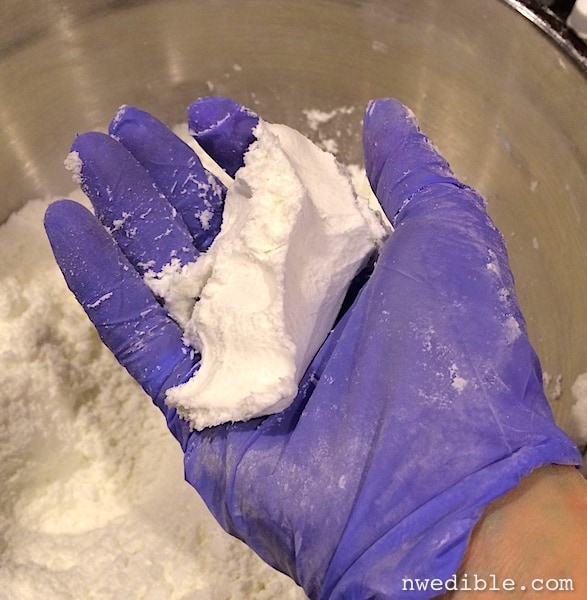
With one hand, stir dry mix constantly with a whisk. With other, drizzle in the water until the mixture just clumps together. If you start to see or hear fizzing, that means there is too much water in one area and you should stir that area quickly to distribute out the moisture.
Add just enough water so that the mix holds together when you squeeze it in your hands.
Add Color
If coloring your bath bombs, use a few drops of food coloring to achieve the desired shade. I used paste gel food coloring which is very concentrated and only needed a small squeeze to get the shades I wanted. Knead well to distribute color.
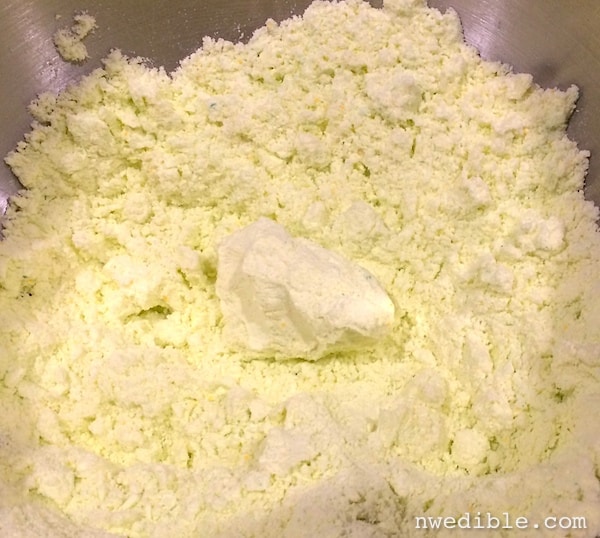
Add Scent
If scenting your bath bombs, add in the essential oil a drop or two at a time until the your desired scent is achieved. Knead well to distribute scent.
My favorite scent/color combo of the batches I made was lemongrass in a pale yellow-green color. It turned out really delicious smelling! I also made a violet-tinted batch scented with chamomile and lavender. I’m hoping it soothes my son who hates to sleep before bed.
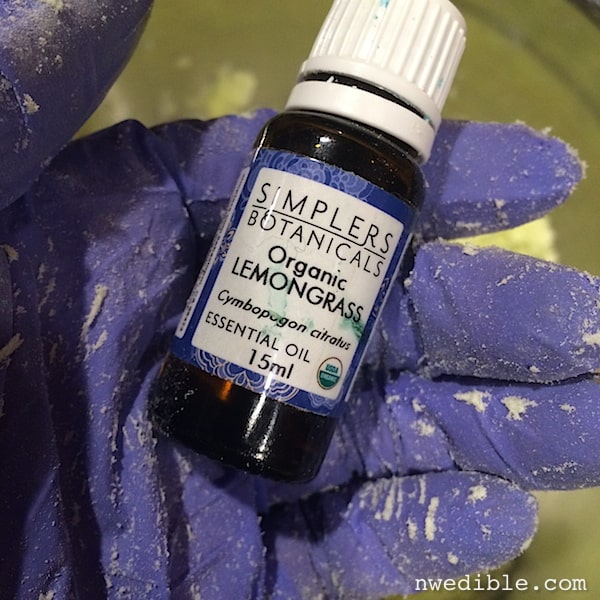
You want to be careful which essential oils you choose – ones with skin soothing properties are desirable. Though I have not personally experienced this, too much lemon essential oil can apparently make a bath a bit more astringent on the sensitive bits than anyone really wants. Always be considerate of the sensitive bits, people!
Pack Your Mold with the Bath Bomb Mix
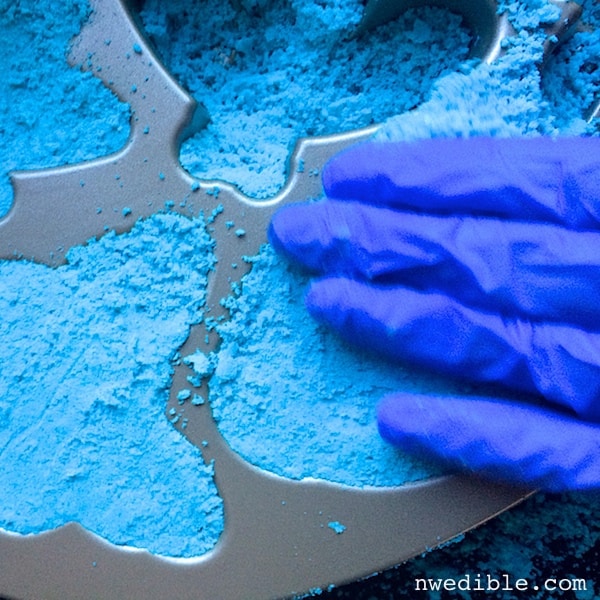
Really get in there and pack it in. You want the mix to be very firmly compressed in the molds.

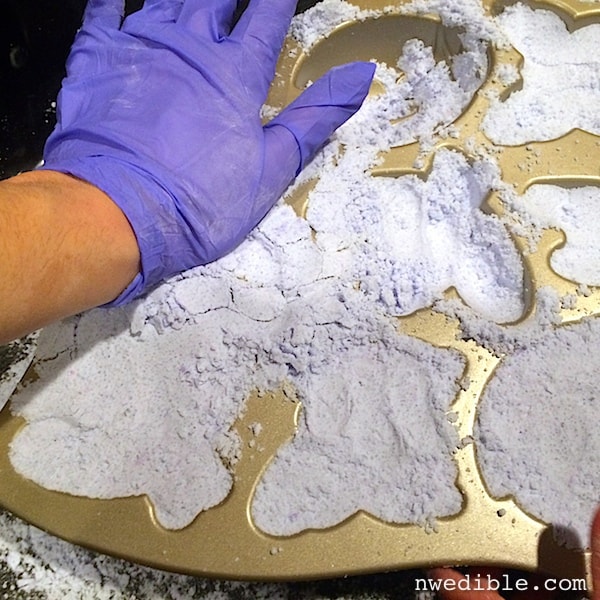
Smooth the tops of the bath bombs – if they are uneven on the bottom when you flip them over to unmold them, they tend to crack more.
Unmold Your Really Cool Bath Bombs
For the pan-type bath bomb mold I was using, I found unmolding was easiest if I set a sheetpan bottom-side-up on the bath bomb mold. Then, holding sheetpan and bath bomb mold tightly together, I flipped both over together.
The result was the sheetpan right-side-up topped with the upside down bath bomb mold. To finish unmolding I slowly – and very carefully – lifted the pan straight up off the bath bombs, which conveniently stayed behind on the sheetpan.
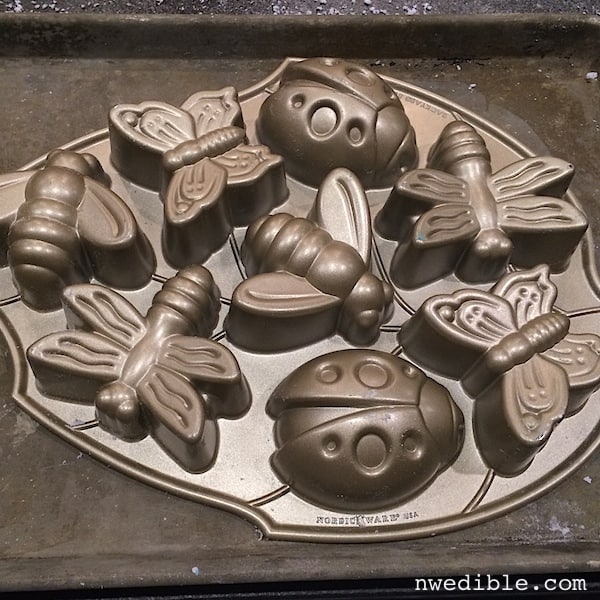
You do have to be quite steady-handed unmolding because the bath bomb mix is very soft at this point and if you bump it you will mess up the shape. Since the fun shape of these molds is what makes them, I didn’t want sloppy edges.
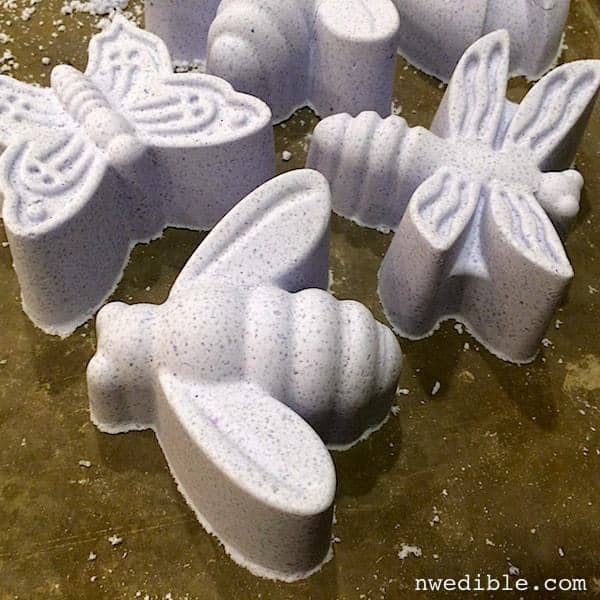
If you do mess up unmolding a bath bomb – or a whole batch – you can just smoosh the bath bomb mix right back into your mold and try again. If it starts to get too dry to work with, just sprinkle with a few more drops of water and mix well.
Dry Bath Bombs
Let bath bombs dry overnight.
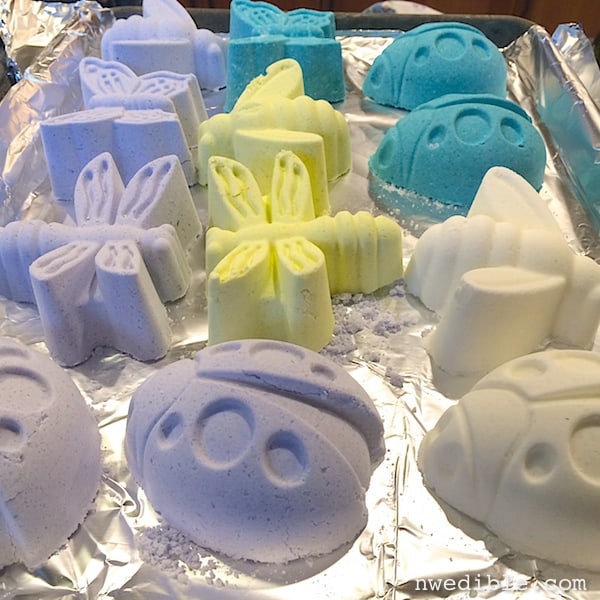
In the morning a few of my buggies had minor superficial cracks and one of the bees had cracked its wing right off but they mostly stayed together. The ladybug – the simplest of the shapes – was 100% reliable. The more complicated designs had more problems in unmolding and with cracking.
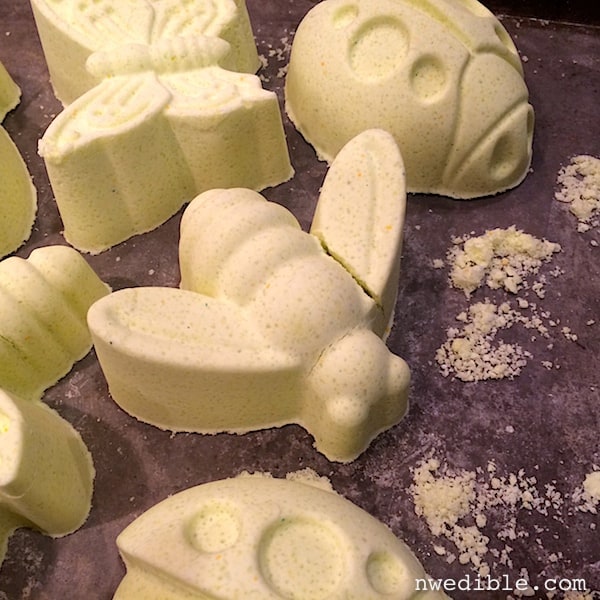
Some other online instructions for bath bombs suggest letting the bath bombs dry in the mold, and that may be an option too – I needed to use my cake pan to make more bath bombs so I had to move a bit faster than that would allow. Letting them dry after unmolding worked fine. If you have experience with the “dry in the mold” method, please chime in in the comments.
Package As Desired
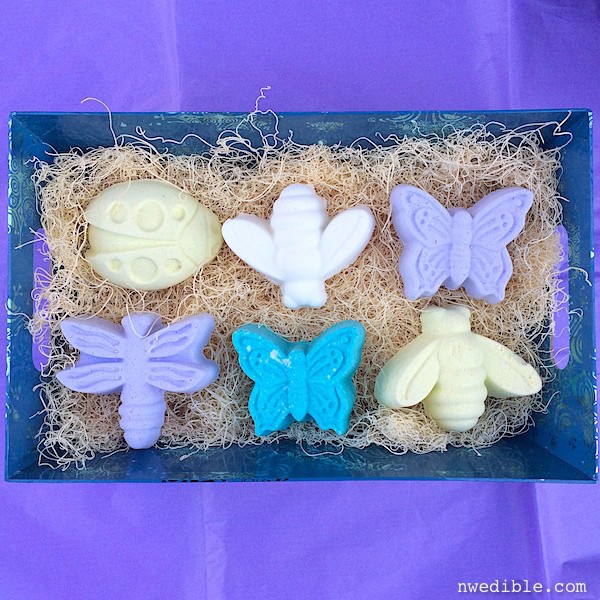
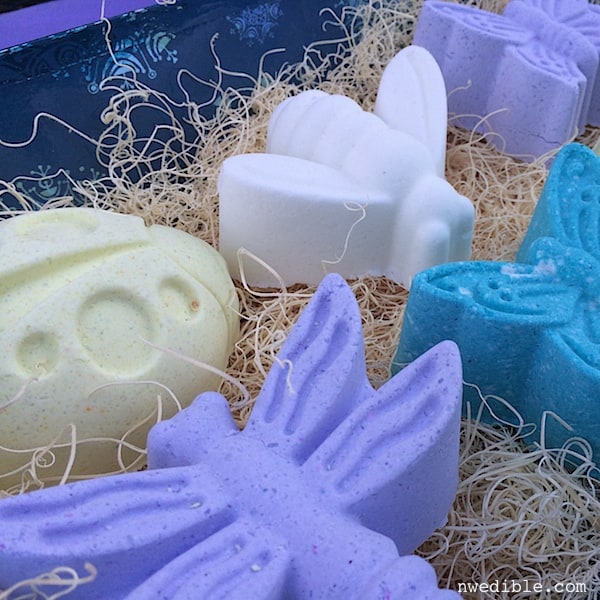
When bath bombs are fully dry, carefully package for gift giving or your own personal spa day. I placed six in assorted colors and shapes in a box lined with wood shreds. Shredded crinkle cut paper would also be good. I wouldn’t stack these for gifting – no mason jar filled with bug bath bombs, I’m afraid – they aren’t meant to be knocked around.
Printable Bath Bomb Instructions
DIY Really Cool Bath Bombs
Ingredients
- 1 cup citric acid
- 2 cup baking soda
- 1-1/2 cup cornstarch
- 1/2 cup epsom salts
- 2-4 tablespoons water
- Small squeeze of food coloring (Optional)
- 10 drops essential oil, or more as desired (Optional)
- Equipment: suitable mold for bath bombs
Instructions
- In a large bowl, mix together the citric acid, baking soda, cornstarch and Epsom salts.
- With one hand, stir dry mix constantly with a whisk. With other, drizzle in the water until the mixture just clumps together. If you start to see fizzing, that means there is too much water in one area and you should stir that area quickly to distribute out the moisture.
- Add just enough water so that the mix holds together when you squeeze it in your hands.
- If coloring your bath bombs, use a few drops of food coloring to achieve the desired shade.
- If scenting your bath bombs, add in the essential oil a drop or two at a time to achieve the desired smell.
- Pack bath bomb mix into molds very firmly and smooth the surface of each bath bomb.
- Unmold bath bombs onto a sheetpan or other flat, dry surface.
- Let bath bombs dry overnight.
- Carefully package as desired for gift giving or your own personal spa day.
Related Stuff…
(These are affiliate links. Purchases made through these links cost you nothing extra but allow me to periodically enjoy a nice glass of wine while taking a soothing bath after way overdoing the weeding. Full financial disclosure here. Thanks for your support, folks. It puts the fizz in my bathwater.)
Citric Acid – We buy this stuff in 5 or 10 pound bulk bags because it gets used in canning, cheesemaking, dry baking mixes, happy-hippie weed spray and more around here. It’s quite useful stuff. Here’s a one-pound option.
Baking Soda, Epsom Salt and Cornstarch – sure, you can get all this stuff at the supermarket, but maybe you hate leaving your house even more than me.
Cute Bug Cake Pan – You can also use this pan to make cakes (but be honest – will you?) and it’s adorable. A substantially less expensive silicone version is also available, but I wasn’t thrilled with trying to firmly pack the bath bomb mix into squishy silicone molds. Proceed with caution.
Gel Food Coloring – This is great stuff. If you’ve only ever used the crappy drippy food coloring from the grocery store, think about upgrading. And of course, if food coloring skeeves you out, just skip it.
Essential Oils – Apparently there is a big controversy about essential oils. If you have a brand you love and trust, go for it! For this use, the most important thing is that they smell nice, so I went down to the Yuppie Hippie market and smelled all the brands until I found the one I liked the most. It was the Simpler Botanicals brand. If you don’t have a trusted brand, I recommend an in-person reconnaissance to your local hippie health food coop.
186
What a perfect DIY! I have all of these ingredients on hand, and I found citric acid in the canning section of my grocery store last summer. They also sell it at the mom and pop hardware store in town. I think I have an old soap mold that will work too. Thanks for the cool craft; it will make small holiday gifts for friends much easier.
Those look like a lot of fun to make (might try it with the kids). Now if only we had a proper tub!!!
WOW, you had me worried. Me being from West Virginia, that is not what we called Bath Bombs. Although ours did have a fragrance.
LOL – Awesome!
Hi Erica! First, Thank you for this tutorial! I have a problem! I made perfect flower shape bath bombs. I let them dry in the silicone molds for 24 hours! They popped out perfectly and I was so excitedThey smelled beautiful, they were the perfect color and I even added a few bits of rosemary and lavender to each one. The next day I went into the room to start wrapping them for gifts and I had little piles of power! They totally crumbled on me! So… I made another batch and added more moisture. They just kept puffing up over the mold like bread rising and when I took them out, once again, they just crumbled apart and wouldn’t even come out of the mold. I am afraid to try again. I stocked up on all the ingredients and wondering what to try. Did you have any similar problems?
I actually used this great tutorial but added far less cornstarch, only 3/4 cup. Also, the puffing up is the citric acid/ baking soda being activated prematurely by a bit too much moisture. Your mixture should just barely hold together when tightly squeezed in your hand. I hope this helps, and I hope I have not been a “buttinski!”
Might I suggest adding some petals of dried flowers that coincide with the fragrance of the bath bomb, ie. dried lavendar blossoms? It would make the bombs attractive even if they were simply made with mini muffin tins. Just a thought but one I hope to try since I have some dried blossoms AND lavendar oil! Thank you for the recipe … sounds fun and can’t wait to make some! 🙂
I do this and it looks gorgeous and really professional… I just lay some simple dried petals in the mould before putting the mixture in and they fit into the mixture perfectly with a smooth finish. Also works with glitter. I do leave the mixture in the moulds for more than a few seconds, but if you take them out quickly you could just gently push the petals in. The glitter is easily added afterwards. I’m not sure about the petals adding to the scent, my dried petals don’t really have any scent, although I haven’t tried lavender yet, probably the best bet for scent, but petals do look beautiful and I just choose to match whichever oil scent or colour you’ve chosen. Big recommend on the petals from me:)
what about arrowroot powder instead of corn starch? I ask only because I often see that substitution made and I have arrowroot at home but not cornstarch. 🙂
I have a similar pan, with 5 or 6 of the butterfly shapes in it. Fun gift idea!
I don’t know, but I would guess it would work. Maybe start with a 1/4 batch just to make sure?
Did the arrowrooot powder work?
I used arrowroot powder in place of corn starch. Read that arrowroot does better with acid mixtures…so far, so good. Bombs are drying now, just muffin tins this time, the house smells good!
I would have *loved* to have this recipe when my kids were little (none of us do baths anymore), but I have a friend with little people and I think she would love these for a gift! Thanks for sharing =)
Love the idea and look of these. I also love epsom salt baths after a hard day working in the garden. I’ll poke around for a recipe with more of that in it and see how it works out. I might “up” mine with lavender flowers or dried rosemary too, for my grown-up girlfriends. Lovely, and thank you for the inspiration in more ways than just this particular blog.
Thank you so much for the tutorial! It’s actually something I’ve been looking for for awhile! I have spent much $$ at Lush in the past for their bath bombs… One has cocoa butter in it, I might try that.
I feel very out of the loop, but what controversy over essential oils?
I will add this for everybody who’s talking about adding bits of things (lavender buds, herbs, etc) to their bombs– Lush does this, and in my opinion it just makes an awful mess! It’s weird (for me at least) to be trying to soak with little pieces getting stuck to legs and etc. Then after the bath, you’ve either got to get it all back out, or let it go down the drain. It kind of kills the ‘relaxing bath’ vibe to have to do so much cleanup afterwards!
I SO agree with you Mara! I prefer my bath without floating debris! And cleaning up after it sorta ruins the relaxed mood from my soak. Although it’s pretty in the bomb itself, I stopped adding “stuff” after using a bomb just once!
When I make bath bombs, I use a small plastic funnel (“bath kisses” – like chocolate kisses, some of them scented with cocoa absolut, of course) but the Fabulous Shapes mould is brilliant.
I use melted coconut oil or cocoabutter (or some other solid-at-room-temperature oil with a luxurious reputation and a decadent scent) instead of water. It makes them “bath fizzies” rather than “bath bombs” but the result is the same if you want a spa-day at home. 🙂
Can I get the ingredients for your bath Kisses Meliad?
They sound very nice!
These are so pretty and DIY :O I
I’m making these with my daughter to give as gifts for her friends (first Christmas *ever* I’m organized enough to be crafty with my kids!), and we’re doing them in muffin tins with festive cupcake liners. I suspect they may need longer to dry… I’ll let you know how it goes!
Erica,
Do you have a correct amount of liquid that works with this recipe? I have tried two half batches now. The first one was a horrible science experiment gone wrong with orange goo climbing out of my cookie sheet and spilling onto the counter. The second one I left what I thought was really dry. I unmolded 12 beautiful camellias and showed them to my hubby. Two hours later though, they had melted down/expanded into blobs.
It really is a brilliant idea and I would love to have these to go with my handmade soap.
Thanks!
Birgitt
Hi Birgitt,
So sorry this isn’t working! I had done 3 batches before publishing this post, but just to be sure before I responded, I just remade the recipe. It took me 3.5 tablespoons of water to sufficiently moisten the dry stuff. What I do is stir the dry stuff really briskly as I’m dribbling in the water so it doesn’t activate the acid-base reaction. But there is the “martha method” where you put your water in a spray bottle and spritz the dry stuff until it just holds together. That might work better for you. It occurs to me that perhaps different moisture levels in our different homes might also impact how much water is needed.
I took some pictures of this latest batch with 3.5 tbsp water to show the consistency you are going for. Maybe this will help?


Bless you! I will try that amount. I think I will include the liquid soap colorant I am using in the total as well, as it is more than a few drops. I may also try the Martha method… And a heavier bowl. I was using one of my soap/craft bowls and it wants to spin as I whisk, making it hard to pour just a drop at a time of water.
Home moisture levels might be an issue…except we have had no rain here in ages and so it’s pretty dry.
Thanks again. I’ll report back. (I truly should have taken a pic of that first batch… LOL)
Birgitt
Erica,
Well, third time’s the charm! I made another half batch, using powdered color and about 2 Tbsp of water and it worked like a dream. They’re lovely and the mold pattern is crisp. I guess I just couldn’t believe it took so little water.
Thanks so much for your help. It truly is a crime to drop $5.95 apiece for them at the store. (What an elitist bath!)
Birgitt
YAY! I’m so happy this worked for you! Thanks for coming back and letting me know how it turned out!
Hi Erica
I made them and they looked great. I left them to dry for 48 hours, when I came back they looked like they had “melted” and so I had one big thick dry sheet. It looks like I must have added too much water without realising (I would say the texture was not far off wet sand by the time I was finished but there was no fizzing happening at all, they looked perfect!).
Just thought I would chime in to see if anyone else has had similar results (I think I saw one person above). Im going to re-do them tomorrow night and fingers crossed these ones work.
I have read about drying them in the oven, and about wrapping in clingfilm once dry to “protect” them. Do you have any view?
Regardless of my mucking up the first attempt thank-you for the inspiration to make these!
Hi Jaime, I haven’t tried the oven-drying but I think it might work. You might also try letting them dry in the mold – that is something that other bath bomb recipes sometimes recommend. The mix should be quite dry – like it should only clump together when you squeeze it, but otherwise crumble. I also suspect there might be an issue with what kind of colorant is used – I use gel paste colorant so it takes only a drop to get a very intense color. If one were using the liquidy food coloring that’s more like water, I think that might add enough extra moisture to potentially cause a result like you and another reader were seeing. I dunno about the clingwrap – my first reaction is that the less you can handle them, the better. I think it would also depend on the moisture level in your home – if your house is dry, the plastic would be more likely to TRAP moisture, which would be bad. If your house is quite humid perhaps plastic wrap could help prevent excess moisture from being absorbed from the air. If you try these again with less water, please report back and let us know how it went. Cheers!
Hi Erica
I did round two and they seem to have worked perfectly this time. I used 3 tablespoons of water and this time I dried them in the muffin tin in a warm oven. Here’s hoping they don’t melt in the coming days 🙂 thanks for the inspiration I am always keen after 14 years of being with my wife to come up with a thoughtful gift and this recipe was ideal!
Hi Erica,
Thanks for posting this! I just wanted to let you know that I tried drying them in the tin overnight. I had to use a fair amount of force to get them out (drop the tin onto the cookie sheet to jar them out), but all of them survived (I have the same tin you do). There were still some minor cracks, but otherwise worked like a charm. 🙂 I have my second batch in a warm oven to try to dry them more quickly. Will let you know how it goes.
Awesome! Thanks for letting me know!
OK, results are in from the oven drying. I did a hybrid approach— dried them in a warm oven (residual heat) for 3 hours in the tin (just long enough to get the material to pull away from the side of the tin) and then dried them for another couple of hours in a re-warmed oven. I don’t think I recommend this strategy– the superficial cracks are now deeper (though no structural failure). I think it dries too quickly, causing stress and deeper cracks.
Thank you so much for this recipe! It is simple and my kids love having ‘fizzy baths’. I use a mini muffin tin to mould mine and keep them on the small side as my kids always end up using 2 each (meaning 4 in the tub at once, lol). I have a tiny variation to suggest to your readers: I slowly add 3 tablespoons of almond oil (though any light oil would work if allergies are a concern) followed by just under one tablespoon of water which I top up to full with food colouring. I find the oil is nice in the bath, and it holds the ingredients together really well without fizzing too much. Also using coloured water makes the colour mix in easier. Thanks again for the great recipe- I’ve tried about 5 or 6 and this one is by far the best I’ve come across.
How many does this make?
Hi Erica, I loved the bugs so much I quickly ordered the pan and I just made my first batch! So cute and easy! I will say that after watching several bath bomb tutorials I thought it was going to be difficult getting the bombs out of the mold. This wasn’t the case at all and as I was inverting the mold, three of the bugs fell out so hard they cracked. No worries, I just put them back in their holes and packed them down again. Then I covered the mold with a piece of cardboard before I inverted hem again. Thanks! Christi
I loved your gorgeous bug shapes SO much that I went in search of the mold/ pan. I bought the very same shapes, but in a silicone pan, on E Bay for $10 and free shipping. Obviously I was concerned I wouldn’t be able to pack the mixture hard enough, in which case I would make beautiful muffins, but it worked!! And so easy to remove after drying! Thanks so much for sharing this recipe and inspiration!
Great recipe and explanation! Just a tip…mix the essential oils with 2 tsp of plant based oil (I used coconut). Essential oils typically should have a ‘carrier’ oil added when applying to the skin to prevent irritation. If you do this, just reduce the amount of water you use. You can also use witch hazel instead of water as it is great for treating itchiness or skin blemishes. And coconut oil is great for your skin too!
I let my bath fizzies dry in the mold. It’s the only way I can get them to retain shape. Worked great in an ice cube tray! I tried to make them in plastic Easter eggs but they always tend to split into the two sides of the egg instead of staying as one beautiful egg. Any advice on what I’m doing wrong? Thanks! Excellent tutorial though!
What size boxes do you use for packaging? There’s so many online, I can’t tell which would be big enough. Also, can you package bath bombs in plastic treat bags, or would that not work? Thanks! 🙂
Is it okay to NOT use food colouring?
How many does this recipe usually make? I love this idea and what to make it for a gift but idk how many this will make
What would make it not fizzy in water once dry
How many does it make
How do they make the foam? When I do mine home, they don’t produce this much bubbles…
They are already edible but I wouldn’t recommend it. The citric acid needs the baking soda to react.