Every year about this time gardeners start inflicting all manner of experiments upon the humble spud. We drop them into burlap sacks, grow pots, wood towers, mesh towers, tire towers, garbage cans, straw bales and more. We attempt the Square Foot method, the Ruth Stout method, the Hilled Row Method, the Plastic Mulch Method.
The goal with these various growing methods is always the same: maximum possible yield of clean, unblemished potatoes in a minimum of space. To achieve this ideal, potatoes need moist, rich, acidic soil under the seed spud and loose, dryish, lightweight soil or other matter above, where the vine will grow and new tubers will form. These conditions are easily created in container culture, and bins and cages give the added advantage of dead-simple harvest. Once the vines die back, you tip-and-pick.
So it seems that potatoes should be the perfect candidate for all these grow-bin experiments. And yet, for all the internet promises – “Grow 100 Pounds of Potatoes in 4 Square Feet!” – I have never, ever, ever heard from an actual person who has achieved results like these. In fact, often I think that the potato usually manages some yield no matter how you grow it more from the insuppressibility of the tuber than the creativity or skill of gardeners.
My own experiments two years ago in burlap sack potato growing were a dismal failure. Last year I grew potatoes both in ground and in large Rubbermaid plastic tubs. The potatoes grown in the ground were fine: the quality and quantity were neither spectacular nor terrible. The tub-grown taters did better. I filled the tubs with purchased compost and was rewarded with a good yield of very clean, nicely shaped if slightly small potatoes for most varieties grown. (French Fingerling was the clear winner.)
But by the end of the season, ants had found the bins and had made a happy colony inside the warm, protected, loose soil. Harvesting required overcoming the fear-factor of dozens of ants swarming my forearms and hands as I plucked the potatoes from the soil. And all that purchased compost cost a pretty penny.
So this year, I am trying yet another way. I hope (don’t all we potato growers?) that maybe I’ve found the perfect very low cost, portable, good-drainage, large-scale container for growing. In a few months, the results will, one way or another, speak for themselves.
Assembling the Cages
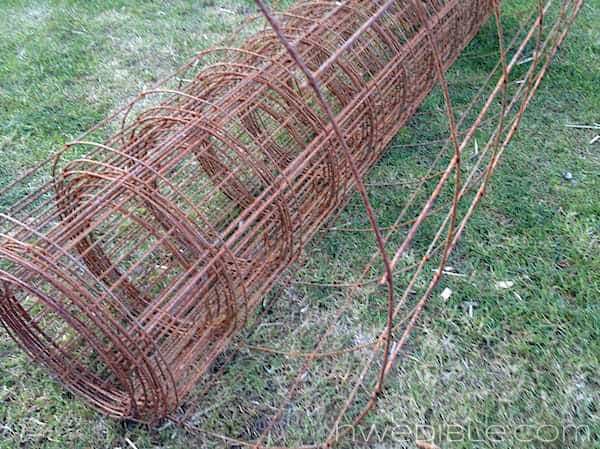
My Heavy Duty Potato Cage starts, like so many projects around my yard, with a roll of concrete reinforcing mesh. This is the same roll of mesh I’ve used to make rebar arch trellises, pea climbing supports, tomato cages, cloche supports and more. This one 5′-wide, 150′-foot long roll of concrete mesh is like the garden gift that just keeps giving.
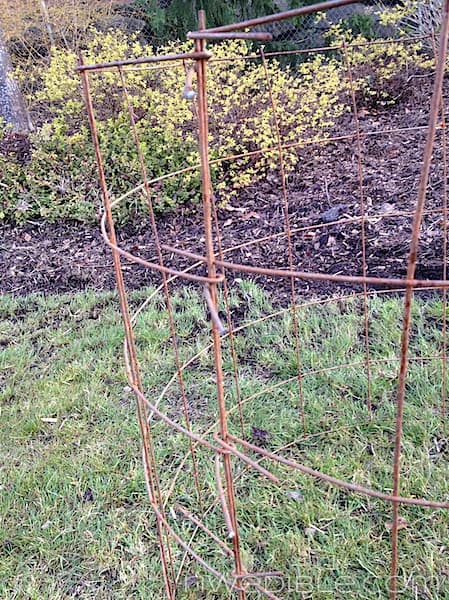
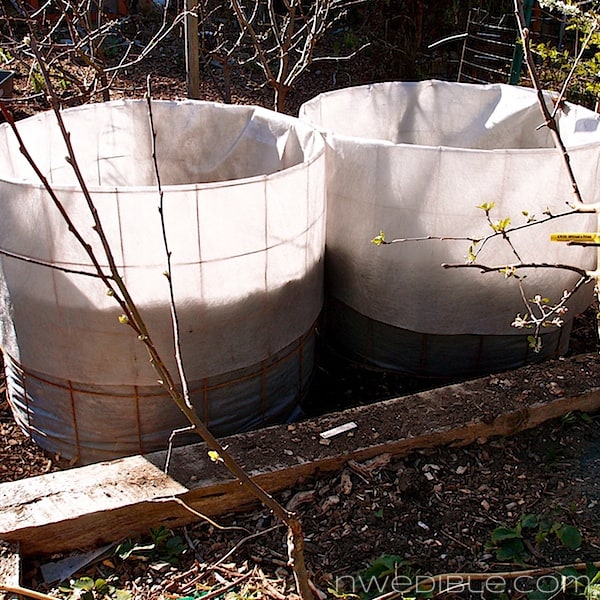
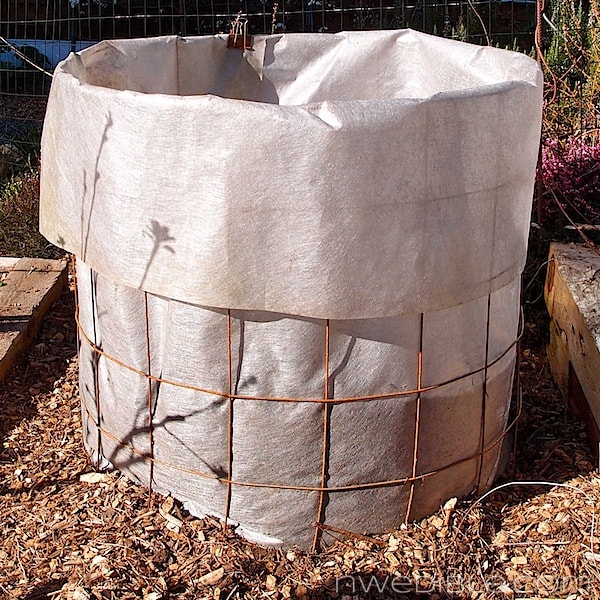
I cut a 9 foot section of the mesh and then cut that in half lengthwise. This gave me two sections, each 9 feet long and 2-1/2 feet tall. Each section was wrapped into a circle (the mesh naturally wanted to curl up so this was easy) and I twisted and folded the loose ends of the mesh back around the opposite edge to hold the circle securely. Result: easy heavy duty potato cages.
I decided on locations for my potato cages and roughly leveled the ground where the cages would sit. I set the potato cages into place and used a few landscape staples to hold them in place.
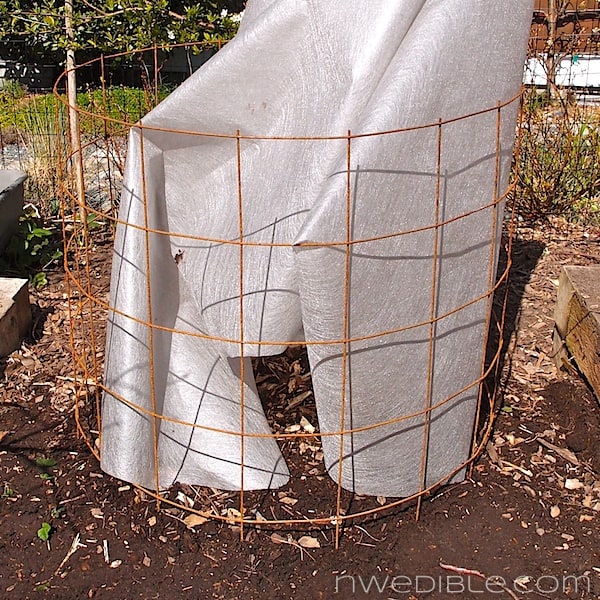
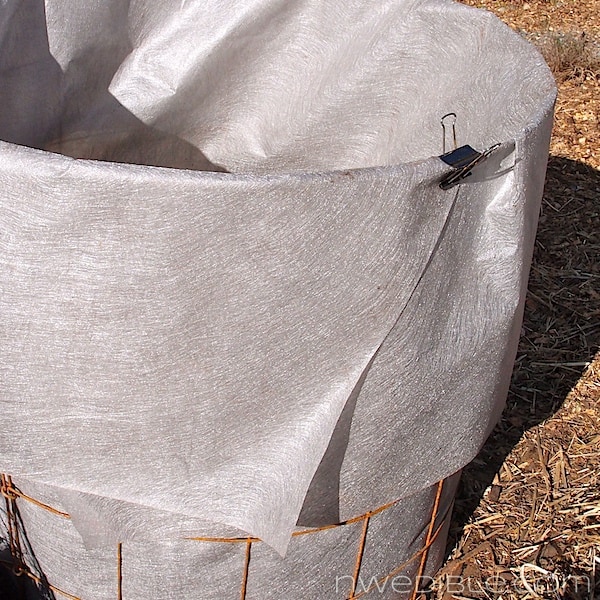
Then, I cut a section of landscape fabric to fit inside the mesh potato cage. I fitted the landscape fabric down to the ground but left the bottom of the potato cage open. I smoothed the landscape fabric against the edge of the cage as best I could.
I folded the extra landscape fabric at the top of the cage over, and held the fabric in place with a binder clip (binder clips are essential garden tools!).
Filling the Potato Cages!
One of the things I like about these cages is their substantial size. But big containers needs lots of soil, and trucking in loads of compost just isn’t in my budget this year.
One of my goals for this project was to reduce the cost by coming up with a good growing material that was on site (not something I had to buy in a bag). Straw, although less expensive than bagged compost, is still $12 a bale in my urban area, and I had terrible results using straw in my burlap sacks so I ruled that out.
I have had pretty good luck growing potatoes in various forms of compost. My chickens make excellent compost for me. However, though I am not particularly squeamish, I hesitate to use fresh chicken bedding (i.e., uncomposted chicken poop) for root vegetables like this.
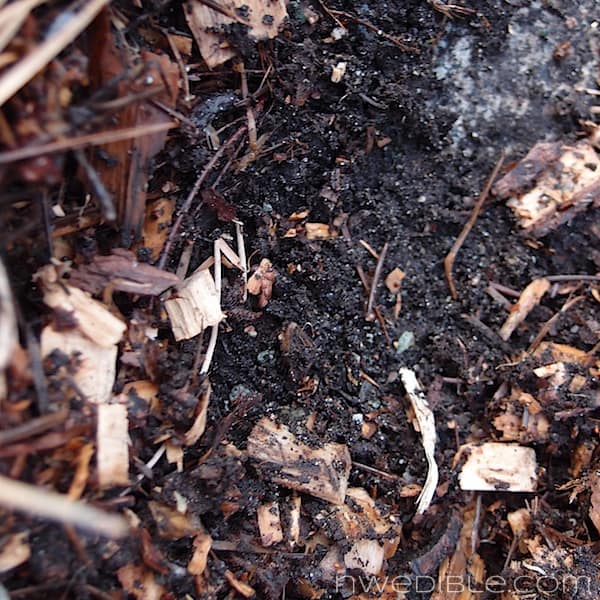
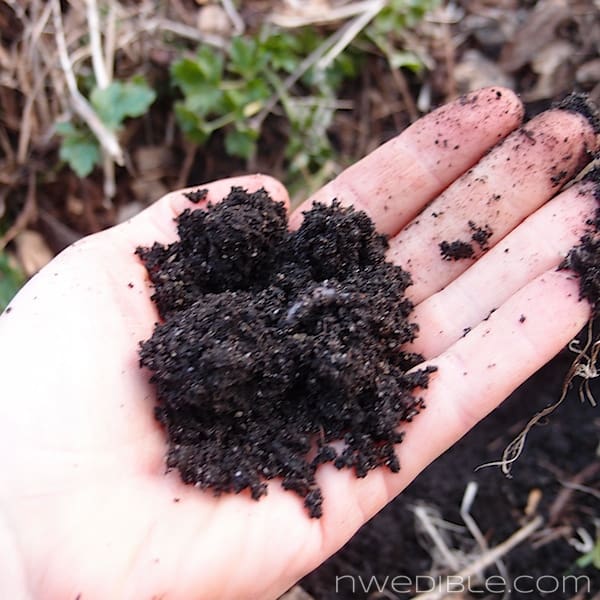
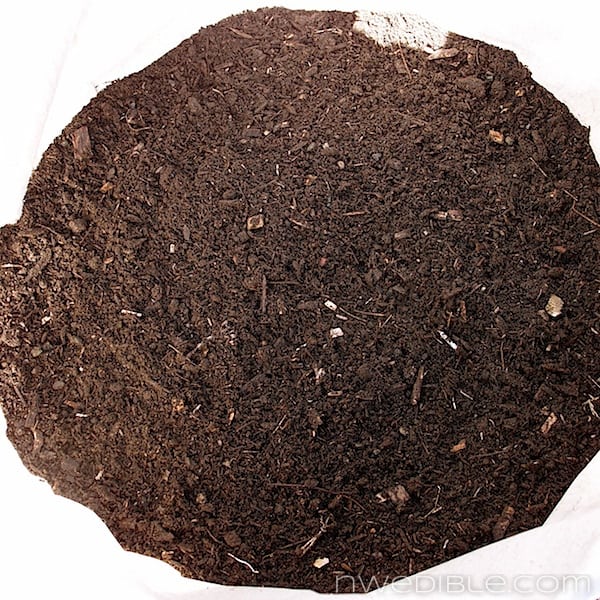
In the end, the answer was under my feet. We mulch our network of garden paths with free woodchips from a tree trimmer friend of mine. Scratching aside the top layer of last year’s chips revealed wonderful, rich, fine-textured soil just underneath.
I dug up as much wood chip path compost as I needed to fill the potato cages about a foot or 14 inches deep. This was actually really easy, and barely made a dent in my network of paths. If chucks of wood chips or less composted material made it into the bin, I didn’t sweat it.
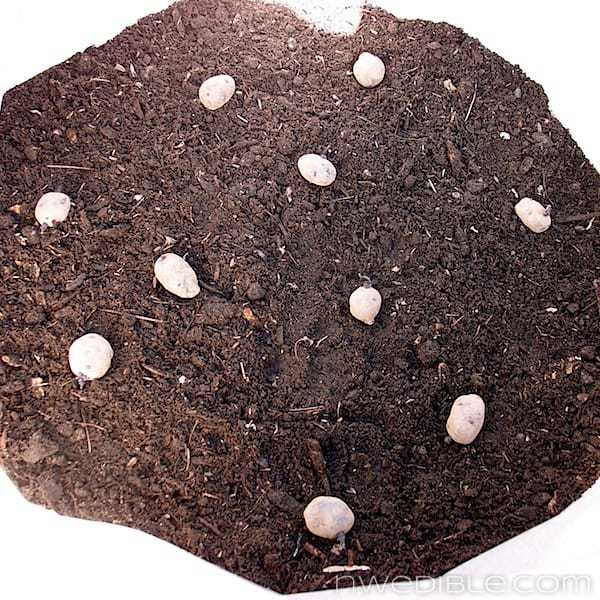
I dumped some of last years finer (bagged) compost on top, and mixed it into the top layer of soil. This brought the soil level up to about 16 or 18 inches. Then I laid out my seed potatoes atop the soil in each bin.
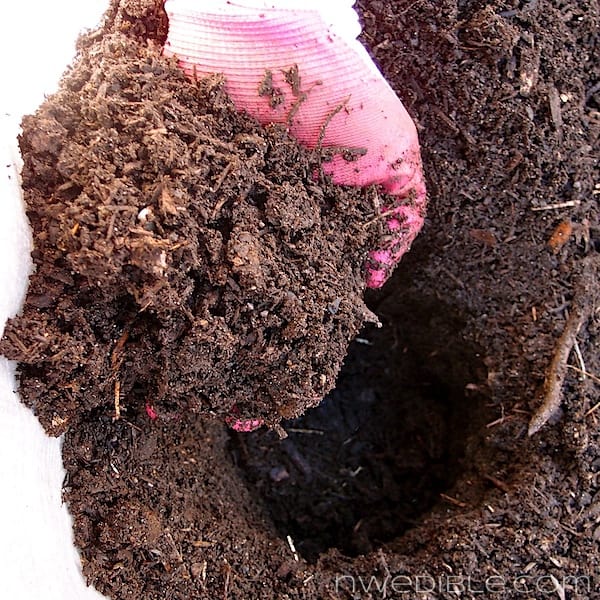
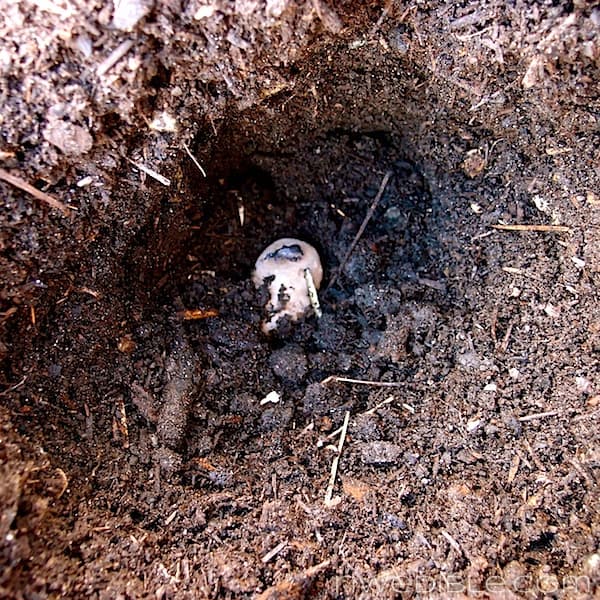
I scooped out a hole about 5 inches deep for each seed potato and dropped it in.
The light, fluffy soil was smoothed back over everything.
Can’t Build Just One
I made four of these cages, and they were fast and easy to put together. The concrete mesh, lined with landscape fabric, didn’t deflect or bend under the weight of the soil, and so far there’s been no leaking of soil.
I’m pretty optimistic about this design. The landscape fabric should act in much the same way as expensive grow pots, allowing a lot of air and moisture flow and encouraging beneficial air pruning or roots as compared to plastic or masonry containers. Unlike burlap, the landscape fabric should stay in one piece and not start to rot out within a few weeks of soil contact.
And of course it was cheap. Because I had concrete mesh and a roll of landscape fabric lying around from other projects, and was able to utilize the wood chip compost from on-site, this project was free to me. If you had to buy the mesh and landscape fabric new, you still shouldn’t be out more than $10 or so for each bin.
I’ll update you on how this is working as the potatoes grow.
How are you growing potatoes this year and what method has given you the best success?
27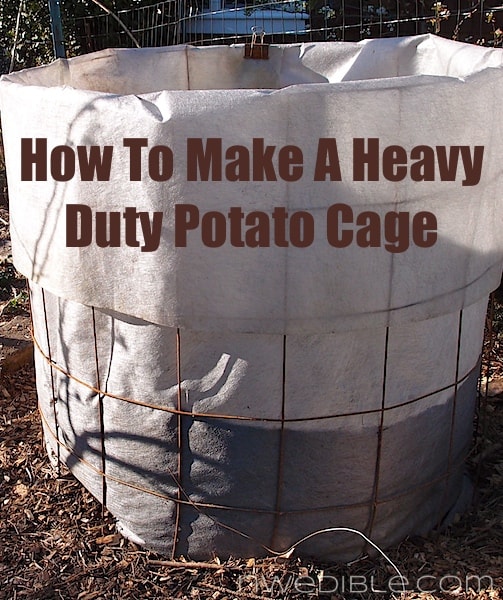
We do the same process for the most part, but use cedar boxes. I started ours 1 Feb 13 and have added a couple levels as they start popping their leaves out. I’m told its a 10-12 wk process, but I’m think maybe starting now with warmer weather. I saw the promises also and built the box to try it out and test the results. Looks like we have another mth, but again I’m thinking closer to two. I’ll let you know how it turnout.
Love this idea and can’t wait to see how it turns out and your plans for harvesting. Keep us updated!
What will you use to continue filling your bins as the potatoes grow?
Landscape staples?? Never heard of ’em….
Matt
They are long not sharp staples you push through landscape fabric or agribon cloth to hold it in place. Handy little things.
You can also DIY them out of wire coat hangers: https://nwedible.com/2011/02/garbage-made-useful-wire-hangers-into.html
You could find similar items where you get soaker hoses.
Nice! I had been considering making something like this up as well from my old concrete-wire mesh tomato cages (I was a bit overzealous in years past), but hadn’t done it yet. I gave up on the wooden towers, though was also using a lot of early season varieties– and that doesn’t work for that.
Motivated now!
Just did a post on my blog about building potato cages JUST LIKE THIS! We all must be in the same small yard, big prospects mind set.
I used old feed bags instead of landscape fabric, but anything that will hold soil and potatoes in and varmints out is a winner!
I couldn’t build just one either I built two and then added another design to it….Spuds are good, yo!
Interesting approach. It should work with welded wire fencing too.
I’ve always done potatoes in the ground. This year I’m trying to do early potatoes and the ground was too wet to work so I just dug a little pocket for each seed potato, covered with a little compost and I’ll be hilling up with straw which is only about $8/bale out here in the boonies.
Potatoes, like tomatoes, have determinate and indeterminate forms. Almost all the potatoes available in North America are determinate. This is probably why almost everybody reports failures at getting better yields from potato towers. The standard determinate forms are bred to produce tubers all at once and die on a convenient timetable for farmers. For a potato tower, you want the plant to keep growing and producing additional tubers as you increase the soil depth. There may be some varieties available among late season potatoes that will do this, but since I don’t grow this way, I can’t point you to one. Anyway, it is a starting point for more research.
When I’ve had a problem with ants coming into my kitchen, I’ve sprinkled cinnamon or pepper at their entry point and that takes care of the problem. I wonder if you sprinkled either on the ground before adding the soil if it would work. Last year I planted sweet potatoes in a very large container starting with about ten inches of good soil. As the vines grew, I looped them around in the container and kept covering with a compost/soil mix. The potatoes grew very nicely, but the fire ants also made this their newest city. Harvest was very painful. However, nothing comes with out a lesson attached and I found that meat tenderizer, moistened to a paste(same as you’d use for a bee or wasp sting) and rubbed on the bites/stings (fire ants bite you to keep you from flinging them off and then sting you), then an application of lavender essential oil cut the painful period to about a day and a half and there was no scarring. Being of an experimental turn of mind, I left two of the stings untreated and they hurt for over a week and I still have purple scars from them. So….this year I will try a cinnamon/pepper mix under and around my sweet potato containers and see what happens. I will also try some in cages like yours and put the mixture under and around them. Wish me luck–and be very thankful you don’t have fire ants in WA.
I really like this idea. I was thinking I might not ever grow potatoes again, but maybe this would lure me back after last year’s healthy serving of expensive potato humble pie. I planted them for the first time ever in the precious space of one of our raised beds. I looked at youtube videos and read posts about how to hill them. I was diligent in my care. They did great. Beginner’s luck, I think. I gave a few to neighbors, put the rest in a dark box in our garage before a quick little getaway, and FORGOT about them until they had all sprouted because we were inundated with CSA veggies and other garden veggies and I never had a need to look for more veggies for meals. Ugh. Such a waste.
I’m sure you already know this, but if you ever hae trouble with ants again, sprinkle Cayenne pepper around anything you want to keep ants out of. They’ll stay away, though You’ve have to re- sprinkle every once in a while…
@Bill W. – I recalled HBHusband’s advice about Fedco Seeds having lots of technical information, so, try this:
http://www.fedcoseeds.com/moose/varietychart.htm
I had low yields in a basket type planter, probably because I was using Yukon golds, but Bintjes probably would be better. I found the dry stuff stayed way too dry (in Maui), but adding in soil with a portion of dry straw kept the roots happier. I had trouble with knowing about when to water, since the wind was drying it out so fast. I think Lindsey’s feed bag idea might work better to avoid soil drying at the outer edges.
Using cheap garbage cans this year. Ciscoe Morris swears by this method and a girlfriend mastered it last year. I have 4 cans going right now. Each was less than $10 at WallyWorld (I HATE that place, except for stuff like this).
A must try procedure indeed in growing potatoes. Never thought of such a wonderful idea of using arch trellis.
Okay,
here is your dose of schedenfreude for the day 🙂
I planted potatoes last year – got starts from the nursery (cause I was too late to get seed potatoes), and they ALREADY had little potatoes on them (I was so excited). I planted them, then when the green stalk died back – I meant to harvest them, and I think I forgot – honestly I can’t remember if I looked and there were NO potatoes or more likely I just simply forgot to look. So chalk me up for one potato failure. I cut myself some slack because they were buried under the square foot misinterpretation of the zuchinni plant (for all you new gardeners who have never grown zuchinni – if you’re thinking – well I can’t find the recommended square foot for a zuchinni so I’ll use the row spacing – save yourself – they take AT LEAST *9* square feet – almost a whole bed – PER PLANT. But I REALLY love zuchinni so I wan’t too sad that it choked out the cantelope and potatoes.
I use the same basic principle for my tomato cages. 8′ sections formed in a circle. I leave them full height. I usually put 3 tomato plants per cage. Works great.
Great idea. I”m using this one and referencing you on my blog! Thanks!
I always like projects that use what is already around from other projects! great idea. I have always had better luck in the ground than upright containers, not sure why though, so that is how I’m planting them this year.
I just made some potato cages, but used empty chicken feed mesh sacks instead of landscape fabric. Will see how it goes! Thanks for the idea, I have high hopes for this method. Last year was not a win for me either.
Thanks so much for this wonderful idea. My husband has many tomato cages (homemade) that we no longer need. I finally got though to him that 24 tomato plants for a 2 person household was just overload – big time. We are trying to grow potatoes for the 2nd time, first time did not work, don’t exactly know what went wrong. We are using 2 purchased grow bags and are trying the 5 gallon bucket just to see if it works. Good harvest to all!
Love all the pics and great advice. Can’t wait to see the results!
what a great idea! I am looking forward to seeing how all this turns out.
we are experimenting with container potato growing this year too. We built a huge container with free untreated pallets. I am not sure how it will all turn out but it’s an exciting venture!
i bookmarked this! looking for updates
Any updates on the potatoes? I would like to try this, but am considering you to be a guinea pig for me! lol Love reading your blog so much!!
Dreaming of spring and wondering how your potato harvest went. Can you update us?
Okay… I know you wrote an update… now’s the time to pull it out… April fast approaches! Don’t leave us thinking the lack of a glowing review means it was a miserable flop…. we are in limbo here 🙂
well, I have been waiting and waiting for an update on potatoes above ground! I need to get some in the ground. Is there a difference in growing sweet v. irish/red potatoes?
Thanks for all the tips and tibits
Also a nice way to compost in place at the same time!
Can’t wait to see your outcome. How do you water it?
I cant find landscape fabric in white.
great places for after the potatoes or between the potatoes
http://www.white-rooms.be/apartment-groeninghe/
So you don’t cover the bottom of the cage with landscape fabric?