Here in the Maritime Northwest, year round growing is easier and, to my mind, more rewarding, with season extension techniques.
Perhaps the cheapest and easiest semi-permanent option for season extension is the low tunnel cloche. With a low tunnel cloche, any garden bed can be turned into something like a very petite hoophouse with some plastic sheeting and a frame over which that plastic is stretched.
As simple as the concept is, various gardeners execute the details in thousands of ways, depending on their climate, resources, and preferences.
The supports can be hoops of PVC, metal tubing, rebar, heavy gauge wire, concrete reinforcement mesh, or whatever else you have hanging around.
The plastic could be greenhouse film, an expensive but longer-lasting option, or a simple plastic drop cloth from the painting section of Home Depot with a life expectancy of maybe 2 years.
Over the nine years that I’ve been gardening seriously, I’ve tried all kinds of stuff – including stapling the plastic to lathe and securing the sheeting with all manner of heavy things – logs, rocks, bricks, random broken garden tools.
And through these experiments I have learned that, when it comes to cloches, it is best to just Keep Is Simple.
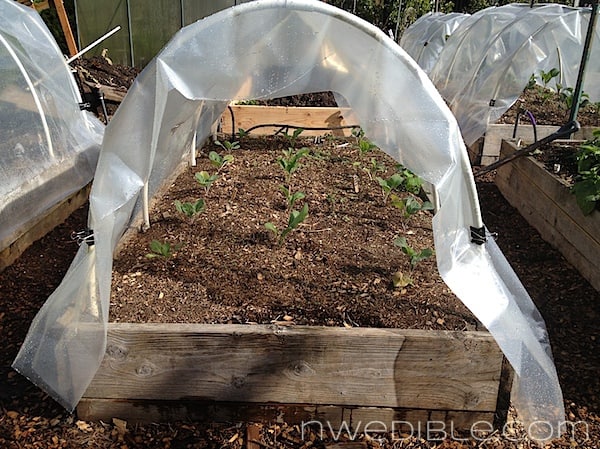
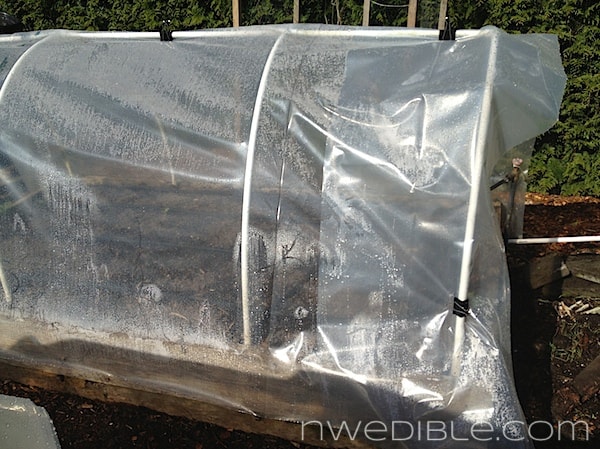
I recently redid most of my tattered, broken-down tunnel coverings with greenhouse film. Here’s my currently preferred KISS method of cloching my raised garden beds.
Framework
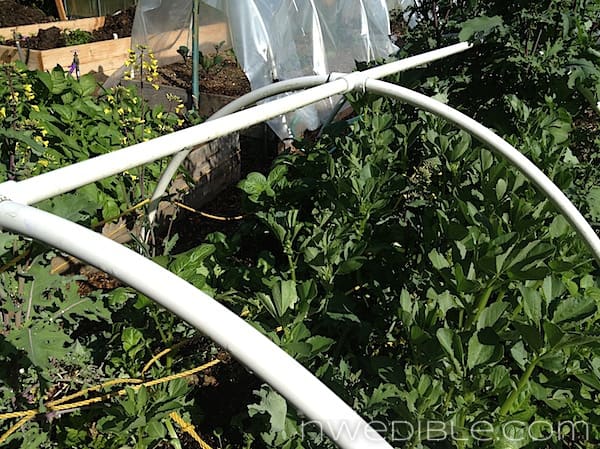
Years ago we built these low-tunnel cloche supports out of PVC and they have lasted very well. I think only two or three hoops have cracked from exposure.
Whatever you build your frame from, I strongly advise having some kind of center rib to secure the hoops to each other (otherwise they tend to slump to one side) and to stop the plastic cover from drooping in the rain or snow. We used PCV connectors, but anything that keeps your hoops rigid is good.
Greenhouse Film
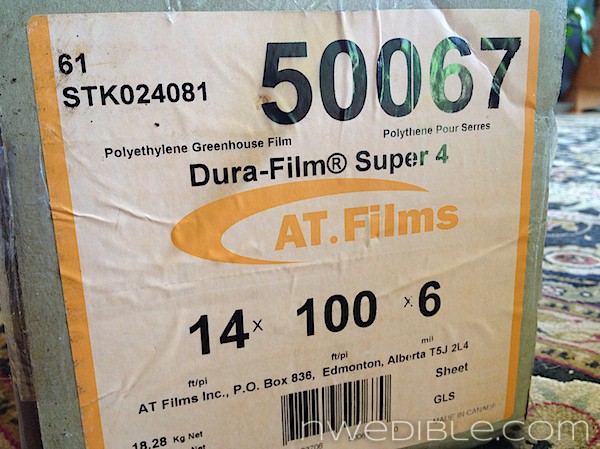
Traditionally I’ve used the cheap builder’s plastic in 4 or 6 mil. For this replacement, I invested in actual greenhouse film. It’s quite a bit more expensive, but should last 4 or 5 years instead of 1 or 2 for the builder’s plastic.
No comment yet about actual longevity, since this is the first time I’ve used greenhouse film, but working with this stuff was a dream. The plastic just feels more rugged and heavy duty than the cheap film I was using. It’s also far more clear than builder’s plastic, which tends to be a milky opaque.
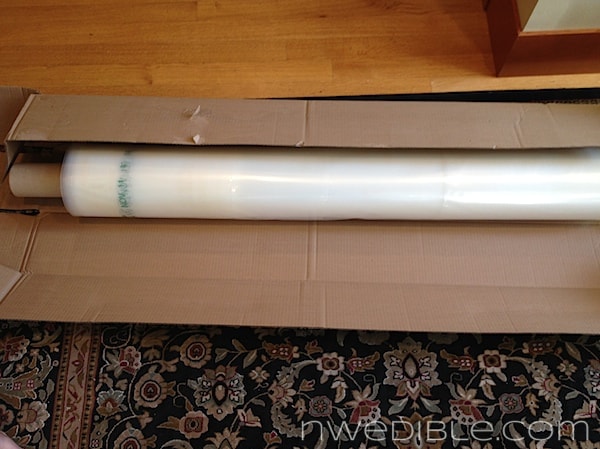
This 14′ x 100′ roll gave me 11, 9-foot by 14-foot sections of low tunnel cloching material. That size covers, with margin, the PVC hoop framework over our 4-foot by 8-foot raised beds.
I unrolled and cut the greenhouse film indoors, on carpet, to prevent tearing, crumpling and snagging.
Securing Your Cloche: Large Binder Clips
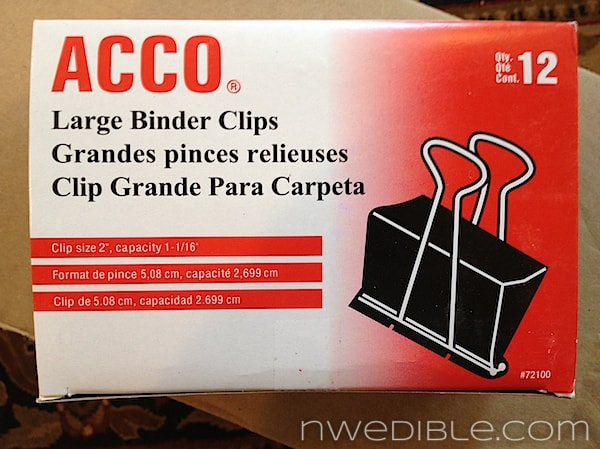
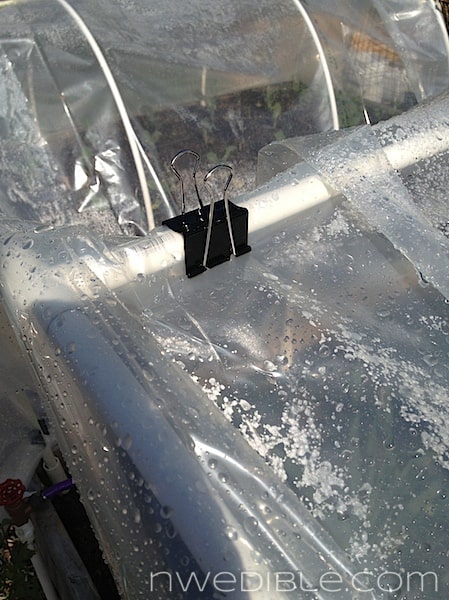
Of all the ways I’ve tried to secure the plastic film to my cloche hoops, these large binder clips are my favorite. They are very secure and stop the film from flying away in our occasionally quite impressive windstorms, and last for years. After a while outside they start to rust but they still work.
Securing with binder clips also makes it very easy to move, adjust, and vent the greenhouse film. Just unclip, adjust the cloche, and reclip. If you watch for specials, they are also pretty affordable. I got several boxes of 12-clips on Amazon for $3.18 each. For securing to a PCV-hoop framework, nothing else I’ve tried even comes close to doing the job as well.
After draping the greenhouse film over my PVC hoop framework, I used 7 binder clips to secure each low-tunnel cloche. Each corner got one clip, and the top spine of the framework got three.
Venting
The whole reason to use a low-tunnel cloche like this in a home garden is to extend your season earlier and later and to increase heat for the real sun-lovers like melons and eggplants.
However, too much of a good thing (warmth) is a very, very bad thing. You can literally cook your seedlings to death under an unvented cloche on a nice, sunny day.
At this time of year (late April) my cloches are in place but are fully vented on the ends 24/7, unless I am protecting something like tomato transplants. In that case, I’ll close the cloche in the evening. But even a fully vented cloche like this will keep day and night temps several degrees warmer. The soil in the bed warms up over the day, and acts as a heat sink as night, slowly radiating that warmth back out to the plants.
Diffuse Light
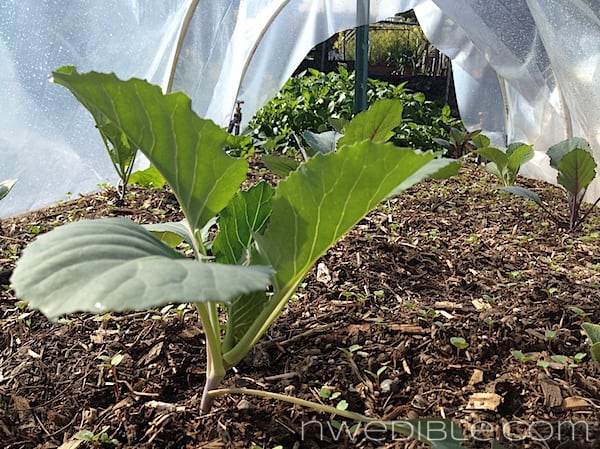
Even cool season crops seem to grow much better under a cloche like this. Sure, they can take the chilly nights and alternating bright sunny days and overcast drizzle, but a more consistent environment of even, diffuse light makes them happier.
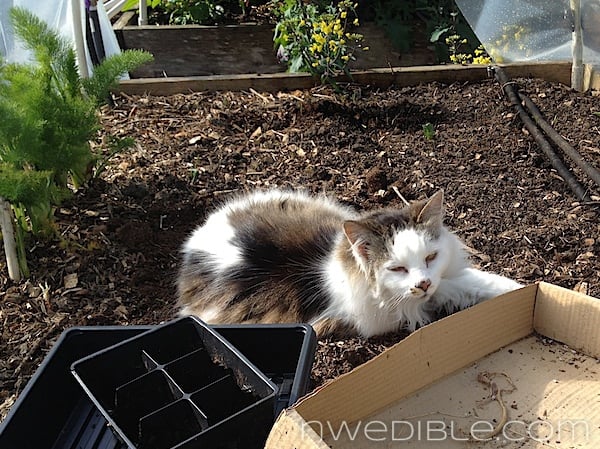
Cats like it too, FYI.
More Cloche Options
There are about a bazillion ways to protect transplants and encourage earlier germination. I couldn’t possibly list them all – that would not be keeping it simple – but here are a couple other techniques I also use.
Micro Cloche
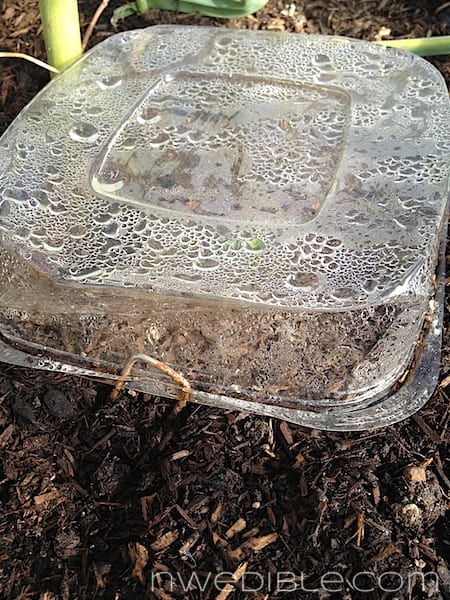
This is a good re-use for those clear plastic food containers that lettuce mixes and cut up fruit sometimes come in. If you or your neighbors ever buy the big, one pound containers of organic spring mix or spinach that they sell at Costco, those are just great for this.
Sow your seeds as usual, but bump your timing up by 2-4 weeks, depending on your climate. Pop a plastic food container over the seeds and secure against wind with a garden staple.
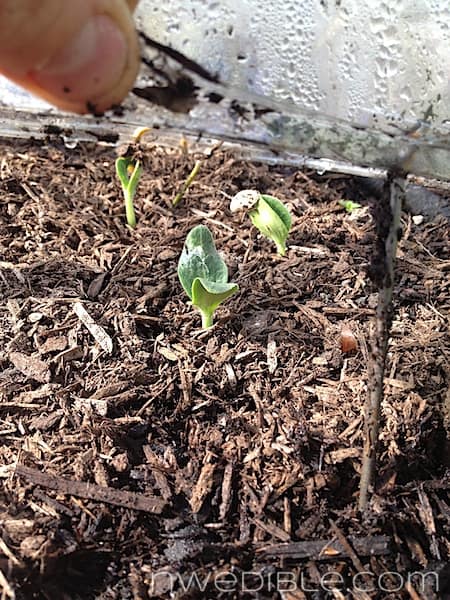
The mini-cloche will warm up the soil and help your heat lovers germinate in place much earlier than they would have without the protection. These are summer squash seeds, for example, sown on April 21st and germinated April 28th or 29th.
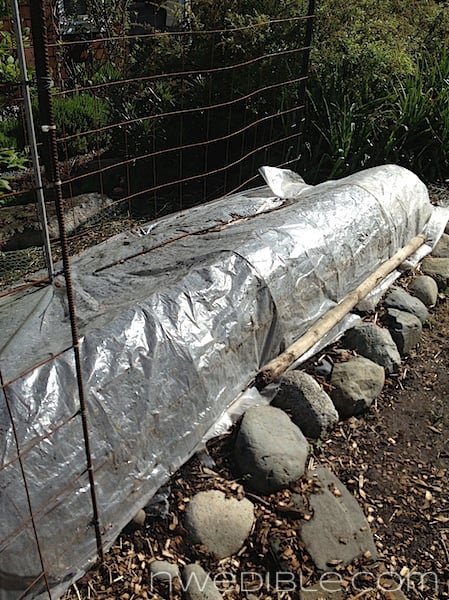
Clear Plastic Mulch -> Super Low Tunnel
This is the area where I’m growing winter squash this year.
I direct sowed my seeds, then secured a slightly oversized scrap of clear plastic (the cheap kind – my greenhouse film does not sit directly on the ground) directly over the soil to warm the soil as much as possible. As soon as the first seeds germinated I slipped a scrap of concrete wire mesh under the plastic. The concrete wire mesh is bent into a tunnel about 16″ tall.
And underneath the tunnel, happy little winter squash seedlings.
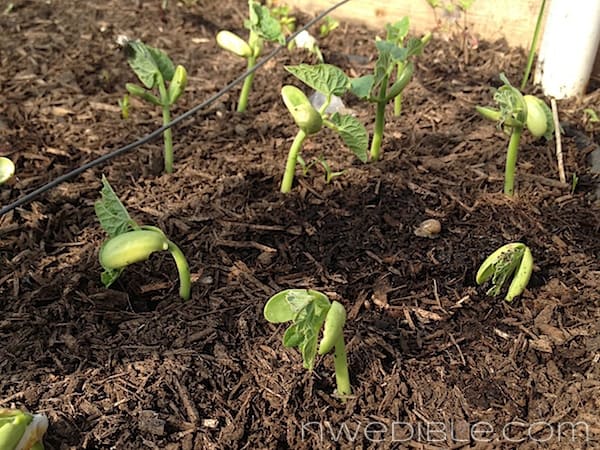
In the main raised bed area, these pole beans got a similar treatment, with a scrap of sheet plastic secured directly over the soil until germination.
Traditionally, I have started all of melons, squashes, etc. indoors and then gone through the rather laborious process of hardening them off and transplanting them out. Last year I tried this method of direct sow + soil solarization (which in a Seattle spring just takes the soil to a pleasant germinating temperature) with low-tunnel protection and am finding it far less labor-intensive, with better results and less risk.
I like better results with a simpler solution.
Do you use cloches to increase warmth or extend your season? What does your plant protection scheme look like?
152


I believe PVC and polyethylene greenhouse sheeting don’t get along very well and the pipe will degrade the sheeting – which is why greenhouse sheeting’s warranty is void if used on PVC. Just something to think about.
Interesting, something like this: http://agdev.anr.udel.edu/weeklycropupdate/?p=4816
I guess we’ll keep an eye on things and wrap or shield the PVC if we need to. One thing is, this pipe is OLD…we’ve had it for years and I wonder if any outgassing has ceased at this point.
Yeah the folks who sold me the greenhouse film said that. My feeling was that, as old as our pvc is, the amount of offgassing to weaken the film would be minimal. But as we need to replace our PVC hoops, we will probably move to conduit.
I’ve been using the same Tufflite sheeting on PVC for 6 or 7 years. No problems so far…
For years, I’ve used 13 gallon long white plastic garbage bags over my tomato cages. I slit the top and hold them in place with small to medium binder clips. Each year I see this showing up in more gardens at my p-patch.
Thanks for sharing.
that’s sooo funny about the cat remark! we had two mini hoop houses and I caught our cat running up and down it crushing the seedlings. ahh *sigh*
I did these techniques with great success when I grew the same things in big rows in beds at my last property. Now that I’m small timing it on rented property, I am going more the perma/poly culture route and mixing, intensive gardening so that the row covers and hoop houses are a hindrance now. 🙁
BUT – I have created mini greenhouses over my tomatoes and am getting super crafty by putting milk jugs and clear jugs over my pepper starts and tomatillos!! Don’t know if it will work, but whatever…we will see!
I use those binder clips ALL THE TIME. Almost as useful as zip ties!
I use PVC hoops too, and honestly couldn’t be without them. We built all of our beds with them, and can easy put them on, or take them off, as needed. I don’t use plastic sheeting though, except when we graft tomatoes, as our climate here is so mild, and I honestly haven’t needed it. I do use a lot of floating row cover, of various weights, over the hoops though, or occasionally even shade cloth, mostly to protect seedlings from marauding critters, or for sun protection. That’s what I love about the PVC hoops, they’re so versatile!
One thing that I’ve found is helpful when building these PVC cloche hoops, for the all important bending phase, is to let the things lie in the sun for an hour or so or otherwise warm up. If I build a PVC hoop in the shade on a chilly spring day and then try to bend it there’s a small chance it’ll fail – I’ve had one or two total pop at the top joint. But when it is just a couple of degrees warmer it not only seems to make the bend reliably but to require much less force to do so.
Great post! Down here in Portland, we just found out that we can no longer recycle those clamshells and salad mix boxes and this is the perfect re-use. I use PVC, builders plastic and binder clips too but I haven’t found a good way to secure the plastic to the raised bed at the bottom. Do you just put the clips low and that holds it?
I was so bummed about that end to recycling clamshells…we’d saved a whole bunch and not gotten a chance to take them in for recycling… thank goodness for garden reuse!
I use the clam shells for starting my seeds. Mini greenhouses is what my mom calls them. I just put a few inches of soil/seedling mix into the bottom, douse it with water, sow seeds, and I have a squirt bottle for re-wetting the top layer. Then I pop the top on and set it in a warm spot, on top of my oil filled radiator like space heater for maters/peppers and other hot loving stuff, and a window sill for the rest. They work wonders and take up way less space than a bunch of 6-packs and 4″ pots…
10 foot long 1/2″ PVC is the perfect size for 5 foot wide beds. They can bend enough for 4 foot wide beds but it looks more precarious. It might be worth investing some time in learning lashing techniques instead of using all those PVC connectors. I did a bamboo pole trellis lashed together last year that easily held a few hundred pounds of spaghetti squash.
This year I’ve been experimenting with recycled drip irrigation tubing instead of PVC for narrow, lower beds. It works well but needs a spine along the top for stability. I’ve been clipping the sheeting to a long bamboo pole along the side. This makes it easy to lift up either side and get into the tunnel for planting or harvesting.
For cloches the increasingly popular technique around here is to get old, cracked or leaking 5 gallon bottled water jugs and cut the bottoms off. I found that rigging up a clamp to hold the neck of the bottle, inverted, and then going around the outside with an angle grinder is the quickest and easiest way to cut the bottoms off.
Good point about lashing. One thing about the PVC connectors is they aren’t glued in place where they join to the “rib” top portion, so it’s very fast and easy to disassemble into hoops and crossbraces for storage or if I need to deep-work amendments into the bed.
Are the water bottles you are talking about normally kinda blue-colored? I know the shape you are talking about, but I’m trying to picture them in clear.
Yep, they’re blue but still fairly clear instead of diffuse like regular plastic sheeting. The local bottled water service has bin of discarded bottles out back and you can dig through it and take them for free whenever they are open.
Awesome Idea!!! I know folks that use those bottles and aren’t super hygienic about storing them, maybe they have some “dirty” ones. I like the idea of how large they are, it would take longer for the tomatoes to out grow them…
I’ve had a lot of success using low tunnels with tomatoes to get them earlier and last longer. I like cold frames for vegetables better as they don’t rip like the plastic. I use 8mm dual sided polycarbonate which is expensive but is also on year 3 with no wear. Any way you do it, though seems to help around here. It even makes a year-round harvest possible.
Oooh…polycarb panels are like my dream set-up!
How do you keep the slugs off your new little sprouts?
The only thing I have ever found to really work is Sluggo. It’s NOT the same as the Cory’s Slug Death type products – it’s organic, safe around kids and pets, and breaks down naturally over a few weeks. I swear by it.
http://www.cloudforest.com/cafe/gardening/warning-sluggo-toxic-for-people-and-wildlife-t3846.html
Thank you so much Erica. I want to do cloches/tunnels this year to winter garden. I only started gardening three years ago so I follow what you do very carefully. I want to learn as much as fast as I can. I say I want to learn 20 years of gardening in 3. You have been such a huge help. I am going to put this on my facebook page and in our vegetable group page. There’s so much detail, it’s totally do-able.
Thanks so much Erin!
It seems sensible to heat and bend the PVC to relieve the stress (and “whip-back” during construction), but it gets crazy expensive to use hotbenders and such – or, maybe try this idea:
I didn’t see polyethylene degrade on PVC in Hawaii, but I guess you could put on an old cotton glove and dip into some acrylic latex to rub onto the pipe. I’m told that brown color structures are less visible in landscape settings compared to white.
Interesting…that’s my kind of Rube Goldberg assembly right there…
Honestly, though, I’ve found a bit of time in the sun, even our Pacific Northwest sun, is enough. And if you are in Hawaii, I’m sure that’s MORE than enough! Just be patient and bend it slow. After a year the hoops tend to retain their shape.
I’ve never had the need to heat the PVC. It’s strong stuff. Been using the same hoops for about 6 years.
OK, here’s how I’ve done mini-hoop-houses for the last several years.
Very similar to your first setup, but I use the “Garden Clip System” from Territorial Seeds instead of binder clips to secure the Tufflite film. They fit perfectly onto 3/4″ PVC and are secure in even the roughest wind storms we’ve had. I’ve screwed pipe straps to the inside of my raised beds, and I can pop the PVC pipe in and out each year. For non-raised beds, I slip the PVC hoops over rebar I’ve pounded into the ground on either side of the rebar. The combination of this secure hoops and the good clips mean that there’s no need for “center rib” you made, and I can do non-straight beds. I’ve run them along 16″ curved beds with no significant sagging.
Last year we used 2-liter soda bottles on top of some of our cucurbits to help warm them up and protect them from some nasty blue jays until they were big enough. Going to pull them out again shortly
Wait – you are kind of blowing my mind. Are you saying that you have ALREADY direct-sown pole beans, winter and summer squash (and maybe other things you didn’t mention in your post) in SEATTLE in APRIL?! And all you had to do was cover them?! I live in Bellingham and I usually don’t plant these things until Memorial Day!! If so, I think you just majorly shifted my gardening paradigm.
Just wanted to put in a plug for using row cover instead of plastic film over the pvc hoops. I love it because although it also brings the temps up nicely and protects against pests, it’s breathable and permeable, which means WAY less risk if one…cough…forgets to vent. Most of the time, venting is not necessary until really hot (well, by PNW standards, you know..80). And I also like that the row cover is permeable to rains, which means I don’t have to water when it’s raining through the winter and spring. I’ve also found it easier to roll up and store than plastic.
I use this in Cheyenne, Wyoming to help extend my seasons. Added bonus is hail protection in the summer here in hail alley.
http://extension.oregonstate.edu/catalog/pdf/ec/ec1627-e.pdf
I should add that I use UV treated, reinforced, clear tarps for my sheeting in order to stand up to the threat of hail. It’s a little more expensive, but it has worked well for me so far. Nothing worse than losing all the time and effort put into the garden in a 5 minute barrage of hail. I did a web search for clear plastic tarp and found several suppliers on-line.
Love these cloches!
I’d like to strongly advise against builder’s plastic for anything in the garden. Last Fall I forgot to bring one of the folded up sheets of plastic in. It was out in the cold, sun and snow all Winter. When in Spring I finally made it to that corner of the garden, there it was, all shredded, not by an animal, but simply degraded. When I picked it up the shreds blew all over my garden.
It was only 1 year old. The ones that are a bit older and that were taking inside weren’t faring much better.
The low sort-term cost does not justify the pollution of these plastics and their long term cost is possibly much higher than green house film or, even better, woven plastic (which is what is on my hoop house, over conduit).
Great info! Wanted to share that we’ve given up the binder clips for u-shaped pipe clamps – they snap on/off the PVC/plastic really easy and don’t rust like the binder clips do!
http://ccne.mofcom.gov.cn/enterprise/showpic.htm?path=10688773/0021.jpg
ARGGG! I am using 1/2″ conduit which I bend on a board I made to make the bend uniform. Using 10′ long pipes, with a 36″ diameter, I can get a nice tunnel that is about 48″ tall at the center. Great! Now here is my problem. I am growing peppers (trying). The tunnel (mid June) will hit 90 degrees. In July I am sure it will be well over that. But I want to hit about 85. If I open the ends, the tunnel temp drops to near ambient air temp (65 daytime, 50 nights) depending on the day. I can live with 65 during the day. But 50 at night is too cold. Ideally my range of temps would be 85 daytime, 70 night; but 65 night might be o.k.). How can I control the temps so it doesn’t get too cold at night or cook them during the day? Oh…and even if the tunnel is 85 at 6:00 pm, even closed it drops like a rock after that to ambient temps…it won’t hold the temp and it is well sealed. Any ideas? Is there a louver for low tunnels? 🙂
I used the grey plastic conduit for my row covers. First I cut 5 to 6 ” of the flared end and attach them to one side of the bed using metal straping. Then I attach 5 to 6″ pieces of 3/4 PVC to the other side. This allows me to just slip the conduit on and of. it’s a snap. The large binder clips seem to work very well and I can set ou or take down a 4 x 16′ bed cover in just a few minutes. I believe the conduit will stand up to the UV better then the white PVC. Stuff bends easy and after a week or two it maintains it’s shape. 2 of the conduit pieces together anong with some zipties makes a top rib. I also use 2 straps on the ends to keep thoes ribs from bending in. Very intrested in the permeable row covers to help with venting and allowing for rain to get in for watering.
Where did you find the 4-way PVC fitting for your cloche ridge supports? Can’t find them anywhere. Help!
I just found 4 way PVC fittings on the Lowe’s web site.
Thanks, Karen, for tip for the 4-way PVC fitting. PVC is better than my rusting rebar cloches support. Will check out Lowe’s.
I just scored a section of greenhouse film and I have access to aged PVC pipe. Do you have a set of instructions that you followed to make your framework? My beds are also 4’x8′, so seeing your sheeting dimensions was wonderful! I see that a 10′ length would cover a ‘6 bed, so I’m guessing that 8′ length would cover a 4’ bed?
Hey! I am currently finishing up my install of my new raised garden beds over here in Portland. I based most of my design off of your information! Was so happy to find your blog with such great pertinent information! I’m trying to figure out how to dog proof. My Golden loves to eat…everything. I’m concerned he’ll just graze on my garden like he does ok our grass! Can cloches be left up year round? Ok thinking my vining plants and tomatoes will get much too tall. Will it get too hot in there? Especially the way this year is going so far!
Hi – How did you attach your PVC Pipe to the box? Are there special things to use? Do you just keep the PVC pipe on all year round, even if the plastic is off during the summer?
Also… How high did you make the tunnel? I have two 4 x 4 foot raised beds. What length PVC pipe do you recommend? How do you cover the ends during the winter?
Thank you!
Lots of terrific ideas here and very well written from experience of what works and what does not.
I had planned to cut the bottoms of hard plastic juice containers that had lids and then I could just take the lids off. But by the time I weeded the garden to plant frost was past. Maybe next year. It would be nice to be able to start tomato plants early in the season but they are spaced pretty far apart. Still trying to get some ideas for cloches. For row plants spaced closely together the tunnel cloche looks to be ideal.
An alternative to the 4 way joiners is to bind the pipes with bike tube. It grips well. Also, additional to the binder clips and pipe clamps another way to secure plastic is to close a marble in the plastic tied with twine that can then be tied to the frame.