Classic new gardener problem: you successfully grew a seedling. You planted it and nurtured it from a little seed and – life doing what it does – it’s flourishing, putting on layers of healthy leaves and growing up well.
And now you have to kill it – on purpose.
You have to murder your seedling so that other, slightly better or slightly luckier seedlings can grow big and strong without competition.
It’s tragic, like Shakespeare.
Oh cruel, cruel fate that hath put these secateurs in my hand! Why hath thou made me both judge and executioner among young kinfolk, when I cry only for life, dear life of blossoming verdurousness!
But look, it has be done or none of your seedlings will have room to grow properly and they’ll all suffer (as will your harvest yields). So get over the sentimentality and know that when you thin your seedlings – which you must – you are doing one of the many essential tasks which you committed to when you decided to become a veggie gardener.
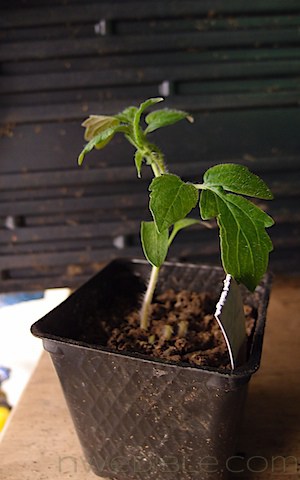
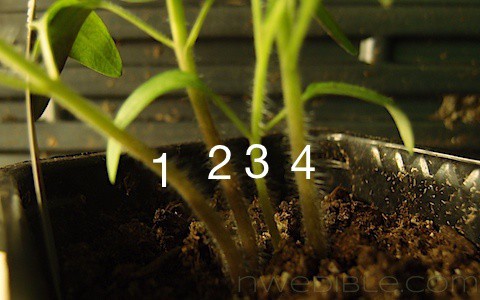
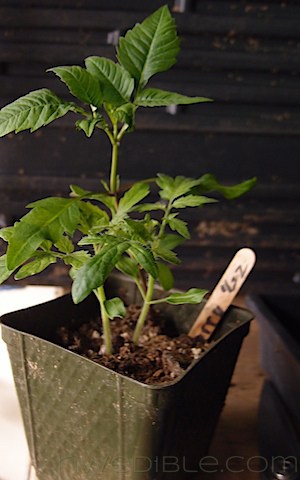
Let’s look at this tomato seedling I started in late January. This “seedling” is really four tomato plants, all looking to fill this 4″ pot with a heathy root system.
Unless there is obvious leaf loss or disease, you can pretty much ignore the leaves at this point. When you evaluate seedlings to thin, look at the stem first.
We want the thickest, stockiest stem we can find. That rules out seedling #3. We also want a more or less vertical stem. That rules out seedling #1 which is growing at a weird angle as it tries to get at more light.
Sorry guys, you gotta go. A pair of kitchen shears or small scissors is the right tool here. Just snip the seedling off at more-or-less soil level. Don’t try to pull the seedling out or you’ll probably mess up the roots of all the seedlings, including your keeper.
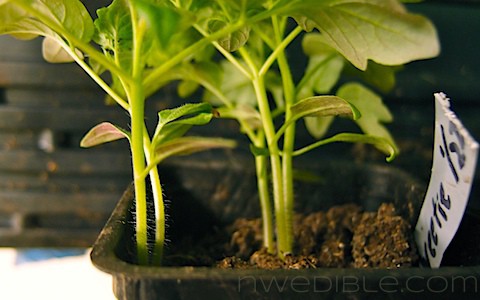
Okay, now we’re down to two seedlings with equally qualified stems. We need a tie-breaker at this point, so look to the leaf mass of the finalists. The seedling on the bottom in this photo has more leaves, and they are more well developed. You can see she’s working on her third set of true leaves at the center growing point, while her sister in the top of the photo is still growing out the second set. We have a winner, and the top seedling is snipped out.
The result of the seedling carnage: a plant with room to grow and develop properly. With a little time, continued space to grow and – cross your fingers – heat, this plant will grow into a mature, ripe-tomato-laden beauty. (Since this is Seattle, in reality she’ll probably peak as a green tomato goddess, but that’s not really her fault.)
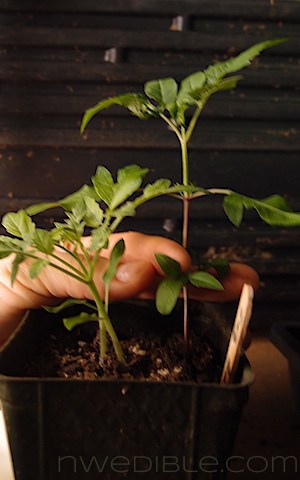
A few notes about culling the weak. Sometimes you’ll see something like this:
And say to yourself, “Woo-hoo – look at that tomato in the back go! That’s the super tomato…that’s…hey, those leaves look kinda funny. Damn it, that’s not a tomato, that’s a weed!”
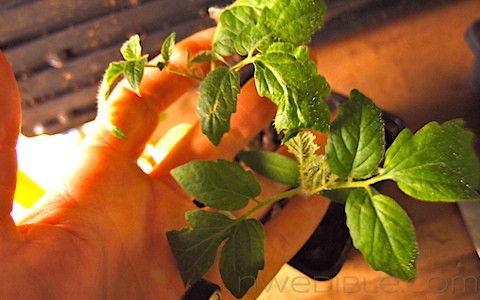
Yup, if you see something that looks too good to be true, it is. Get rid of it. This tall thing – whatever it is – came from some seed that hitched a ride in the vermicompost I used to start some of these tomatoes.
You won’t run into this much if you use sterile commercial potting mix, but occasionally a batch of good seeds will have a seed that develops into some very different seedling – much taller, or very different leaf shape or something. Get rid of that one. If it’s that far off from everyone else at the seedling stage, it’s probably not going to mature into what you think you planted. Genetics are funny. That’s why professional seed folks rogue out anything that looks too different in a batch of seed-crop.
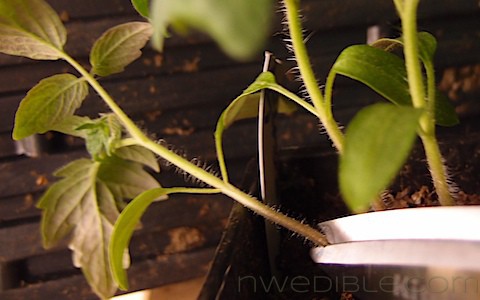
Another reason to cull is poor seedling location within a pot. My daughter helped me plant these tomatoes, and the seeding density and location was a bit variable. Here you can see a pair of seedlings growing right at the edge of the pot. They look good, but that location isn’t ideal because all the roots will be off to one side when the seedling is transplanted. Since I had viable seedlings growing in the center of this pot, I cut off both of the side seedlings first thing.
 So go forth, guilt free, and know that thinning your seedlings – in a pot or in the garden bed – is the right thing to do.
Besides, it hurts you more than it hurts them.
30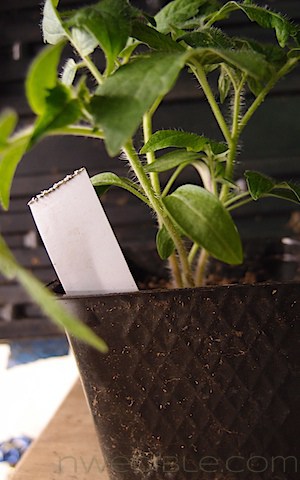
Thinning used to be difficult for me, too, especially with seeds sown directly into the garden beds. It was tough to thin plants when they looked so viable. One thing that made it easier for me was thinning the plants with edible greens. Thinned beet, radish, or turnip seedlings can be added to salads or to other greens to be cooked. Makes it feel like harvesting rather than thinning and made it easier to compost the thinnings that aren’t edible, like tomatoes.
Annie – yes! Microgreens! Very trendy and expensive. Brassica thinnings are great dropped on top of a bowl of soup just before service, too.
It isn’t exactly thinning, but don’t forget to harvest garlic scapes when those start coming up in a few months. Another move that is good for the crop but makes for some tasty eating!
Thanks for this post, it is nicely informative. I have a hard time with the volunteer seedlings myself, which may be why oregano tried to take over my garden a couple of years ago. Learned that lesson!
Well, I usually plant just one to a pot so I don’t have to thin. I really hate it and I am not new to gardening but still hate it.
To save room I actually start everything in flats and then just transplant everyone into their own pots when they are big enough and sturdy enough to be taken out of the greenhouse.
This is an excellent way to do it too. I’m a big ham-handed for pricking out, but particularly if you are working with limited grow-out space and are dexterous starting in flats is really smart. 😉
Great photos on this! I HATE thinning. It’s so hard for me to do. I feel like a murderer. But like Annie, I console myself by trying to eat most of the thinnings. It was actually seeing microgreens for sale at a farmer’s market that made me realize that I could thin guilt free.
Well crap! I’ve been pulling them up as my method of thinning. Thinking, this is so much easier than walking 2 feet to get the damn scissors. Clearly NOT thinking about impacting root systems. Fingers crossed that I’ve not messed any one up too terribly bad my first time out of the gate.
Also, a question. I planted in smaller seed trays. When is it time to replant to 4-6″ pots (or yogurt containers as it were)? Several of mine now have 2 “true leaves” in addition to their sprout leaves (is that a term or did I just make it up?)
And another question, I noticed greenish growth on the dirt of a couple seedlings. Clearly this is because I am keeping them too wet. Got it. Check. The fan is on all day today, and I’m hoping I can dry them out a bit. Am I beyond hope though?
Green growth on the soil is probably fine temporarily, but it does mean you are keeping the soil too wet. Let the top 1/4 – 1/2 inch dry out, depending on seedling and pot size, and once the seedling has a few true leaves. Bottom watering helps tremendously with this.
You can tell when the seedling is ready to u-pot based on the root mass, not (necessarily) the leaf mass. I try to up pot when the are to the edge of the pot and starting to expand, but before there are roots looping the bottom of the pot. This is slightly before what most gardeners would call “when the roots fill the pot.” That said, stuff happens and sometimes I hold them longer.
Here’s more info, with pictures: https://nwedible.com/2011/02/seed-starting-101-up-potting.html
Thanks Erica! I had yet to get to that post in your uber helpful seed 101 series.
Root mass, not leaves, check! This gives me at least another week. Awesome.
I am mostly bottom watering, with a small amount of splash over into the pots. Or maybe a little more splash over than I thought.
Thank you for the info! I’m a newb, but this was one of the hardest things for me last year. I just hated killing my little green babies! It will help a lot to at least know I’m making the right choices for sacrifice. 🙂 (BTW, Nick–I read “Jonathan Strange & Mr. Norrell” at your suggestion, and enjoyed it very much. I’m currently about a third of the way through “Quicksilver,” and am glad I ventured into another 1,000 page Stephenson adventure. He creates such complete worlds. Thanks for the book tips!)
Yay books!!!!
Glad you are enjoying! Don’t forget the 2,700 remaining pages of “The Confusion” and “System of the World” before you find out how it plays out between Newton and Leibniz (and the couple dozen other story lines).
Good Post, Erica! Very few pruning articles include the part about seeing who’s producing the best leaves, or has the thickest stock. Tallest isn’t always better. Keep ’em coming!
Great advice! I’m also another newbie at this gardening thing, and have really learned a lot through your blog. I’ve honestly never grown a single thing from seed, but I’m starting a veggie garden this year in the hopes of making our family more sustainable, and planning to continue growing through next fall, winter, etc. Living in a rental house in Kirkland, but the house came with empty raised beds in the back and seedling trays (and a worm compost bin even). I purchased Growing Vegetables West of the Cascades and The Urban Farm Handbook as resources. Here’s hoping for fruitful yields..
(Threw some money in the tip jar, because, damn, that excel template for year round planting is at least worth a few dollars of saved time and energy, let alone all the other information you’ve shared.)
Thank you Kimberly!
Isn’t it a bit early for the tomato starts in Seattle? I am not planning to plant until end of May. So far I’ve always had the May plants outperform those that I planted early in a cloche in April.
Yes but when your daughter begs you to help plant something, what are ya gonna do? 🙂 Also I’ve been challenged to try The Urban Farm Handbook’s uber early start method this year. Normally I start tomatoes in late Feb.
Ha! I too am following the Annette planned early start. I like a plan, and I have high hopes.
Assuming I dont mess it up.
I am so bad about thinning, and also found that snipping is much better than trying to prick them out. i am trying seed tape this year though – will see how that goes.
I wish I’d known this last year when I started gardening for the time. Pulling seedlings up damages the others. Thanks for sharing.
I am currently taking some informal Permaculture courses and learned a new technique that is used by a tomato breeder in North Carolina. He has a lot of links on youtube under nctomatoman (I think!) He has named quite a view heirlooms like Cherokee Purple. Anyway, due to limited urban space, he densely plants his seeds in each cell of the flat (like 10-20!). Then, when they get their true leaves he dumps them out of the cell, teases apart each little seedling and replants each one in their own individual pot. He claims the mainpulation is harmless and his seedlings grow perfect (and to look at his videos, it definitely seems true!) Anyway, we tested it out at our last meeting and planted a whole flat from one cell of seedlings. I now have a little Ponderosa Pink that came out of a cluster and it is doing great. With his method he can produce 100+ seedlings from one flat (he grows heirlooms for market ). The one thing he does do is use a potting mix called Metro Mix which makes breaking apart the little guys easier. If interested, y’all will have to check out his system (pretty cool). I’m trying it on my own for the first time this year, but it is still too early to see how it works out.
Last year I teased/pulled out as many of the extra plants as I could and repotted them. Most of them took off and I ended up giving away plants, we had so many extra. This year I’m starting plants not only for our garden, but also for my parents, grandma, our church garden, plus extras to sell to raise funds for the church garden (I seeded 108 paper pots of peppers last night…). I imagine this will rapidly disabuse me of my reluctance to cull.
This is always so hard for me – especially with carrots which probably need it the most. Thanks for the encouragement!
Very informative and helpful article. I have had the worst time getting my seedlings past the first set of leaves this year. Any recommendations on how to get to the second set of leaves?
Thanks
Nicole – what happened between leaf 1 & leaf 2?
They fell over and wilted. I made sure to mist them everyday, but I’m not sure if I overwatered or underwatered? Thanks so much!
Sounds like classic Damping off disease. http://en.wikipedia.org/wiki/Damping_off. If you start your seeds in sterile potting mix or seed starting mix and don’t keep them too wet you shouldn’t have it strike you again. I’d avoid misting. As a general rule, edibles like their roots damp but not wet and their leaves dry. If you can create those conditionas as much as possible you’ll avoid a lot of fungal disease issues. Hope this helps!
Makes perfect sense. Thanks so much : )
Smile. It took me not years, but decades to become ruthless enough to really cull.
You are doing great work teaching that to beginners.
http://kootenaygarden.blogspot.com/2010/05/garden-lessons-painstakingly-learned.html
Yay! Had to re-read for this season…first year starting tomatoes from saved seeds from last year. Couldn’t remember when you had started yours…do you plant, then put in the window, or under lights, or greenhouse or…?
Gaah, here I’ve been pulling and pulling! Time to get the scissors out, I’m glad I thought to check your blog for info on thinning – thanks for offering such a great resource!