My poultry’s housing has evolved over the years. First we went from a tiny, unworkable coop for two birds to a spacious, well-designed, and attractive coop that can comfortably house 8 to 12 hens.
Experience drove multiple experiments to increase the efficiency and cleanliness of the coop. Backyard free-ranging was tried (it really was!) but ultimately rejected in favor of a more conventional coop-and-run set-up.
Then we brought ducks into the mix. Ducks added their own significant complications: all mallard-derived ducks are terribly messy and in love with water of all kinds, but drakes (male ducks) are also horrifically ungentlemanly.
First we kept our duck flock in a separate pen and allowed free ranging, but predators and poop (oh the poop!) eventually convinced us that containment was a better plan. There was a series of ponds – built with love, excitement and all natural water-sealing clay, they were filled back in with grumbling chagrin and no small amount of cursing. Small artificial ponds simply cannot sustain ducks.
Which brings us, more or less, to the current set up. My mixed flock of hens and ducks is co-housed in a nice, spacious coop and mostly contained to a nice spacious run. Cleaning and maintenance is simple, the birds are secure, and we even managed to squeeze a water feature in for the ducks.
Here are the features, tweaks, remodels, and systems that I love about our current poultry housing solution.
1. Metal Roof
When we initially built the coop based on slightly modified plans from The Garden Coop, we installed clear plastic roofing panels. While this let in a lot of glorious light, making the coop feel spacious and open, there were some real drawbacks.
First, in the summer in my town, days are very long. At the solstice, day length is something like 16 hours, with another 3 hours or so of “not actually totally dark” book-ending proper sunrise and sunset. Chickens wake up with the sun, and in the summer, having the hens lose their minds in solar-powered excitement at 5 AM was irritating.
Second, within just a few years, UV exposure had weakened the plastic so much that it began to embrittle. We are located in an area with quite a few trees and typical Pacific Northwest autumn windstorms. One unfortunate hit from a mid-sized branch was all it took for the edge of one of the plastic panels to shatter. We tried to “repair” the panel-end with duct tape to get us through the season (who wants to replace roofing panels in the winter?) but by the time the dry weather of summer rolled around, the interior of the coop had suffered water damage.
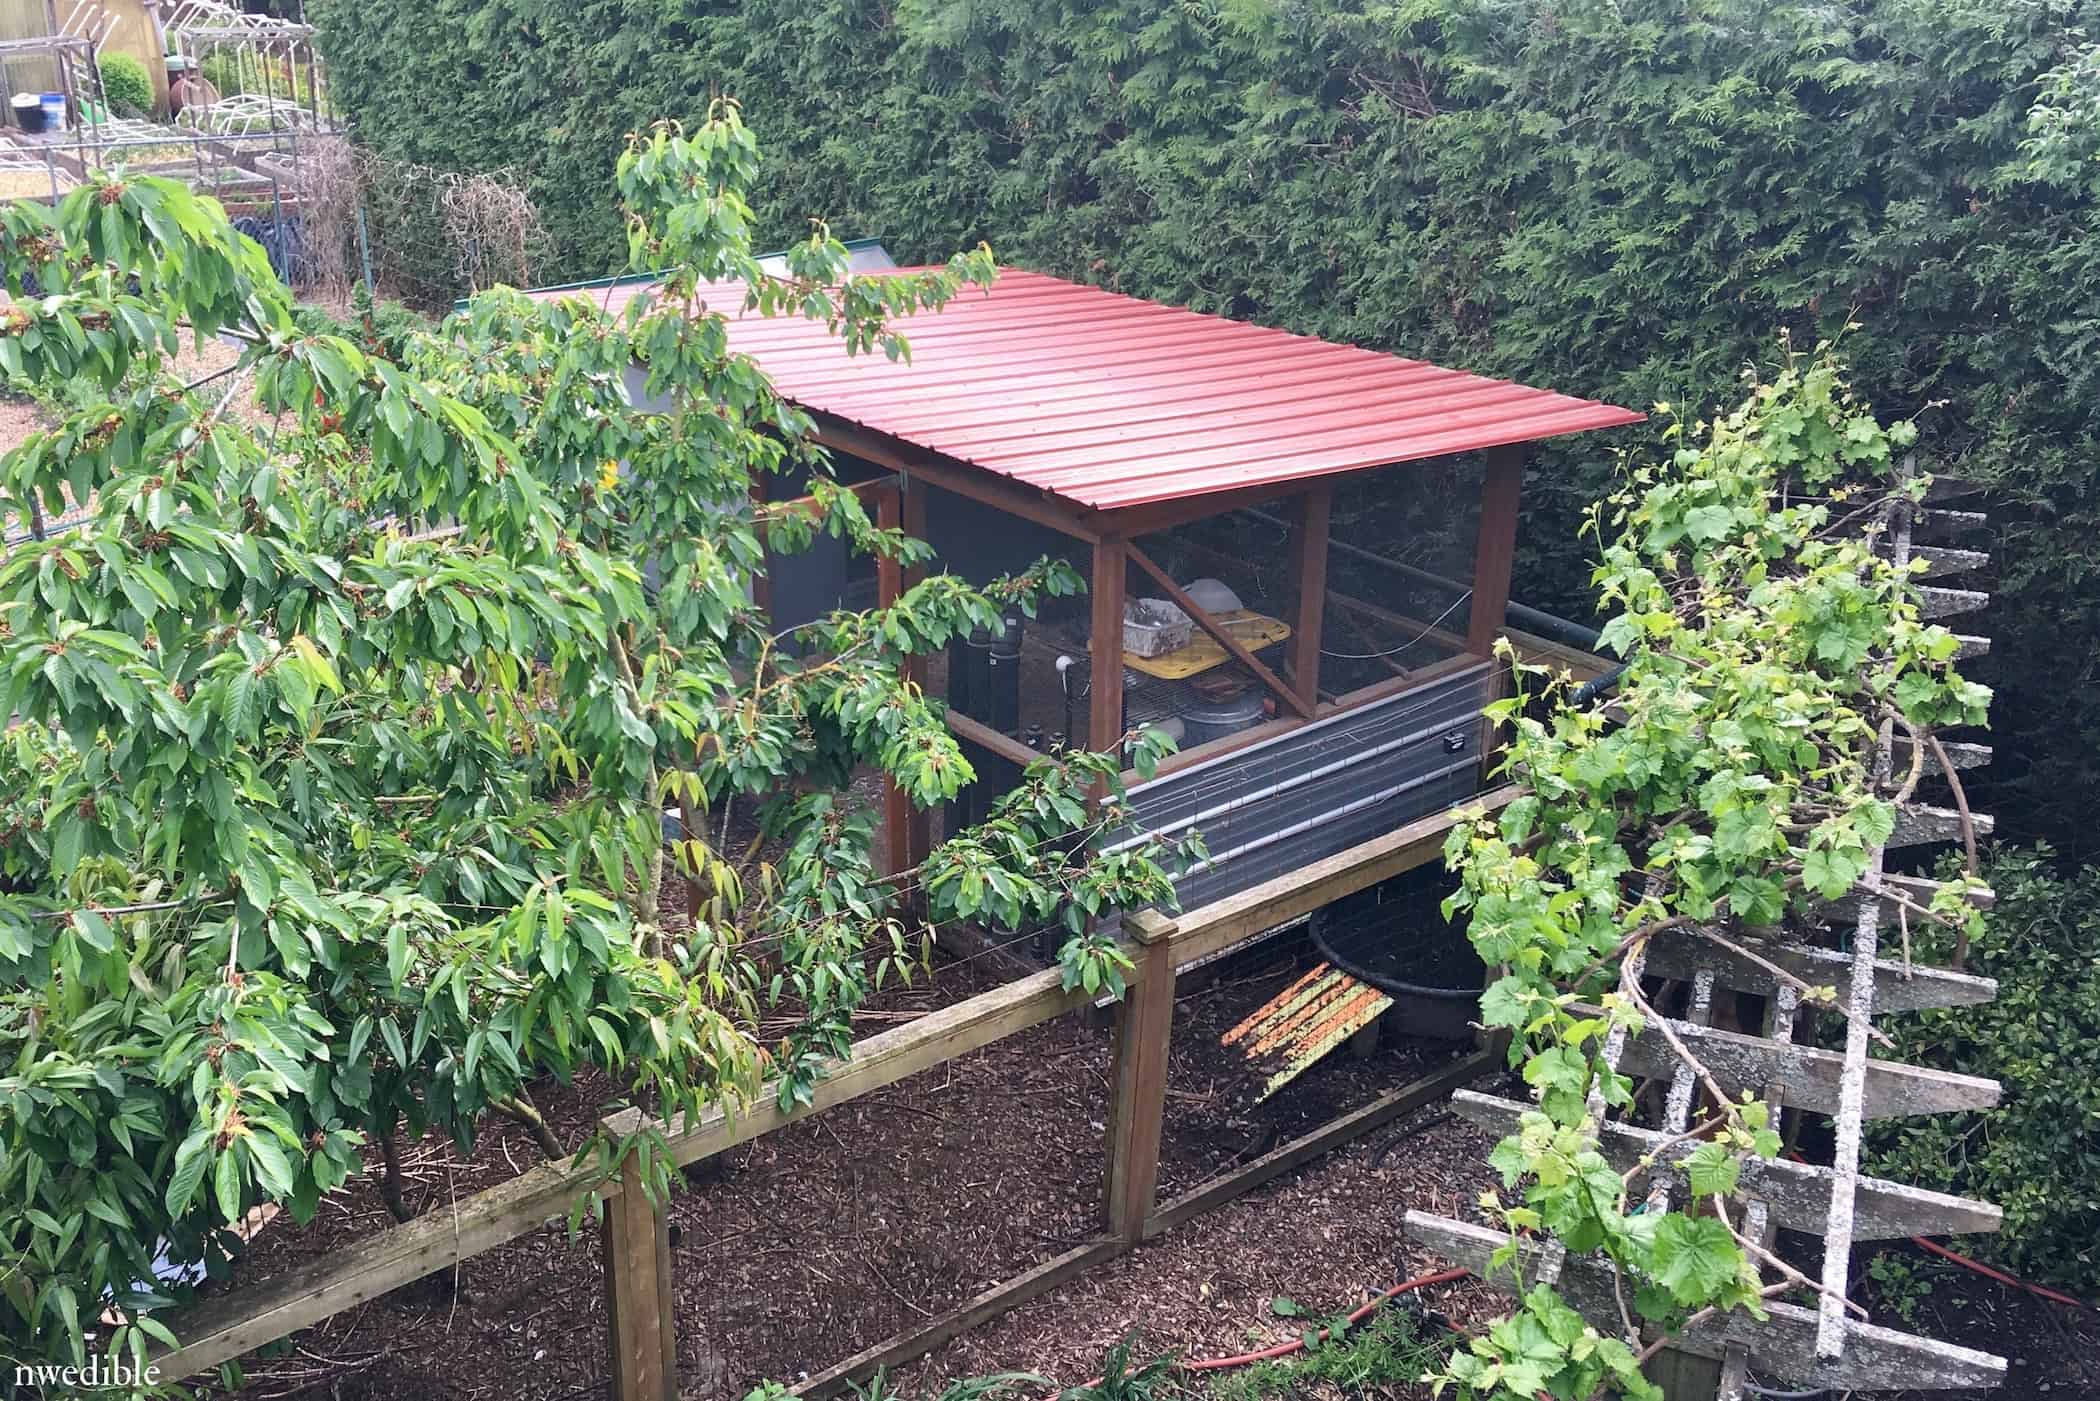
We replaced the plastic panels on the coop with cute red metal ones, which solved both of our problems. The darker coop helps the hens sleep in a bit in the summer, and the metal is far stronger and more durable. To anyone building a coop from scratch, if you can afford the increased investment, I highly recommend metal roofing panels over plastic.
2. Easy-Clean Interior (A): Accessibility
There are many ways to design a coop that’s easy to keep clean. In my experience two of the key components are easy access to areas that become soiled, and the ability to easily disassemble components of the coop as needed for deeper cleanings.
The roosting and nesting area of my coop is covered by one rather huge door, which swings up and completely out of the way, allowing unfettered and stoop-free access to the coop’s inner sanctum.
Initially, a pair of junk-yard hood struts from a Cadillac (!) held up the coop access door through hydraulics (you can see one in the center of the photo). Hydraulic Caddie Coop was, I must say, incredibly pimpin’. However, the hydraulic pressure eventually petered out so now we use a simple bungee cord to keep the coop’s upswing-door out of the way.

3. Easy-Clean Interior (B): Ability to Disassemble
A chicken coop is a lot like an oven. No matter how good you are at regular maintenance, eventually you have to strip the interior down to it’s component parts for a deep-clean. But that analogy doesn’t quite capture the reality of chicken coop cleaning, so imagine that instead of just baking muffins in your oven, muffins lived in your oven and pooped all over everything, all the time.
Ah, muffin poop.
Having the ability to remove pieces of your coop for a more thorough clean is wonderful. A handful of weeks ago I slid the entire nesting box unit (featured below) out of the coop and pressure washed it. Because it is removable and portable I was able to do this and then set the nesting box unit up to dry in the sun. Marvelous!

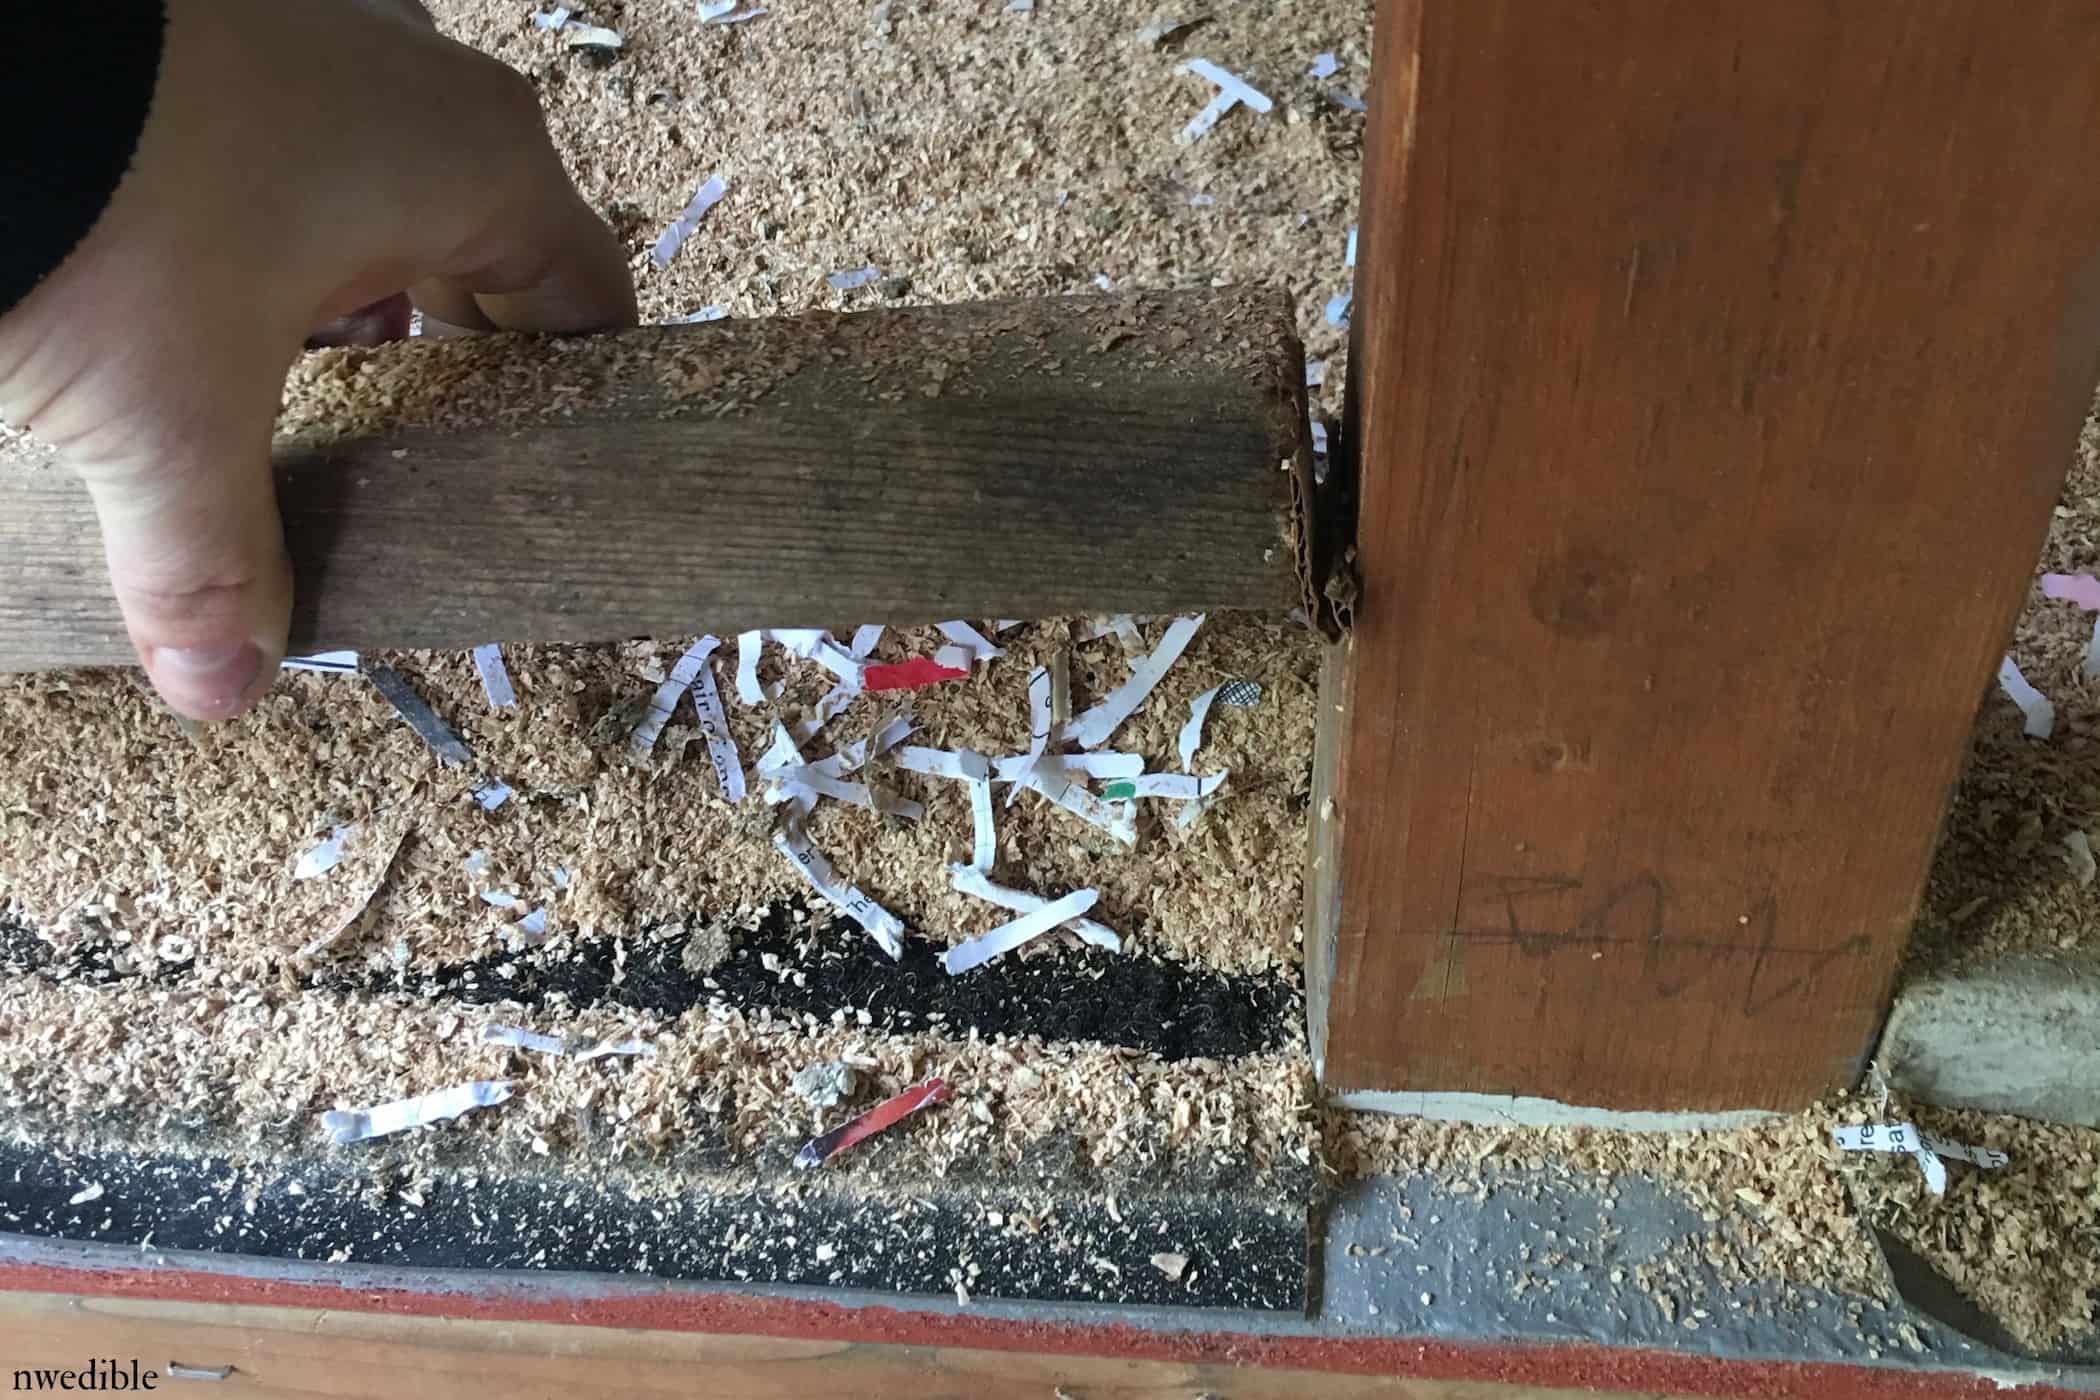
To deep clean the floor in this upper section of the coop, I remove the sections of 2×2 that serve to contain the sawdust litter in this area. They are tension-set between the edges of the coop and the center post, so it’s no effort to pull them up. This makes it very easy to scrape spent or dirty litter down to the floor of the coop, or into a wheelbarrow or bucket set underneath.
4. Floor Protection
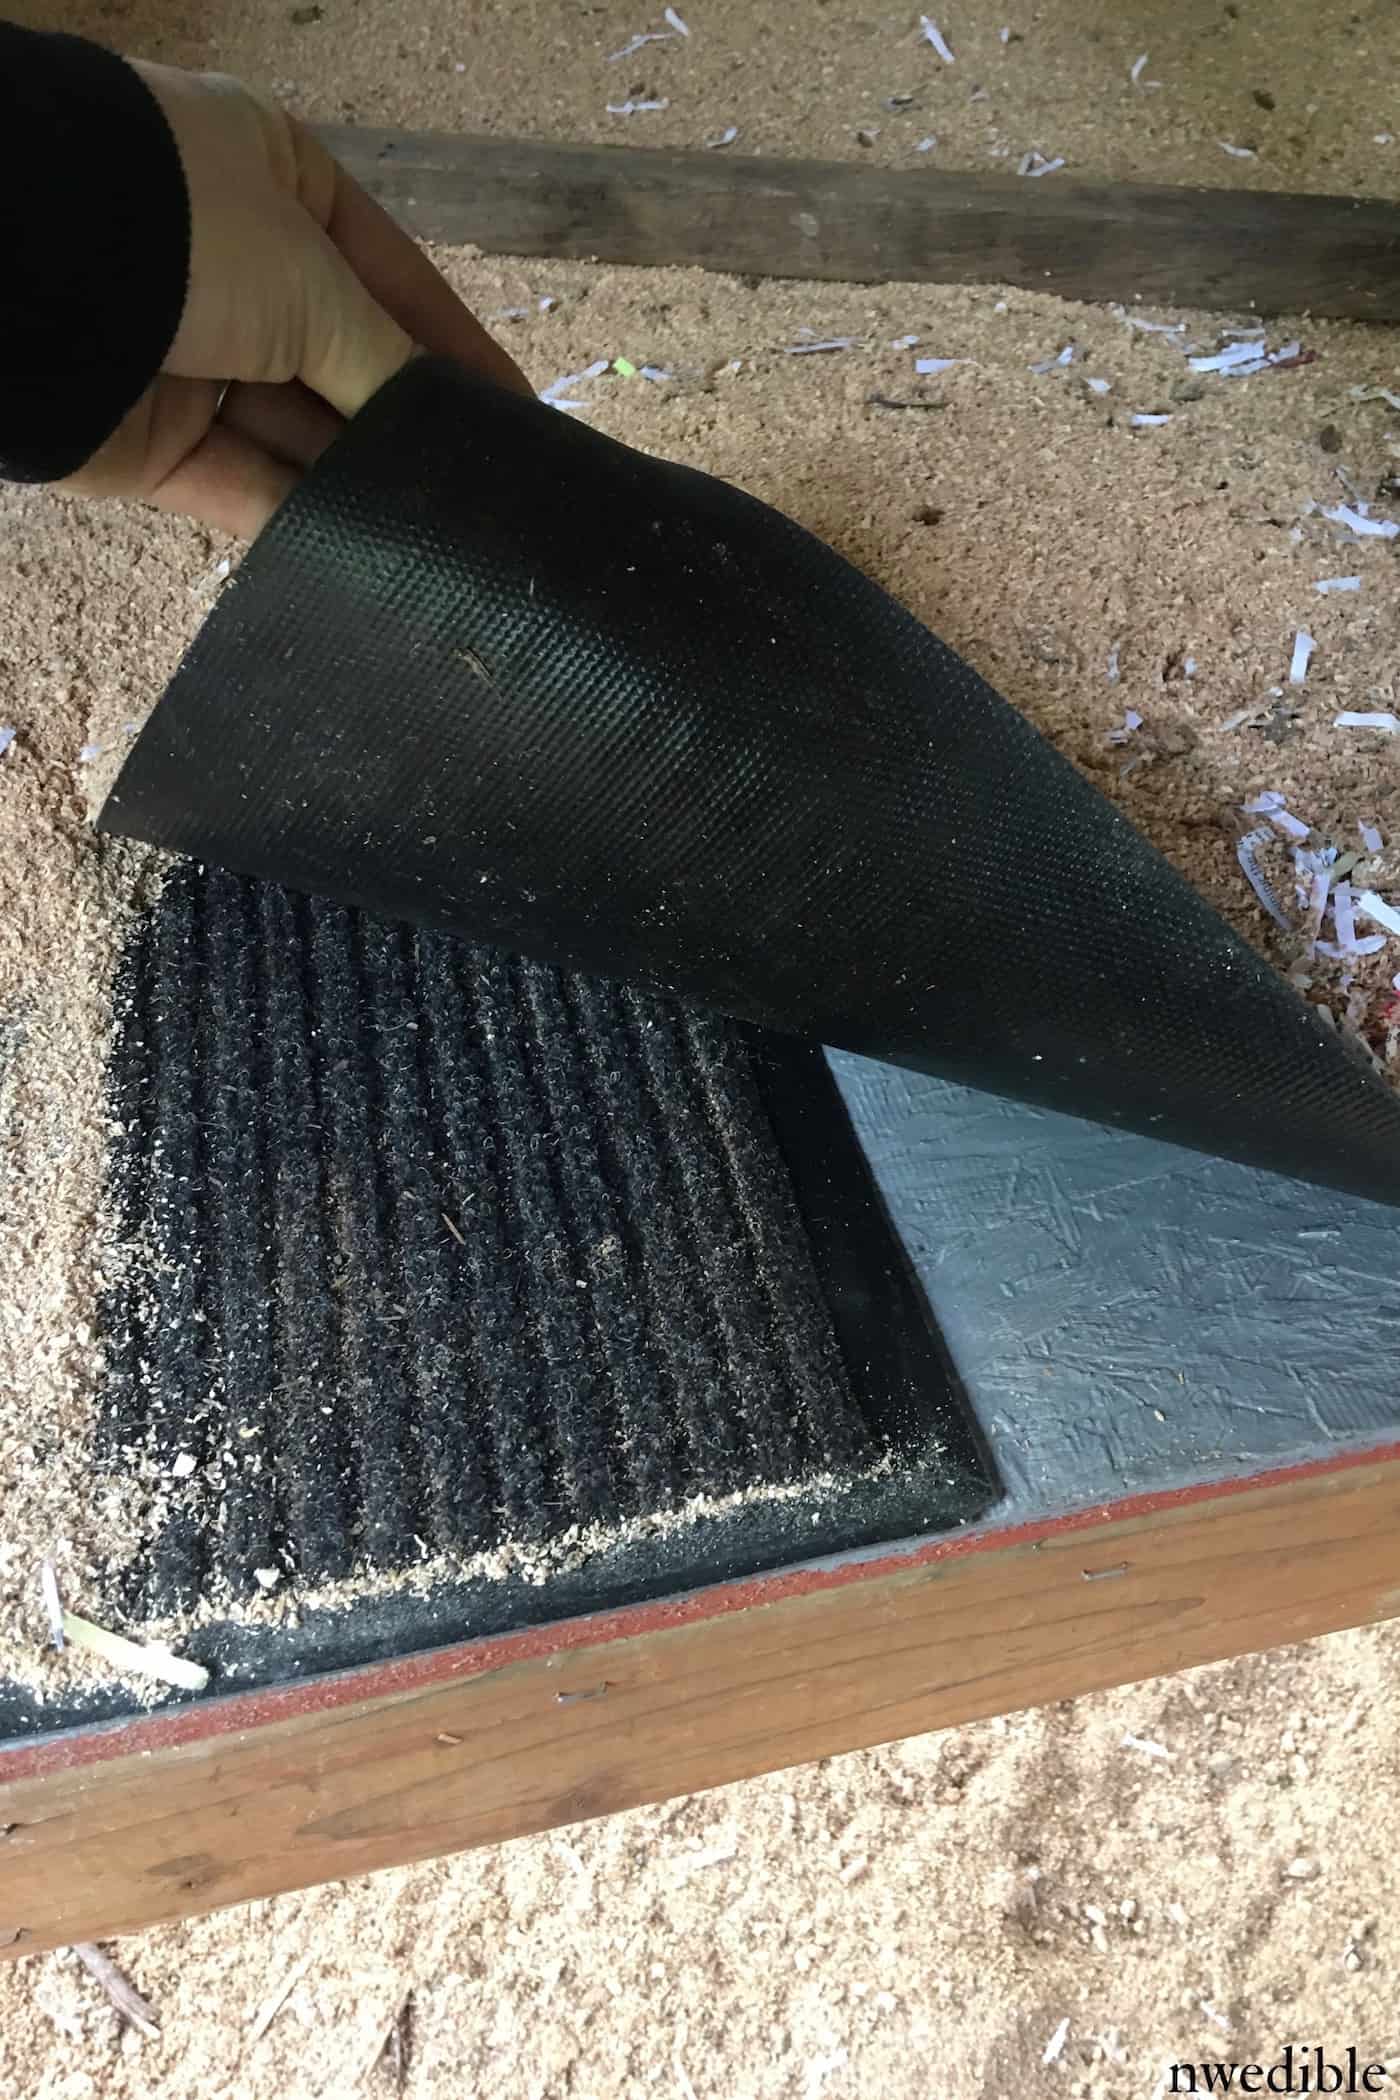
If you have any wood in your coop, I highly recommend you take steps to protect it from poop and moisture. Under the sawdust litter in the upper section of the coop, I’ve protected the floor with all weather, commercial floor mats.
In the past I used scraps of vinyl flooring to protect this wood section of the coop floor, but I found it was very difficult to deep clean the stapled-in vinyl without it starting to rip and shred. The chickens also found it very slippery if they managed to scratch down under the litter layer.
It’s possible that gluing down a section of vinyl permanently, as you would in a real kitchen floor, for example, would provide the stable underlayment necessary for vinyl, but simply stapling it in, or tension setting sections of vinyl, didn’t work for me.
Although a bit more expensive initially, I’ve found heavy duty indoor/outdoor floor mats to be the perfect solution. The heavy rubber backing protects the wood, the heft of the mat keeps them firmly in place without stapling, they provide a cushioned and high-grip walking surface for the chickens, and if they get terribly soiled I can simply pull them out, hose them off, let them sun-dry and set them back in the coop. In this way the mats are also nicely removable for cleaning (see point 3 above).
5. Nipple Watering System
This is an addition to our coop that’s really stood the test of time. I think we installed this gravity-fed method of keeping our hens (and now ducks) in fresh water about five years ago, and with only periodic cleaning and maintenance it’s done its job admirably.
The goal when we built this nipple-watering system was to get away from the standard jug-type watering systems that get messy and dirty within – let’s be honest – minutes of being set out in a chicken coop.
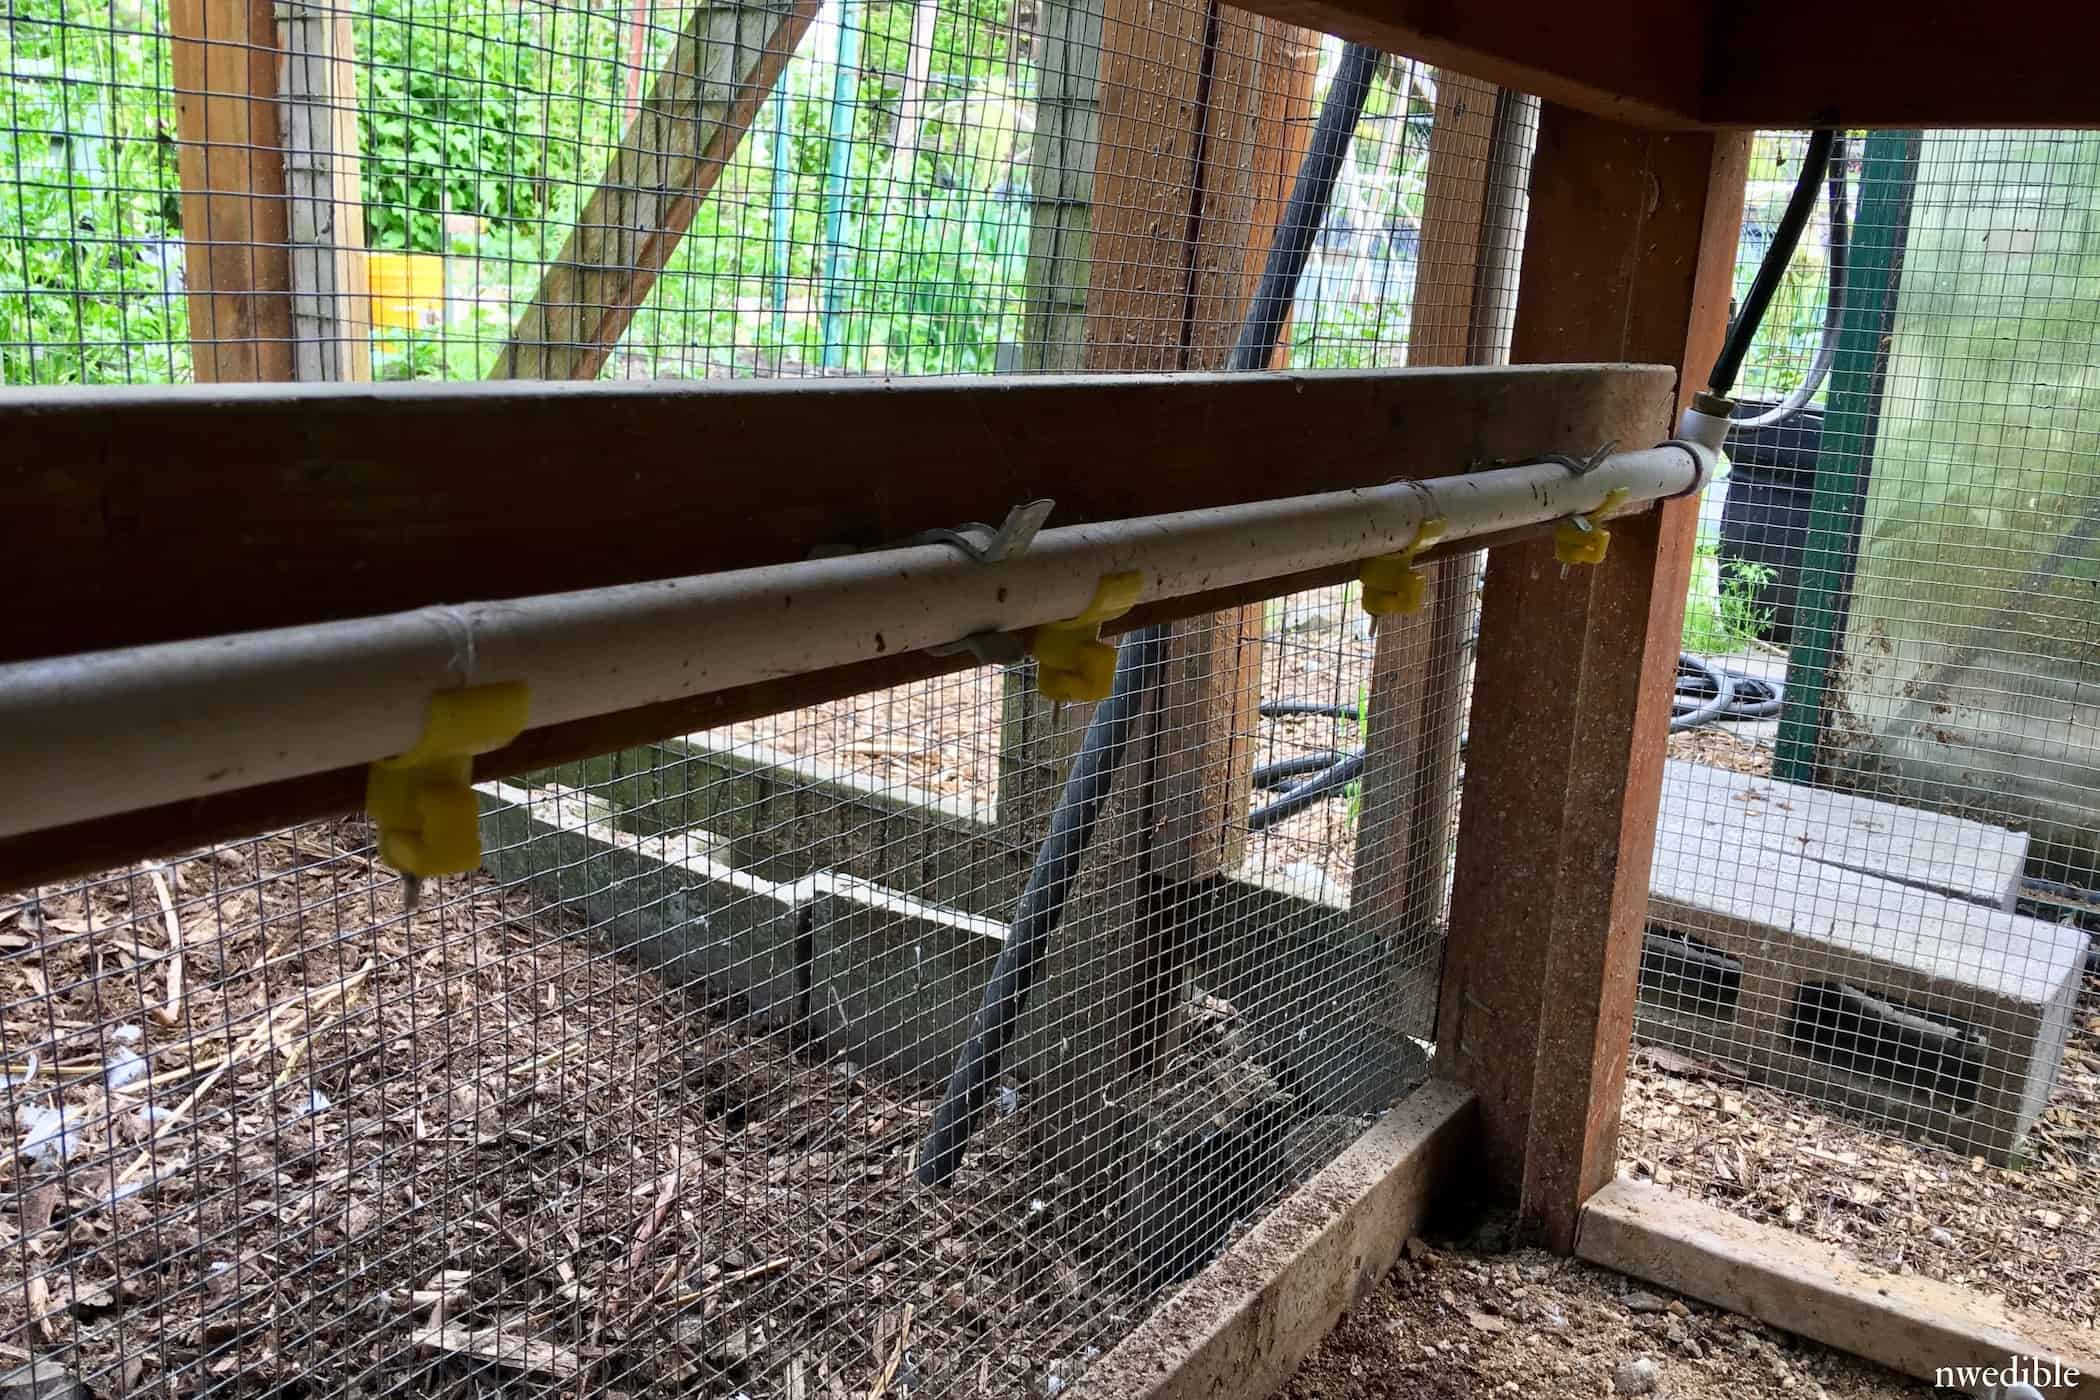
Our system is made with clip-on poultry nipple-waterers and PVC pipe. Tension clamps secure the PVC to a 2×4 which is mounted to the coop. A food-safe black hose runs from a standard five-gallon bucket mounted up and outside the coop to the pipe, keeping the birds in clean, fresh, and poop free water with little work beyond keeping the watering bucket full.
At the time we built this system, there were not a lot of ready-made nipple watering options for the backyard poultry-keeper. Since then, options have grown. If you want to make something like this yourself, there are purchasable options that will make the project simple. (See: PCV nipple fittings, the BriteTap Chicken Waterer, and this all-in-one 5-gallon chicken waterer.)
6. Concrete Floor and Compressed Wood Pellet Litter
How many floor and litter systems have I tried? Roughly all of them, I think. We did deep litter with straw and deep litter with wood shavings, both over dirt. For a while I was convinced that sand was the best thing ever, but the advantages in cleanliness and drainage were offset by the weight and expense of the stuff. Besides, it doesn’t compost.
When the rats chewed through the metal mesh that had slowly been rusting away under the dirt floor and made their way to the never ending chicken food buffet, I knew we had to take action. That action was concrete.
Dear Concrete Chicken Coop Floor:
How do I love you? Let me count the ways.
- You are so satisfying and easy to clean with everything from a broom to a pressure washer
- You stay so nice and dry
- You keep the f%&!king rats out.
Love,
Erica
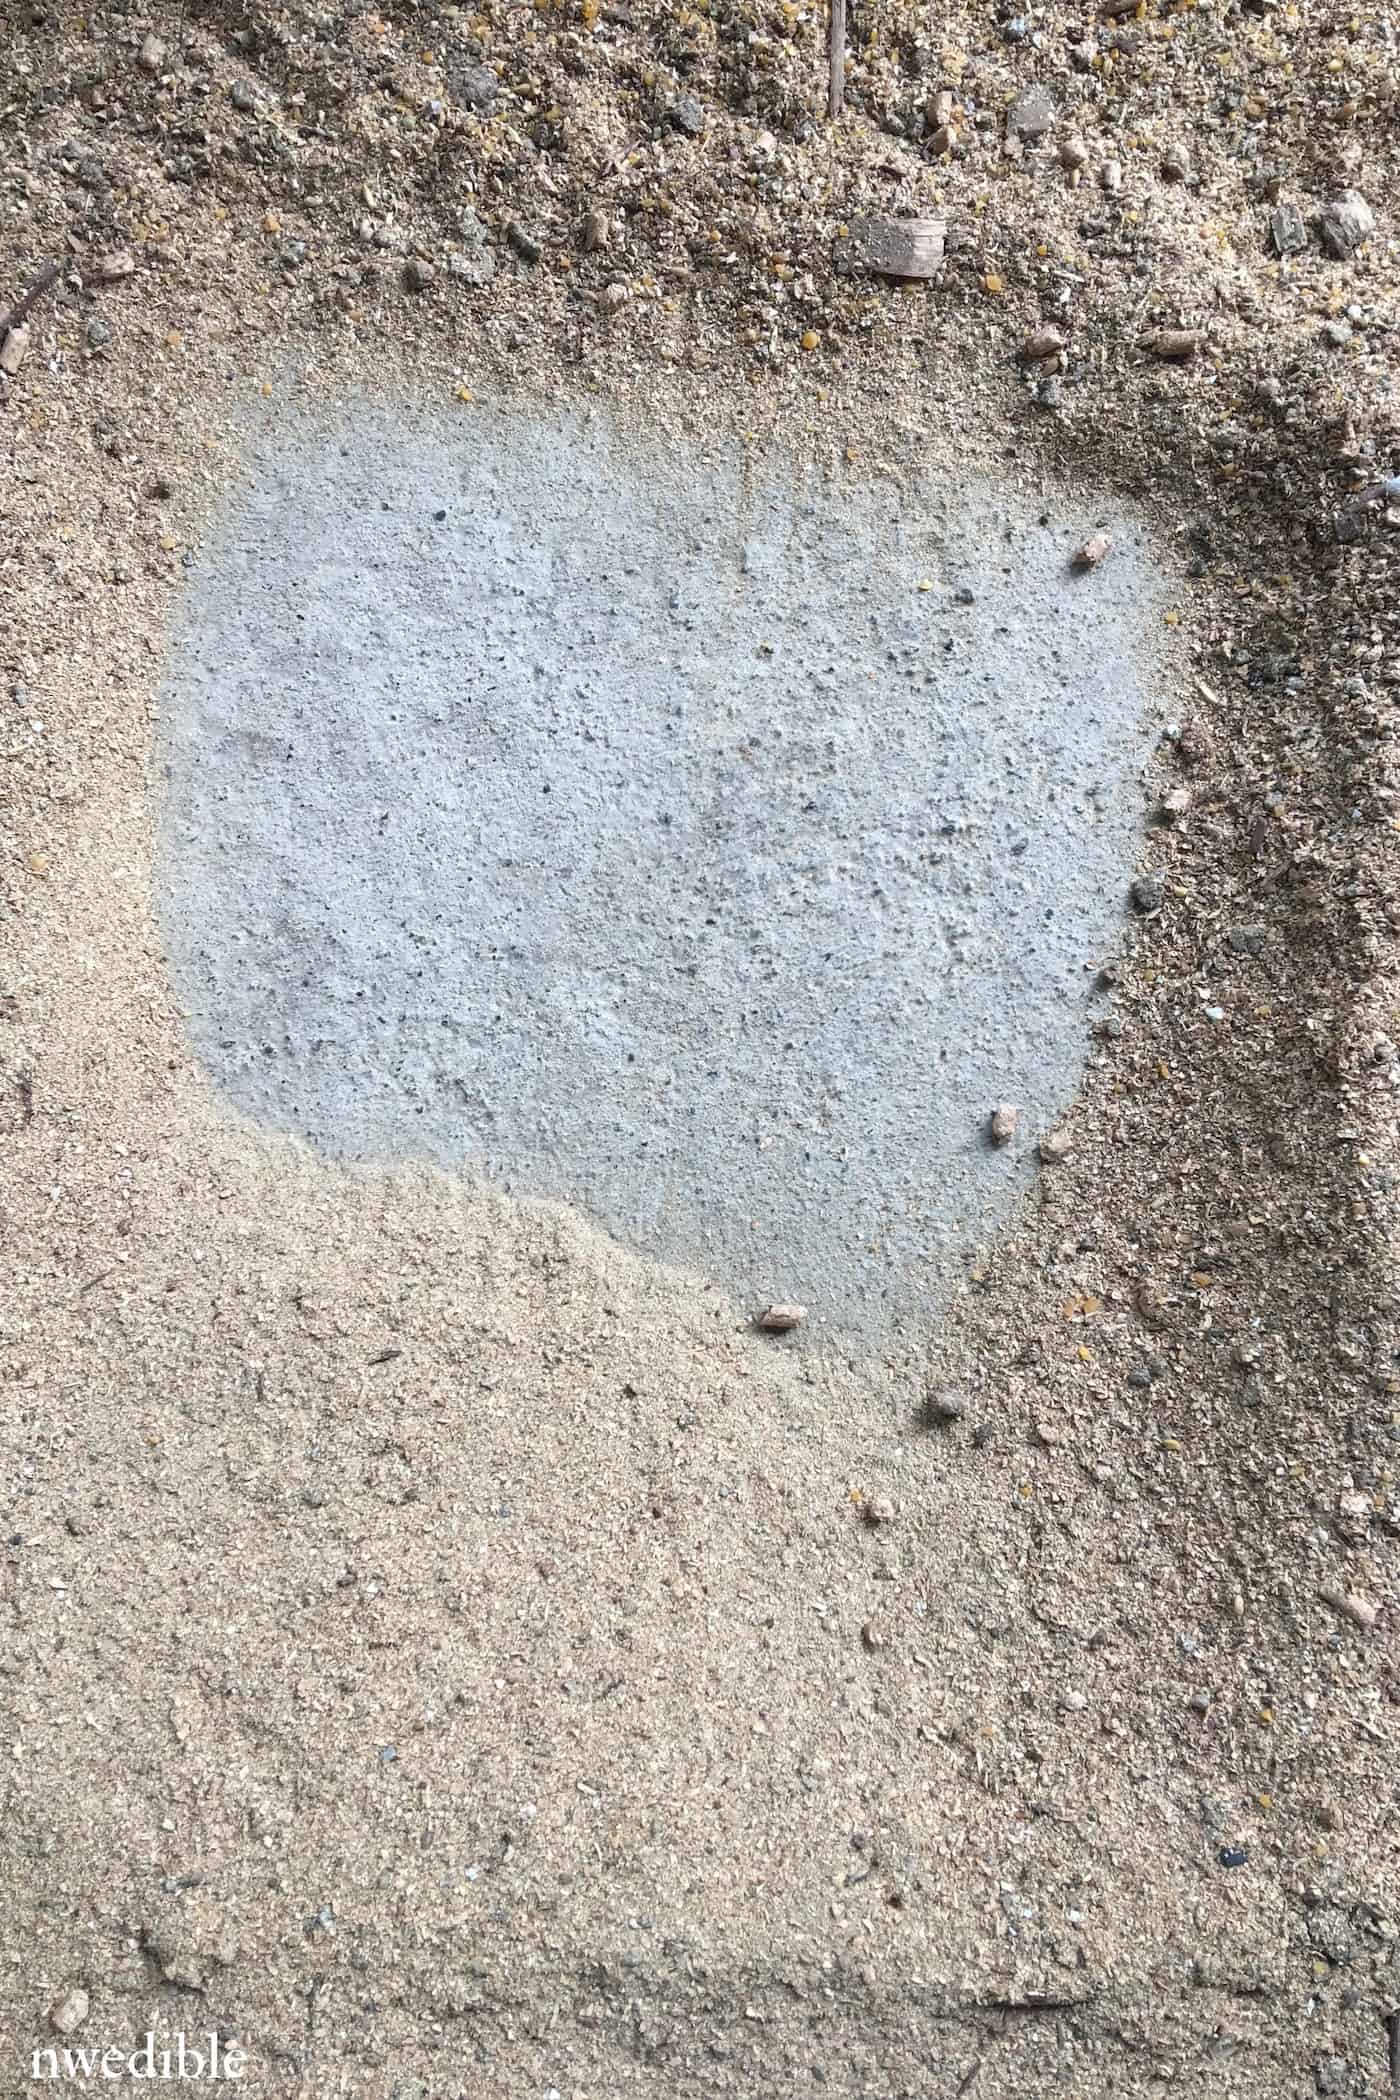
Compressed wood pellets (ours are sold as pellet stove fuel and we stock up in the fall and winter when bags are cheap and readily available) make an ideal overlayment to the concrete, particularly in our mixed-flock coop. I continue to be impressed by the low relative cost, ease of transport, light weight, excellent moisture absorption, fast breakdown into compost, and cleanliness of wood pellets as a coop litter.
The wood pellets break into sawdust as they get wet, and are the only thing I’ve tried which ducks can’t turn absolutely filthy in a day or two. There is none of the “trampled down duck poop frosting” effect that happens with both pine shavings and straw – other duck keepers know what I mean. This is a serious miracle.
Once they break into sawdust the chickens use the dry sawdust to dust bathe.
7. Convenient Interior Storage For Cleaning and Maintenance Items
You might notice that most of the things I’m listing in this article relate to cleaning. That’s not a coincidence. I think fantasy Pinterest coops filled with fabric and fake chandeliers and wicker furniture (WTF?!) are completely, without exception, ridiculous. Your chicken did not just marry Prince Harry. She doesn’t need to live in a castle.
Your poultry housing should be designed with two primary goals in mind:
- Security for your birds
- Ease of maintenance for you
If anything about your coop doesn’t serve one of those two functions, you should really reconsider it.
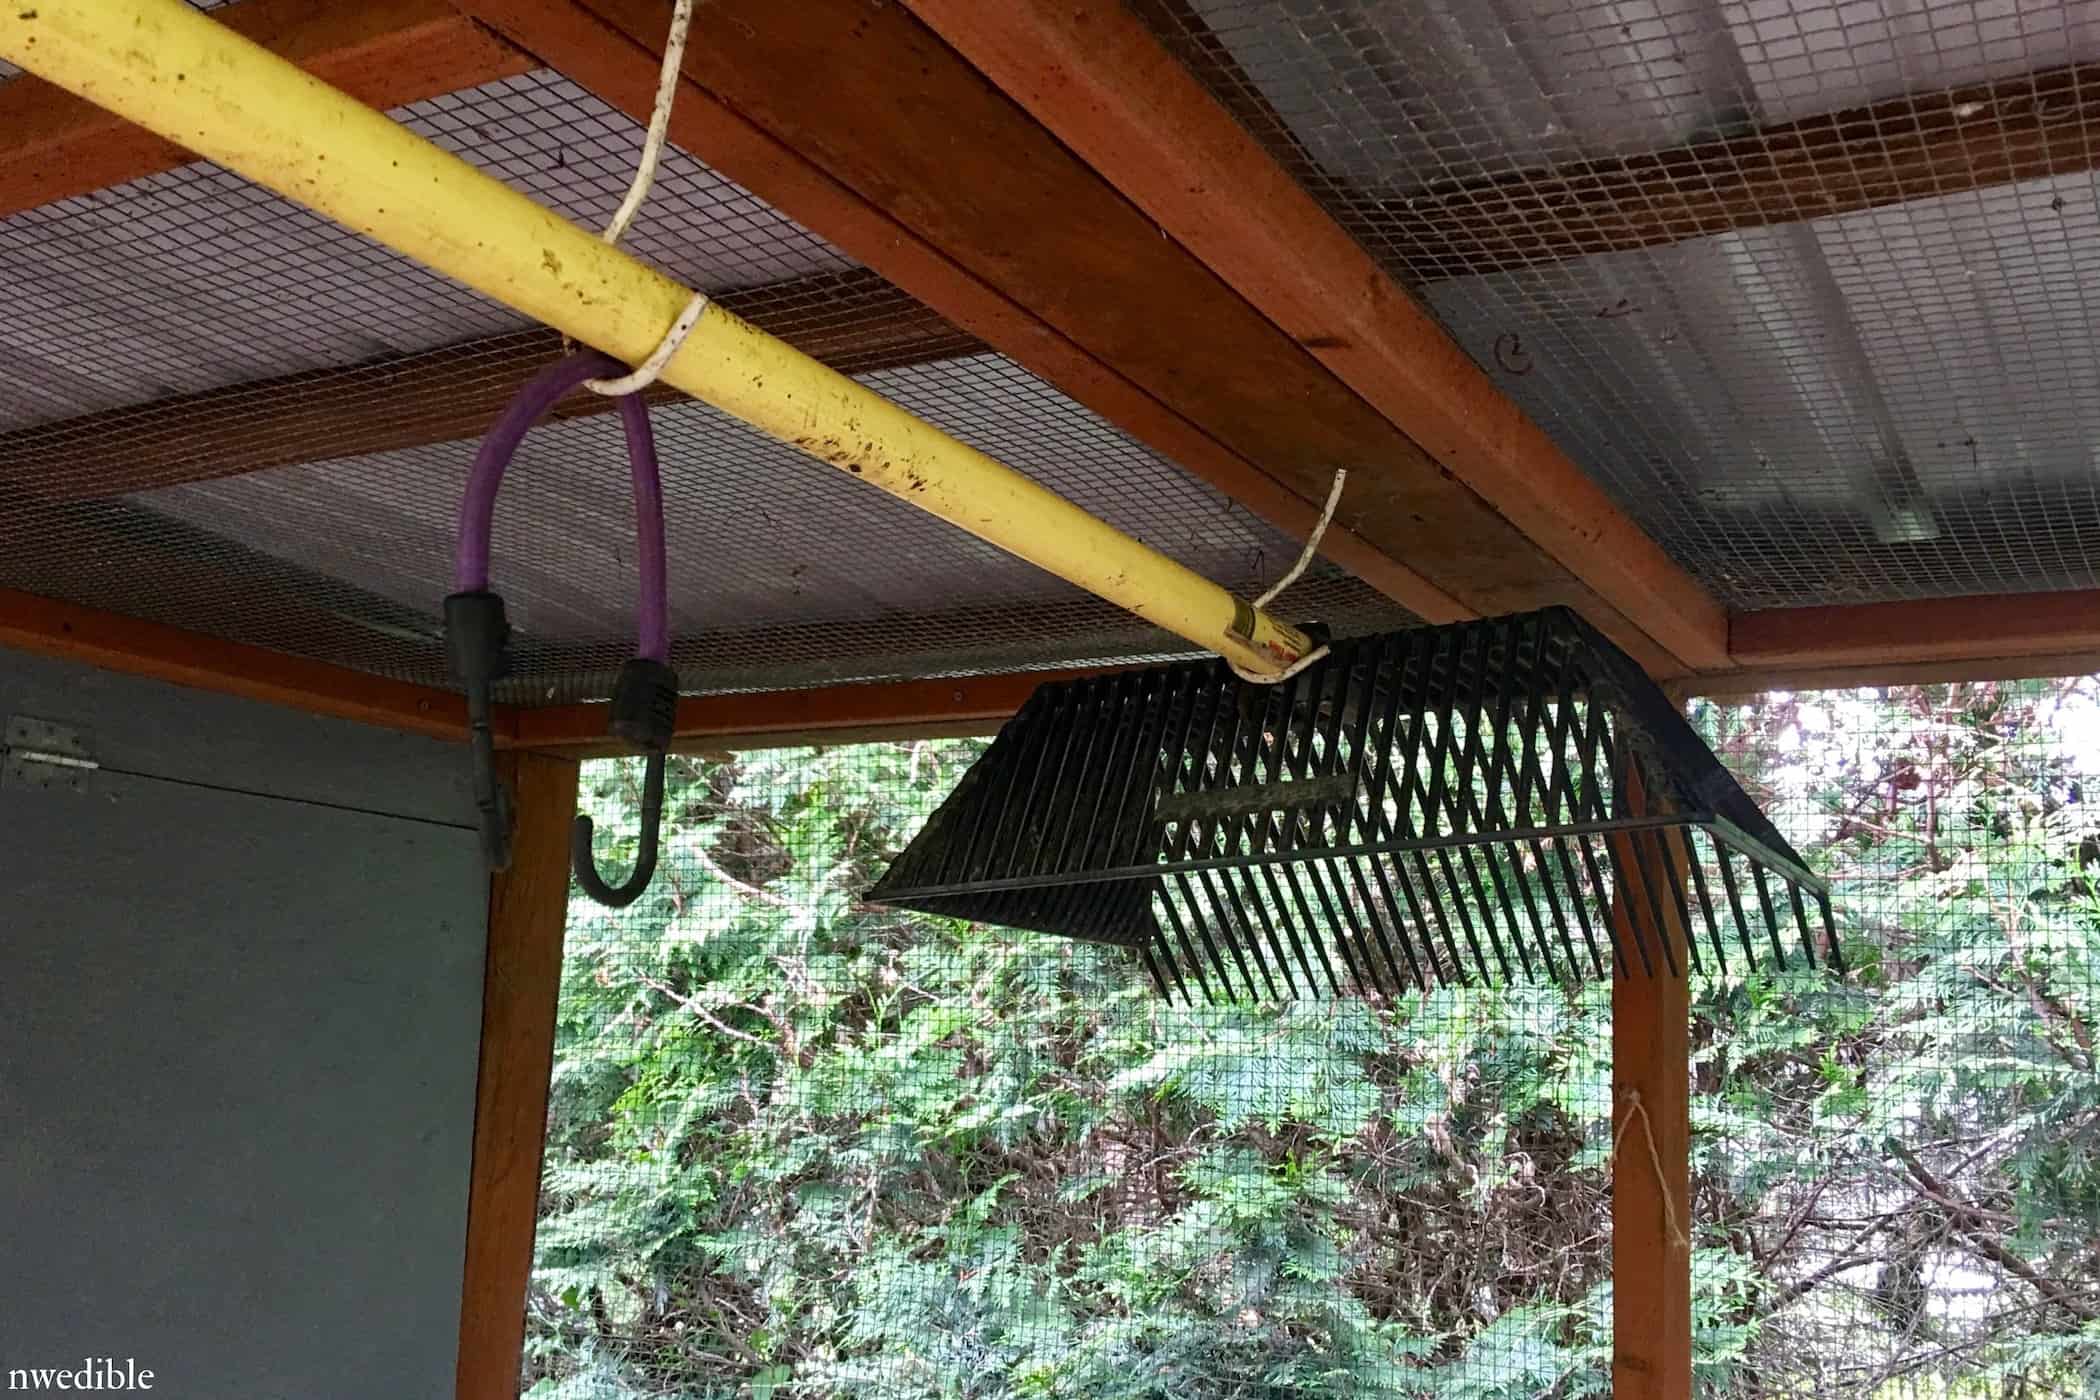
Which brings me to interior storage. I screwed two simple ceiling hooks into one of the cross beams in my coop. This provides a nice place to store my fine tine stall rake. I use this rake several times a week to easily sift through sawdust and wood pellets and scoop up poop. It’s seriously one of the best chicken coop things I’ve ever bought.
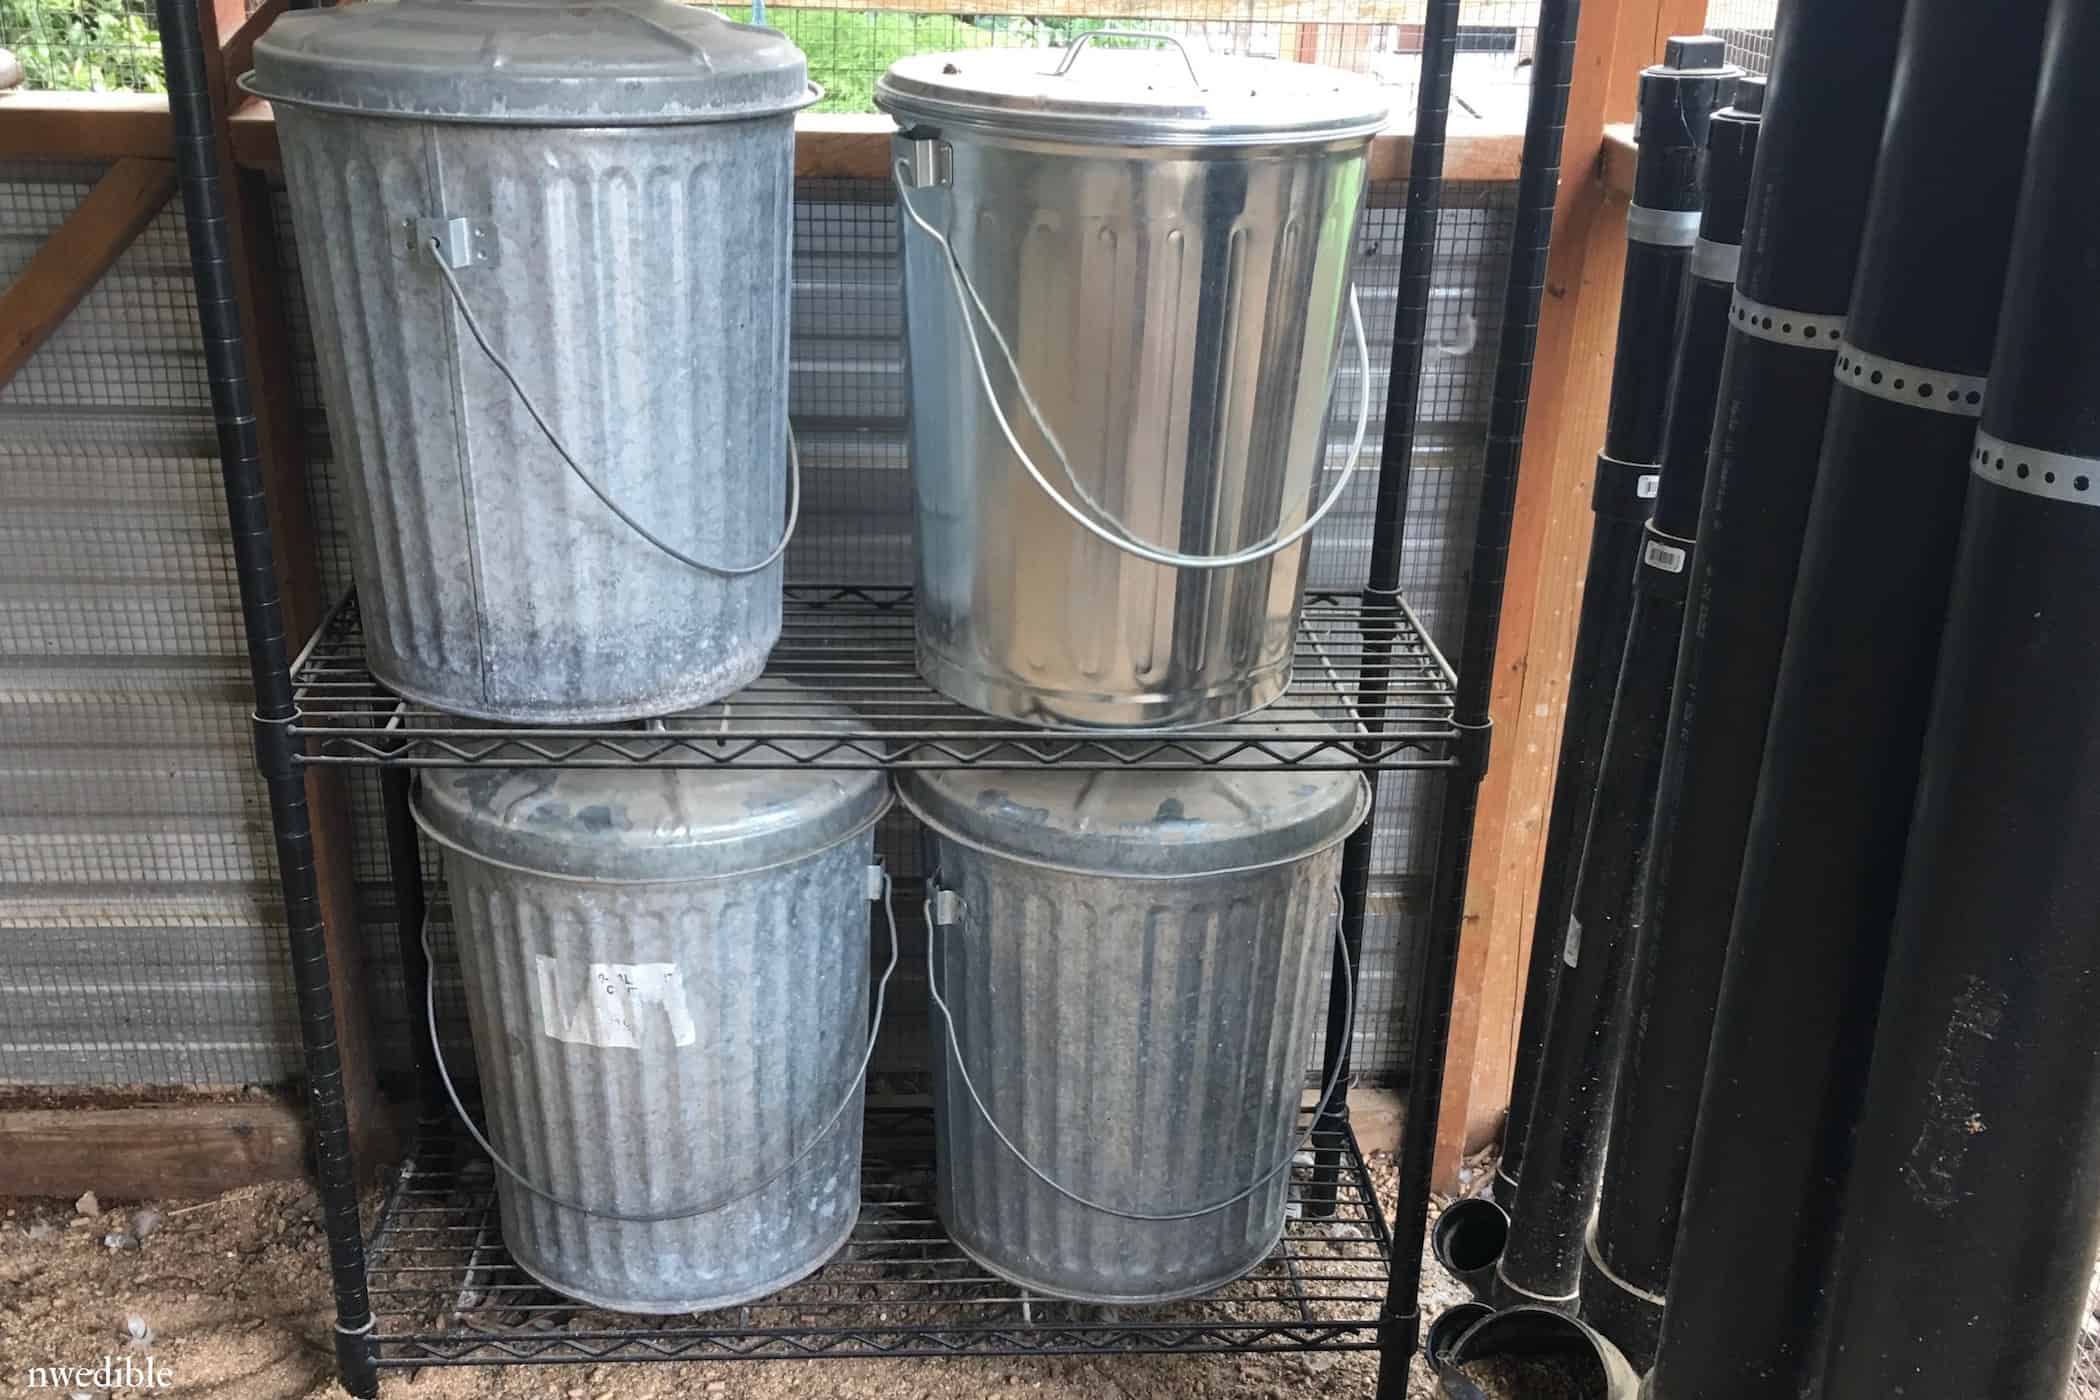
I recently relocated storage for our chicken food, supplemental calcium, and nesting-box materials from the back porch into the coop itself. Although I have not lived with this remodel long enough to declare it a winner, initial impressions are all positive.
It’s a dream to refill the chicken pipe feeders (more on those below) without having to walk back and forth to the patio several times.
8. Gravity Fed Pipe Feeders
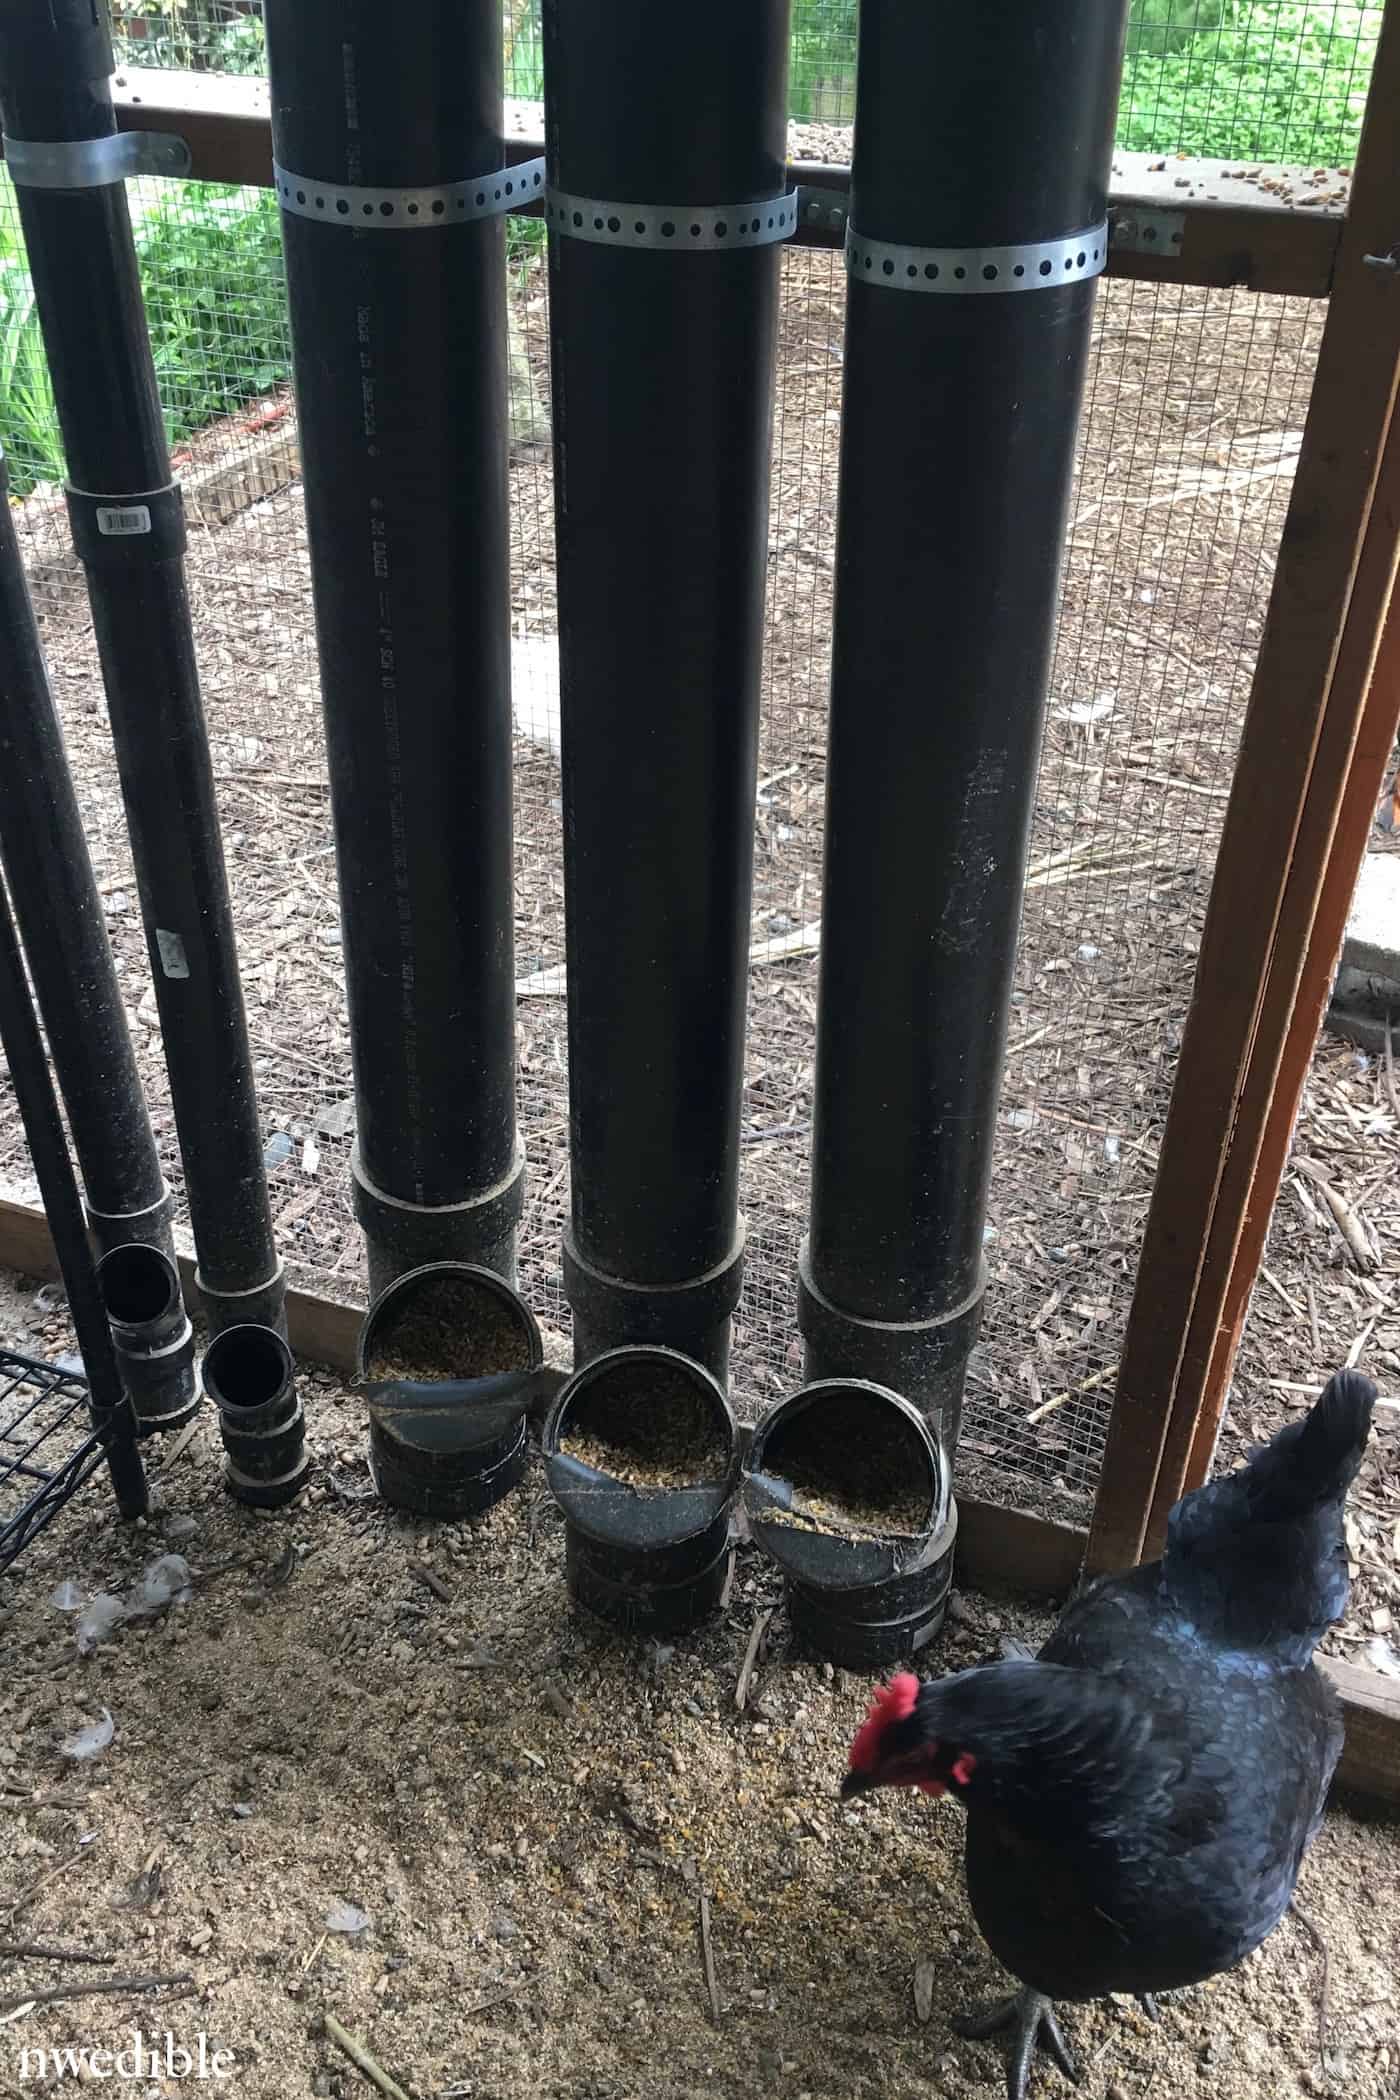
In a pipe feeding system, the feed is stored above the opening from which the chickens eat. As the birds make space by consuming food, more food drops down to fill that opening.
Here are the advantages of a pipe feeder:
- Space efficient – instead of a big feeder in the center of the coop, you can tuck feeders up against a wall, helping to preserve floorspace.
- Volume of feed – you can put a lot of feed in a small footprint, so feed doesn’t need to be topped up as often.
- “Spill free” – this is in scare quotes because it’s not true. But it can be almost true if you construct your pipe feeders properly.
All in all I love these pipe feeders. We’ve been enjoying them for over a year now and I would highly recommend this style of feeder. However, there are two specific things we could have done better – consider this a “learn from my mistakes” piece of advice.
First mistake: we made our pipe feeders too tall. They are 5-feet tall. This is really too tall to cleanly pour poultry feed into the tubes, even for tall people like me. If you look closely you’ll see some spilled feed behind the PVC pipes. Not good. Plus, there is no way a child could hope to fill these things, and as we all know as many homestead chores as possible should be outsourced to the kids. I would recommend something closer to three or possibly four feet.
Second mistake: the feeder opening is too big. The way the “eat-from pipe” intersects with the “feed-storage pipe” is very important. Feed can’t flow like water, so it won’t push up above the intersection between these two sections of the feeder. Instead the feed flows only up to the point of that opening.
We created this intersection with a standard Y-fitting, and that works quite well. However, the opening of the Y-fitting is too large, so chickens and especially ducks find it very easy to swipe and scoop their feed out of the tubes and onto the floor (you can see some of that wasted feed in the photo).
Half-blocking the opening with duct tape worked okay, but over the past year that tape has started to degrade and break apart. When we eventually modify these pipe feeders, I’ll add an opening constrictor to make it more difficult for the birds to knock the feed out.
9. Hardware Cloth Exterior
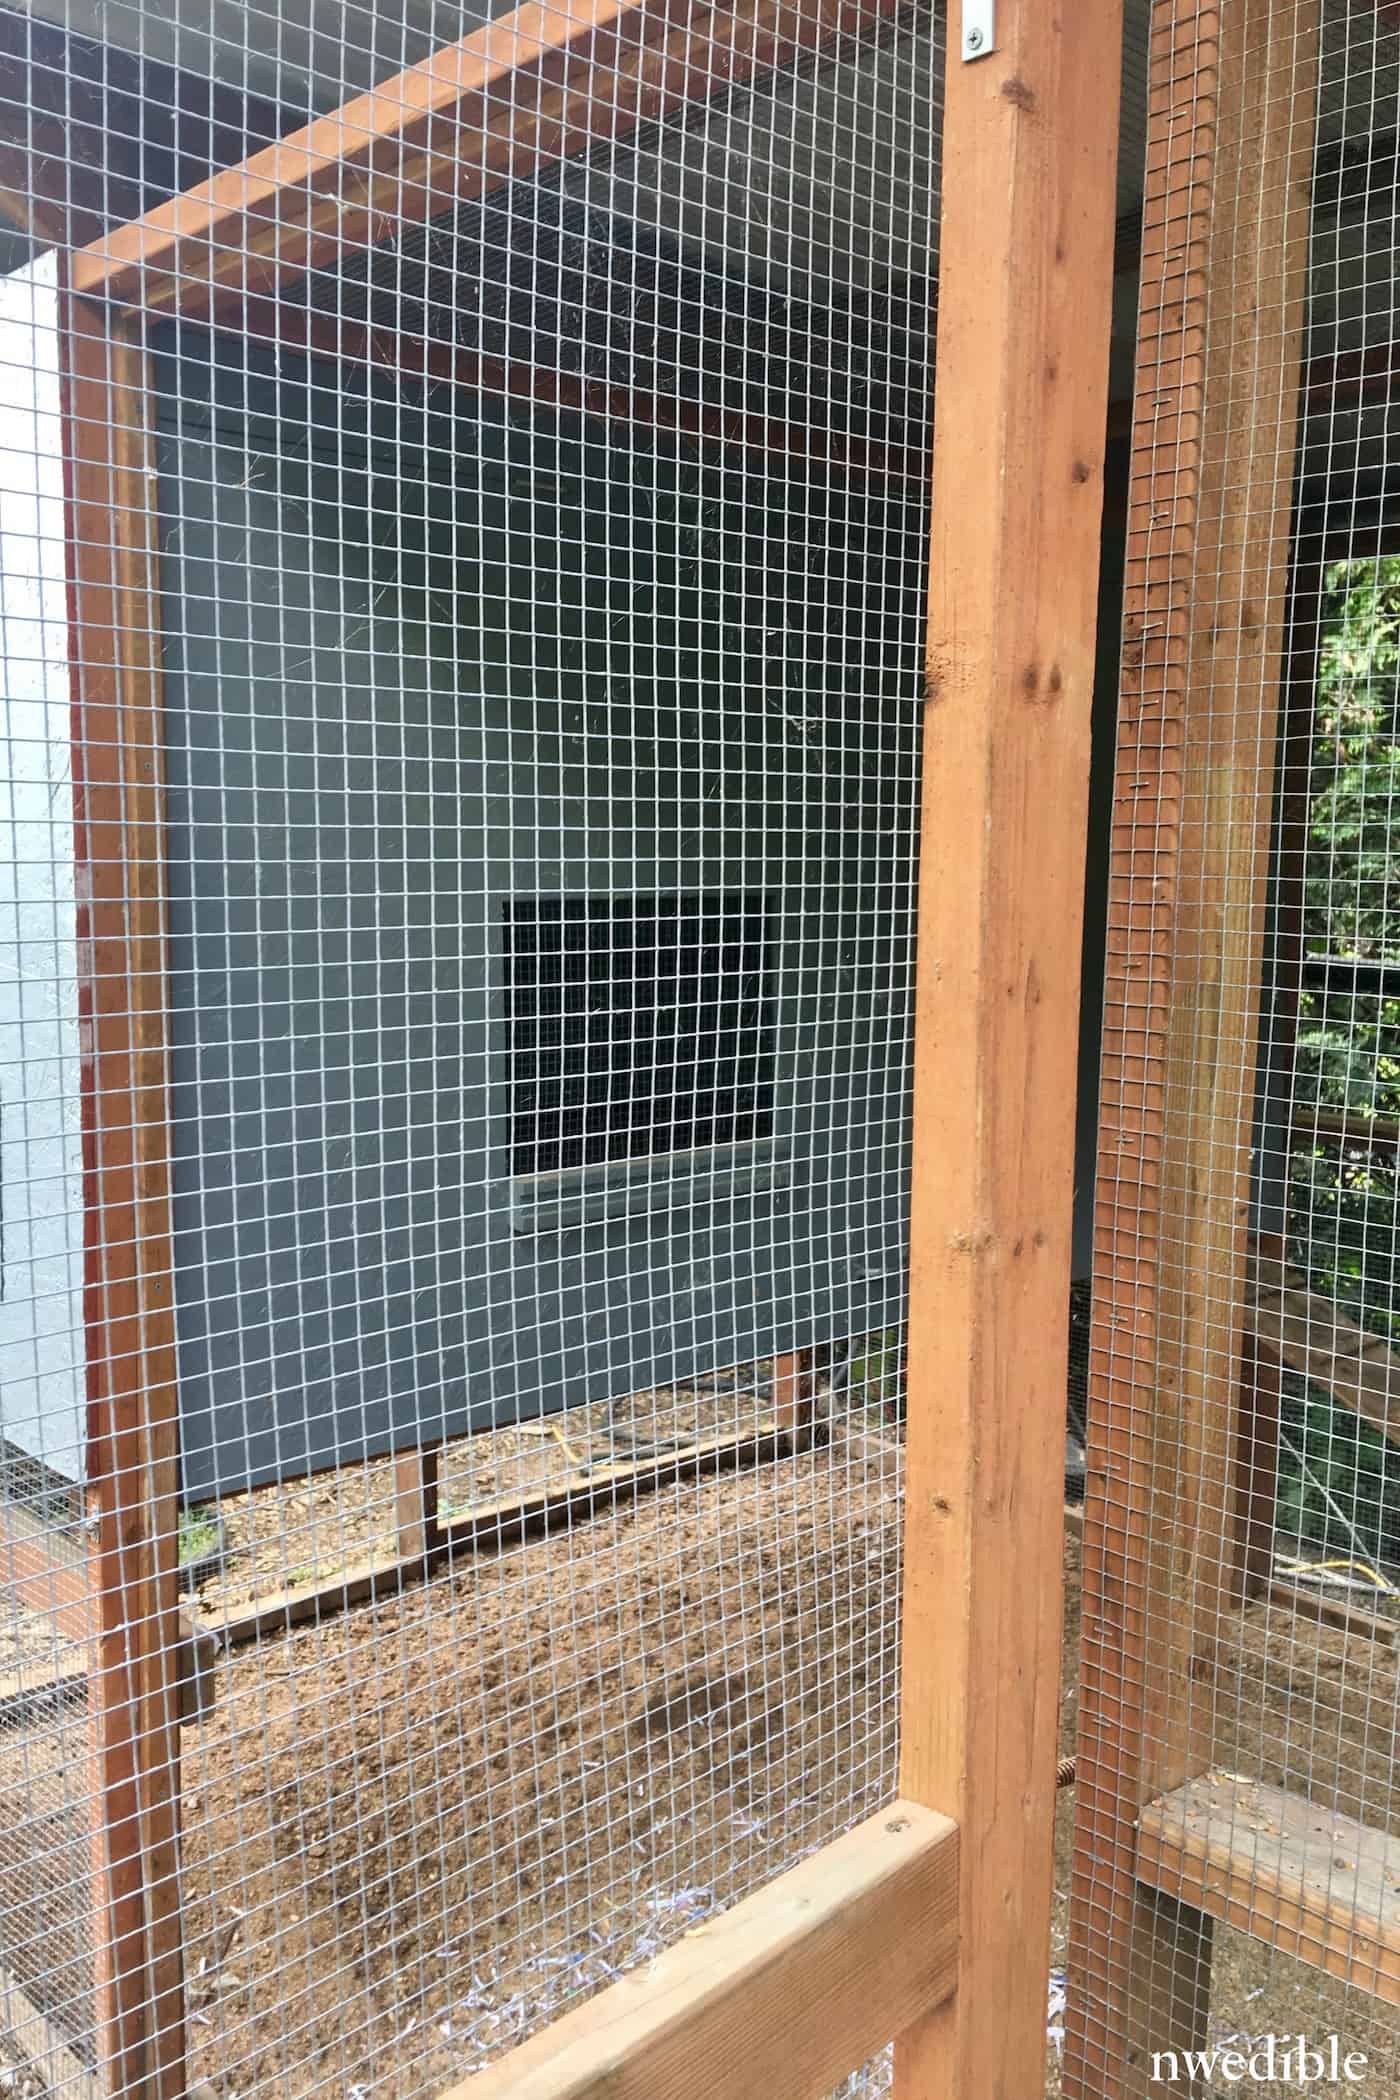
Moving to the outside of the coop, if you live in an area with any kind of critter or predator who might want to exploit your poultry (from rats to dogs to raccoons to coyotes) – I highly recommend you invest in hardware cloth, a tough, small-grid metal mesh that is far more rugged and secure than chicken wire.
The original plans we modified to build the coop called for hardware cloth, and though it was a much more expensive choice than chicken wire, it’s lasted very well. I have lost birds to predators, but never when they were in the coop, so I think the added security has justified the upfront cost.
In terms of maintenance, the hardware cloth has been pretty trouble free. Periodically the sections on the exterior coop door work loose, and we staple-gun them back into place.
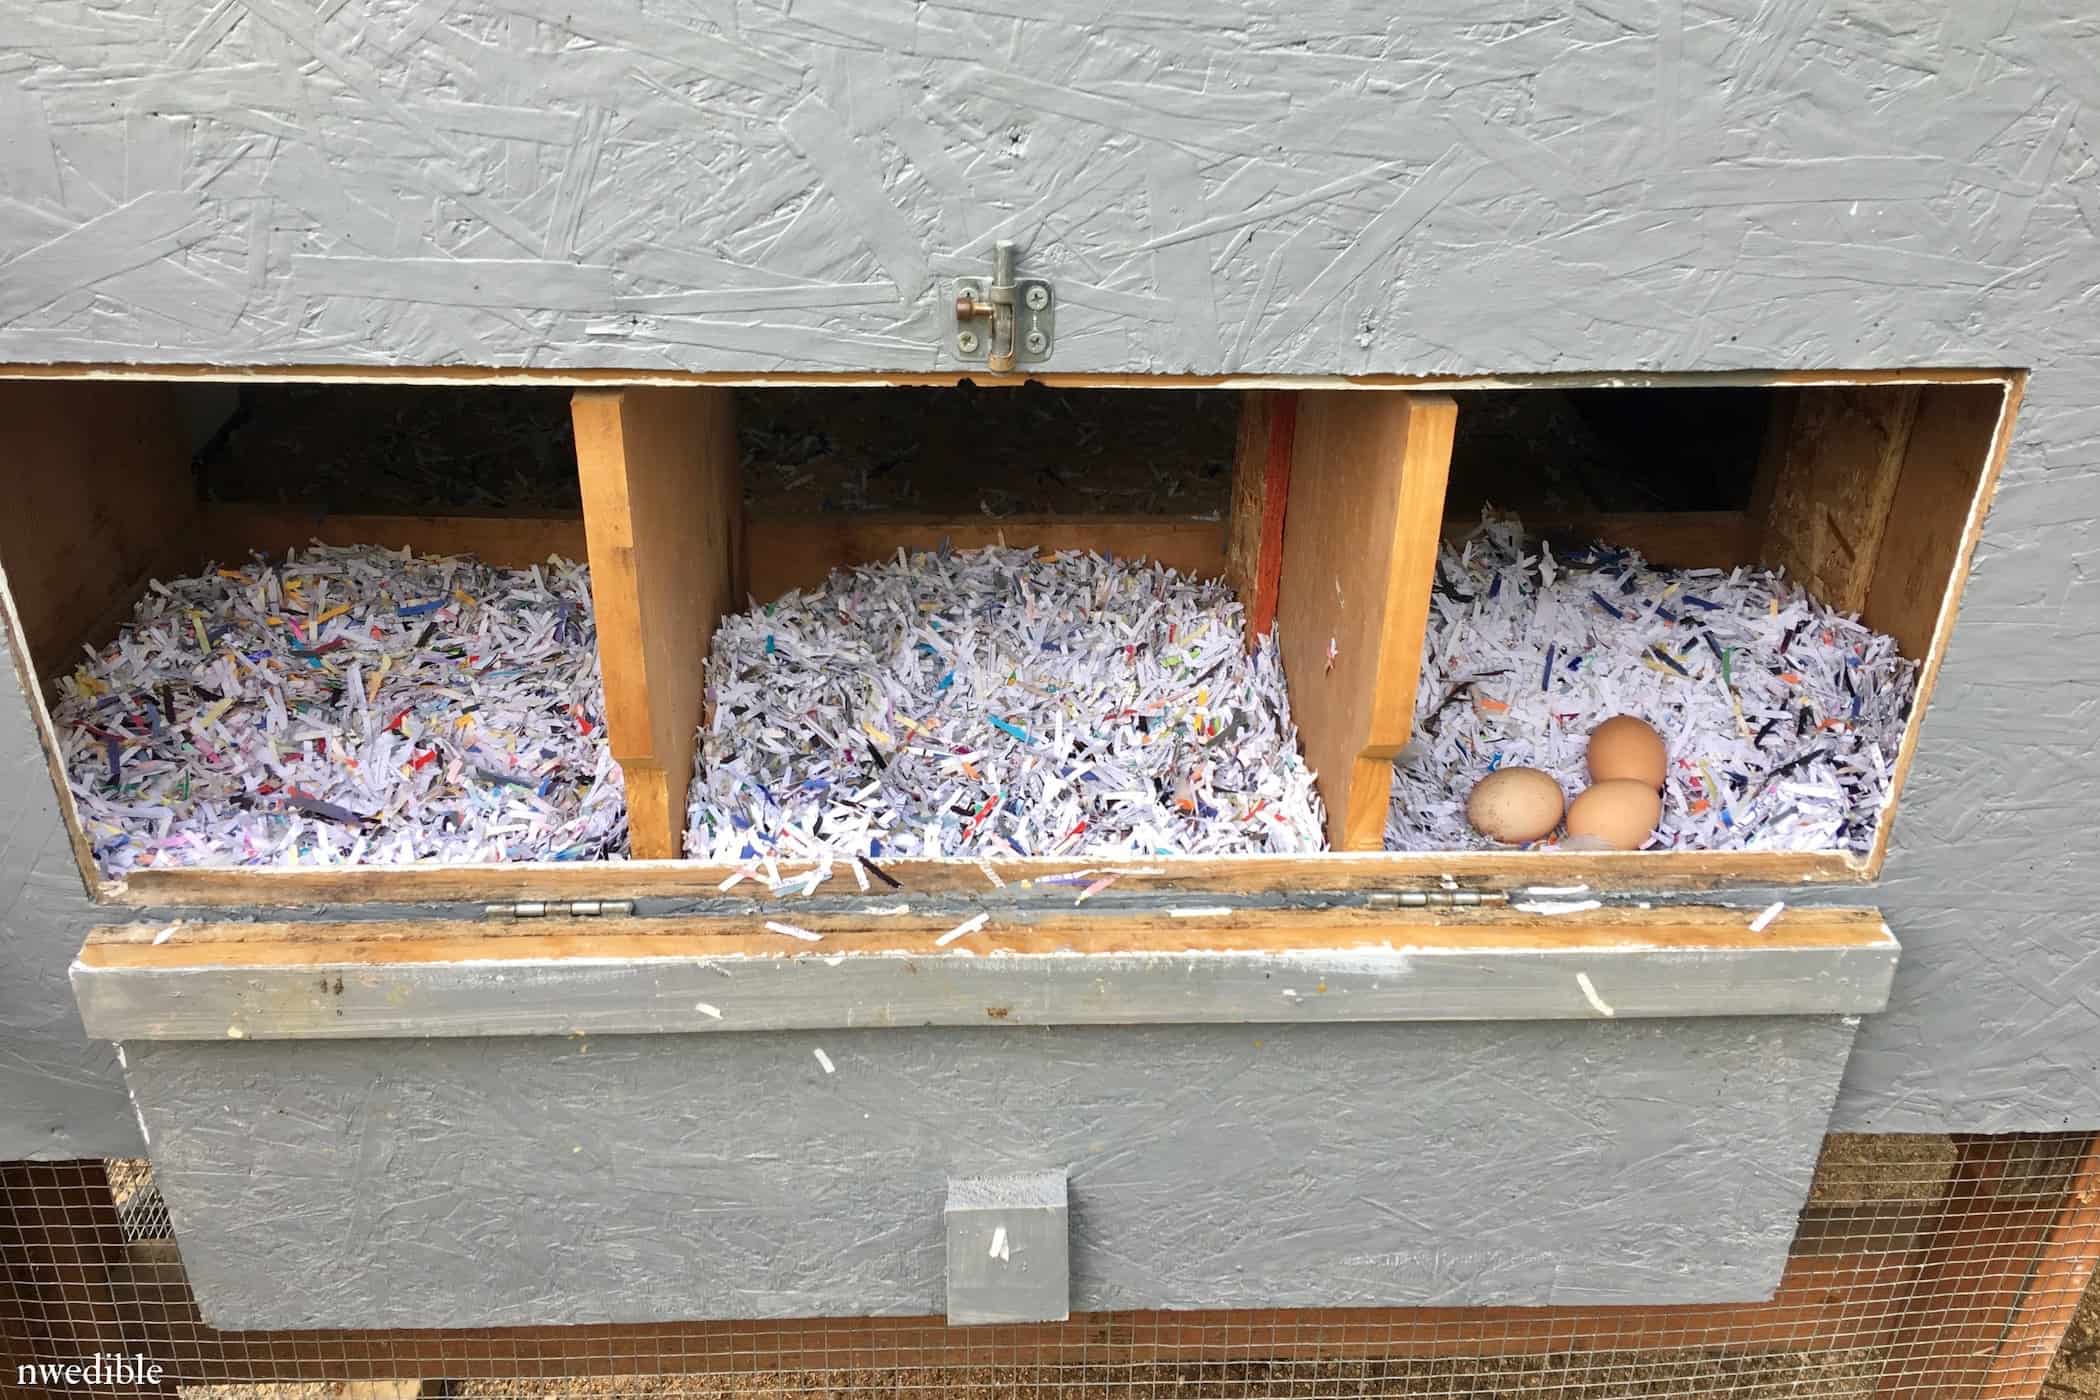
10. Easy Exterior Access to the Nesting Box
Sometimes I gather eggs as I’m tucking birds in for the night. Sometimes (often) I send my kids out to collect eggs on my behalf. For any number of reasons, we often want access to the nesting box where the eggs are laid, without having to open the main door to the coop.
The nesting box “hatch” built into the exterior of the coop makes it simple to gathering eggs without risking a “chicken run” scenario where birds sneak past into the run.
11. A Duck “Pond” That Actually Works!
In one of those it-just-evolved-this-way situations, some cherry trees planted near our coop back when we were still free-ranging our birds influenced the shape of the run and the fence we built to define it.
The fence was bumped out further than the edge of the coop on one side so that we would not have to cut down one of the cherry trees. This created a troublesome little pocket around the back-side of the coop. Birds frequently escaped out from under the fence because of the slope of the ground in that part of the yard.
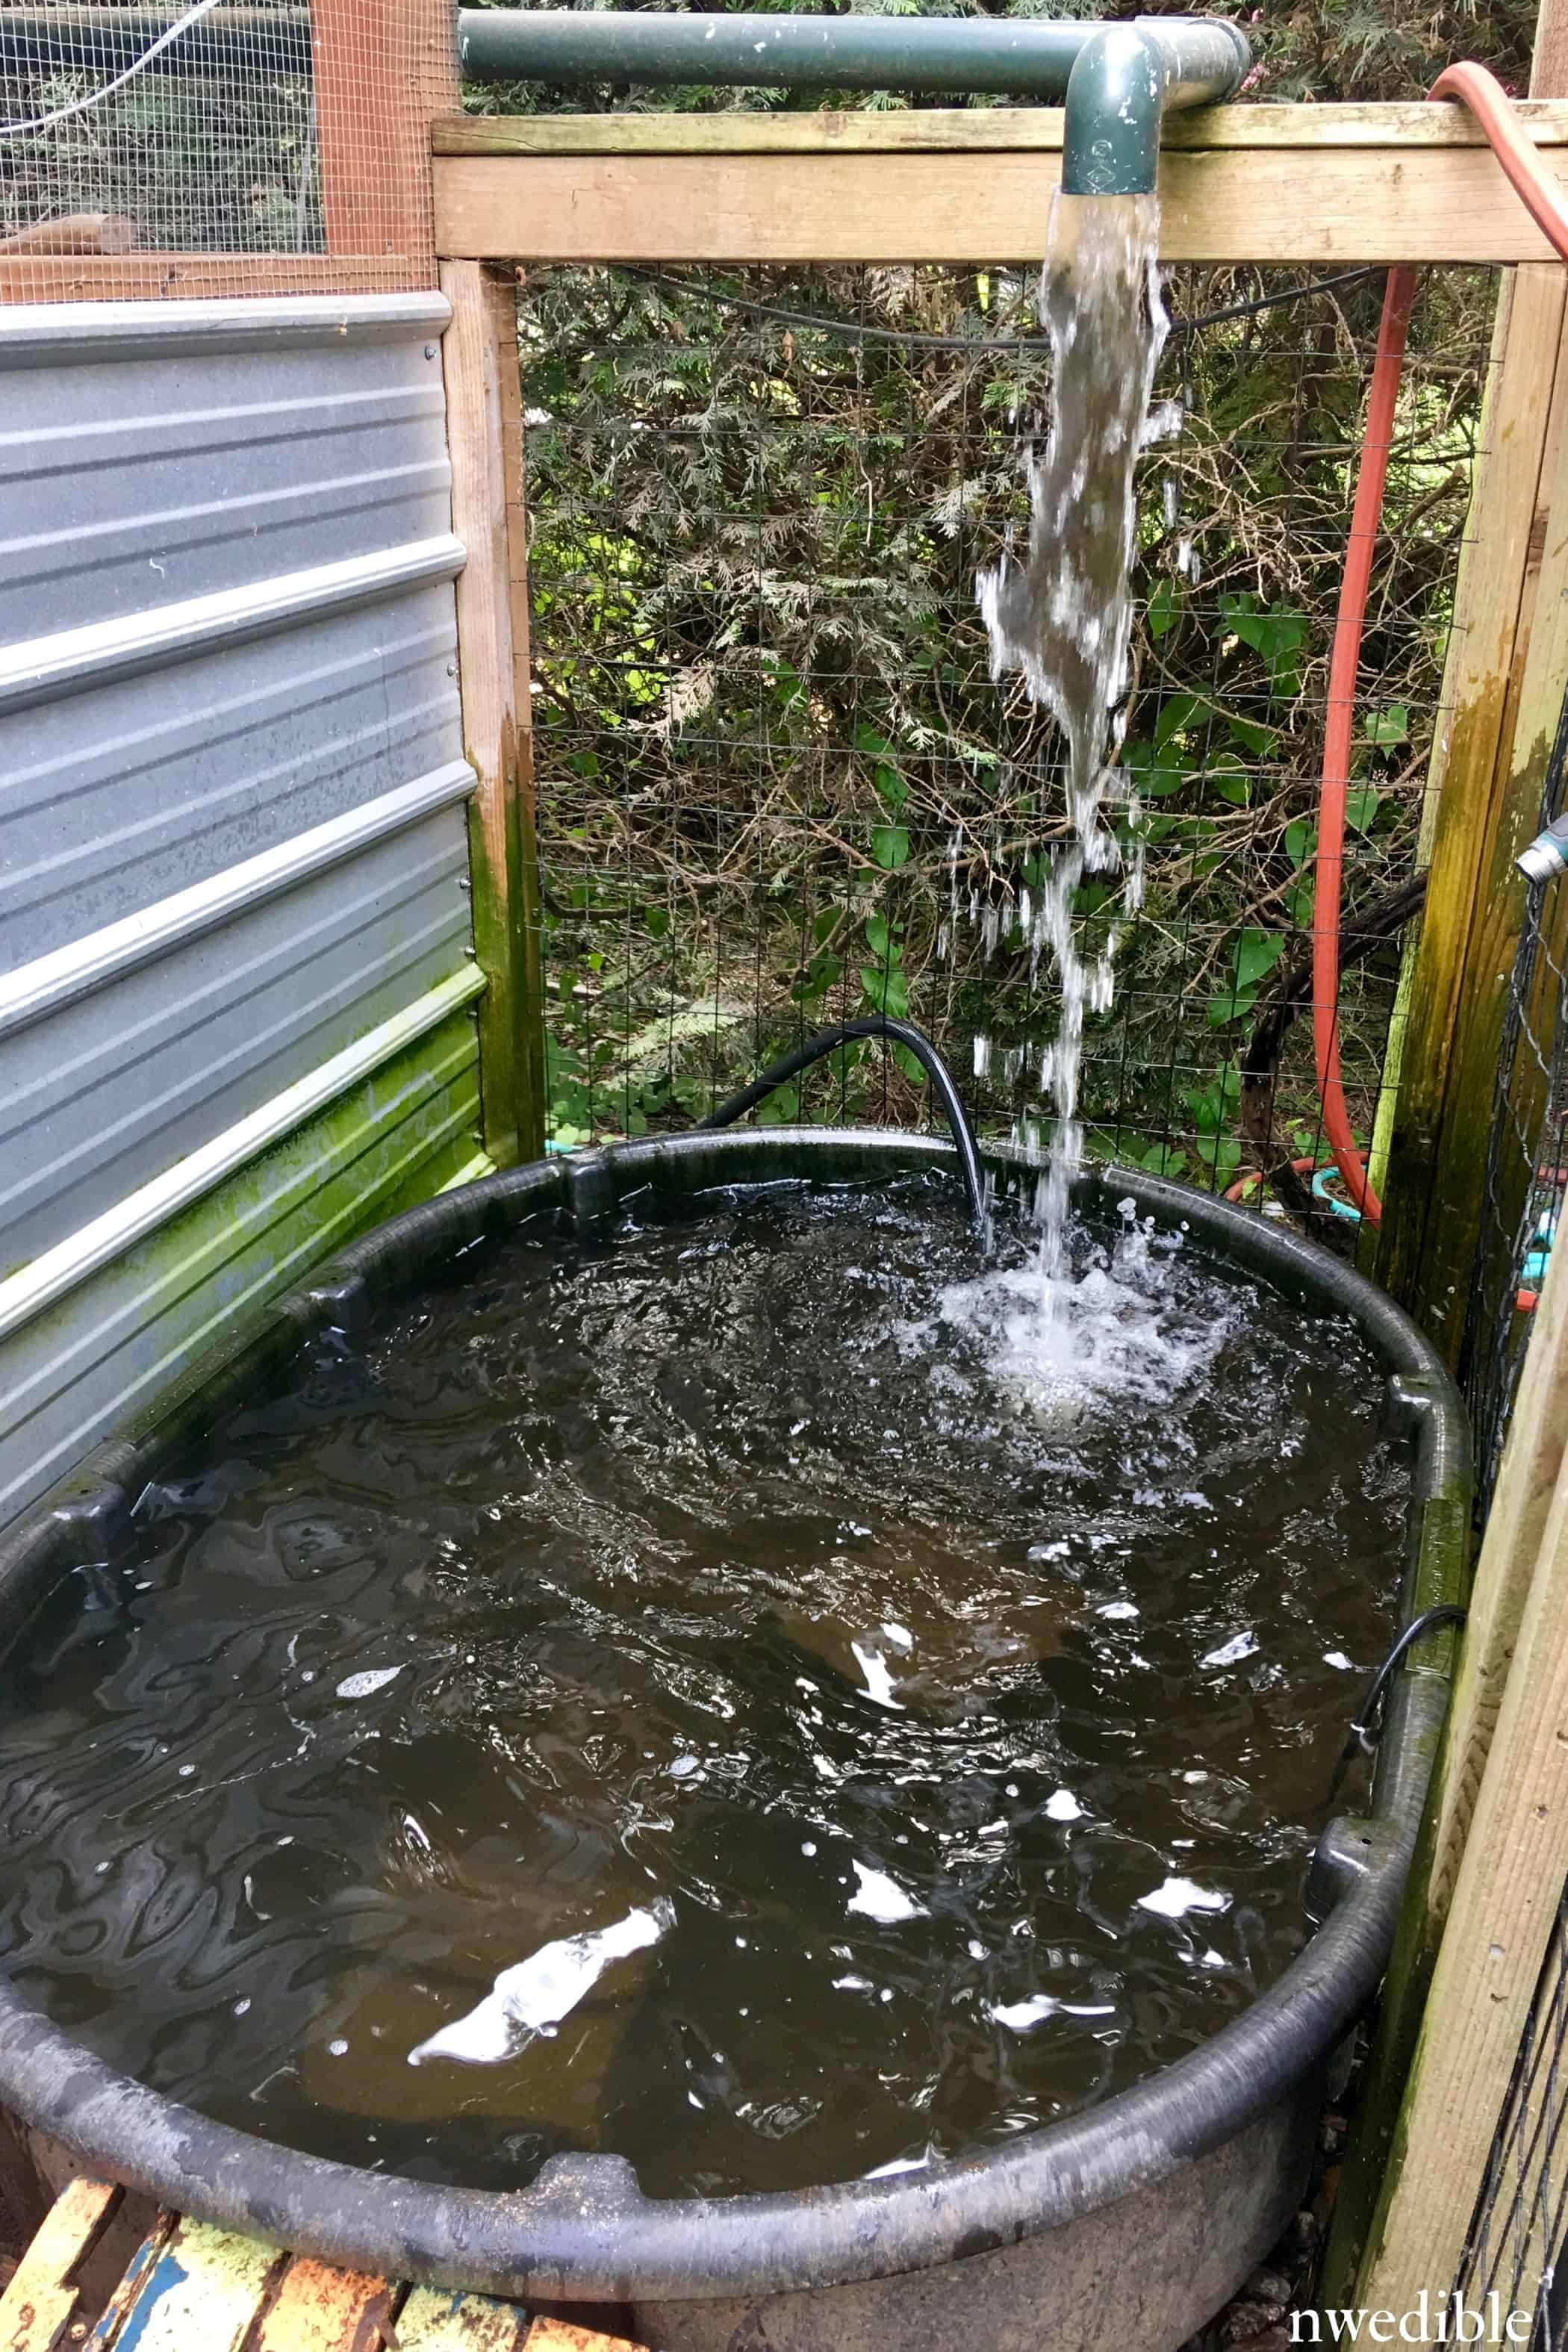
This odd and annoying little cul-de-sac has turned into the perfect spot for our duck “pond” – a Rubbermaid tote half-buried in the ground. (See the first photo in this article for a more birds-eye view of the tub location compared to the coop.)
A very effective filtration mechanism means that we don’t have to empty-and-refill the duck tub very often, and a piece of metal roofing screwed into the exterior of the coop serves as a backsplash to keep the coop itself dry.
What are your favorite features of your chicken coop?


You had a couple really good ideas here that I can wait to use in my new coop when we move and settle in. My husband build our coop six years ago when all this was new to me…it’s pretty, but beyond not conducive to cleaning in anyway! And I’d kill for an outside egg hatch just to keep the poop off my shoes! ha ha….thx for sharing!
To close down the feeder openings, get a solid cap, cut it in half, and glue it in. You can shape the opening with a hole saw first, if you want.
Great suggestion, thanks!
I made the same type feeders a few years ago and added a piece of PVC to the feed area to solve the problem. My gals have to reach their heads in a little further to get feed, but less mess/waste is awesome!
How much dust collects at the bottom of these feeders?
You are a delight. I am also a chicken keeper and learned many of the same things school of hard knocks. I laughed hysterically at your pokes at the designer coop crowd. I am an old lady, keep chickens in town, and find that chickens are excellent listeners. Thankyou so much for sharing.
Can you give instructions on the filtration on the pond please?!
I’m interested as well!
You are priceless, Erica!! You do everything the smartest way… the first time… and then share why the second time is even better ; )… saving us all the trial and error. I’m wondering what kind of filtration system you have for the duck pond… and the size of the ‘pond’… and how many chickens & ducks.. and dimensions of coop/run. So many questions.
I’m wondering what kind of filtration system you have for the duck pond… and the size of the ‘pond’… and how many chickens & ducks.. and dimensions of coop/run. So many questions.
I see this was never answered. I read this whole article just for the swimming tub for ducks. I love getting fresh ideas from true duck and chicken owners and not the fair dust group installing chicken chandeliers. Lol. I laughed and got it. But you are right as much as i love them, ducks are a mess. I would have loved more pics maybe a video of it in use and different angles. From the pic I just can’t figure out how it is situated into the rest of the coup. I was so disappointed that there wasn’t more detail especially how you are emptying, cleaning and filtering this setup. I do hope you respond. Thank uou.
Your posts are so helpful. I always learn something new. Thank you!
Is the duck pond filtration system a standard pond solution or did you create a personal design for that/
It’s totally custom, but based on standard pond filtration concepts. Standard swirl filter in a 55-gallon plastic barrel to get out anything heavy, then topped with round media filter sections in course then medium fineness for biological filtration. It’s a massive filter for such a small “pond” – but duck poop water goes in and by the time it works up to the top of the filter and dumps back into the pond it’s clear. So we only have to fully dump and replace the water in the tub every…month? ish? 6 weeks, maybe? Which for anything involving ducks is a miracle. Plus we are able to drain out the sludge from the swirl filter onto anything that needs extra fertility (nothing ready to eat though, but great for fruit trees and similar).
Hi! Would you be willing to share more detailed plans of your pond filter system? Sounds amazing!
I would love detailed plans of your filter as well. Is it an electric or gravity filter? This is probably t first year with ducks and I work led like to make sure the pond is all set up before winter. Right now we’re filling a kiddie pool daily. Ugh!!!
I was wondering how your ducks use the nipple watering system. I understand they need to dip their bills in water to clear their nostrils during feeding.
They use it just like the chickens, really. They kinda gnaw at the nipples and water drips out. In terms of dipping their bills, they need frequent access to head-dipping water to keep their nostrils clear, but they don’t need water right next to them every time they take a bite of food. Since the ducks are able to full-bathe including shallow dives in their tub, they have access to plenty of water for that bill-cleaning purpose all day long. At night, which is the only time they would be denied access to the outside tub, if they want additional water, they do use the nipple waterer but that brief time without dunking their heads isn’t a problem at all. TL;DR I absolutely wouldn’t recommend exclusively a nipple waterer for ducks, but it’s perfectly fine as a supplemental water source if they also regularly have access to deep water.
Great advice on the roof and very timely.
I have a stack of the clear panels ready to install which I’ll now take back and exchange for metal.
You won’t regret it in the long run. The plastic photo-degrades far too fast for my liking.
I used many of these features in the last coop I built (after suffering with earlier hard to clean versions). One other feature I put in that I loved was to make the coop door a dutch door. That let me open the top third to throw in treats and kitchen scraps without unleashing the horde.
That’s a great idea!
I have that kind of door also. I love it.
I love how you designed your coop. We have a very similar set up. Question for you about cleaning under the roosting bars. We lay down layers of paper (the roll of painters paper you find at Home Depot) every 5-7 days (depending on how dilegent I’m feeling that week) I take up one layer and toss it in the compost. It works well except for when I wait too long and then have to roll up 2-4 sheets of paper which doesn’t make it as cost affective. So my question is, how often are you cleaning up under the roosting bars? Daily, weekly, etc? And how many birds do you have? We have 13. Thank you for sharing all of your advice!
I used vinyl skirting but longer sheets of it as a floor for my coop. Very easy to clean. That way, I don’t have to take anything apart.
Natalie P.
Alabama
I have a really big coop I built for my wife and her birds. 4 at first but how have 20 chickens and 6 ducks. I built a 10×12 building 8 feet tall and coated the whole floor and 6 inches up the walls with roll on pickup truck bed coating. We use pine bedding in the coop and cleanup is SUPER easy. Regularly “rake” up soiled sections and maybe every other month do a total change out and clean. With the truck bed coating we just grab a hose and spray the coop out.
Love this idea. My girls are in an open 8x3x4’ box, three feet off the ground. Two nesting boxes with the roost pole above. The run it’s in is 16x18x8. The truck bed coating in the box would be so much easier to keep clean. I’m in Florida so I just hand movers blankets over the front of the box when it gets below freezing.
Wonderful information. Thank you so much for sharing your experiences. You are a wealth of knowledge. Happy Memorial Day!
Tina
Great humerous advice , I am some way further back on the learning curve – I have chickens and ducks and yes I too underestimated the evils of duck poop ! The plastic roof went down in a spring storm and I now have ducks that roost on the roof joists forsaking their expensive duck houses and one escapee who has built a nest atop the compost heap and is now a hissing catduck !
They aren’t free ranging but unfortunately noone has told them that !
Hello, great information. Do you have any pictures of the pump?
Thanks!
Hay Erica,
We have Golden Cascade ducklings about 2 weeks old. At what point can we introduce the wood pellets in with the ducklings. We are using puppy pads in the bottom of their area now.
The feed store where I got my ducklings had them on pellets, chicks too! So used them at home as well
We have been raising chickens for years . Have a concrete floor in the coop. Best thing we did was start using wood shavings on the floor. So easy to clean.
Please clarify, wood shavings or wood pellets? Do ducklings try to eat them or just leave them alone?
We just started a farm in Issaquah. Our trial and error method has been … replete with errors. I’ve been trying to figure out how to use the surface area of our barn’s roof for rain water catchment to clean out our duck pond everytime it rains. In winter that would be constantly cleaning! We’ve half buried a small row boat to be the duck pond. Just yesterday I got a face full of concentrated duck poop as one of the hose fittings for the pond pump disconnected and sprayed me. Oh the joys of farming! Thank you for your post. I’ll be converting some of the leftover stall mats our predecessors left us into coop flooring. Check us out at http://www.t21farms.com. Evelyn
Please do show filter system! I was going to purchase a swimming pool filter. I have a 30 foot carport I am converting. Broke my arm in 9 places. Construction has halted. A one person construction team is not to conducive to fewer accidents.
My plan is to put pea gravel about 3feet around pond. Sand in run, and concrete in coop. An upper and lower level an paint wood with rubber then cover with floor mat by the foot (cut to the size I need) . Bottom level I have not decided on how to cover yet. The question of pellets and eating risk? How do you water and feed chicks and ducklings. The picture shows 2small tube feeders are they for chicks?
Water for small ones is a question also! Thank you for doing the trouble shooting. I have worked on bird farms and the mess is bad. That is why I am looking at 3 different ground covers. Do you think hardware cloth will work under the pebble and sand? I know it is OK for under concrete.
Love your suggestions !
I always enjoy your “summation” posts that give all the lessons learned–very helpful. The one thing I would add from my own experience is splurging on an “automatic” solar powered coop door. At around $250, it cost almost as much as the entire rest of the coop, which was largely built from recycled elements, but we decided to get one toward the end of our first summer of chicken keeping when we realized that come winter it was going to be dark before we could get home after work to put the chickies to bed. And it’s been worth every penny. It operates off a small battery that charges from a little solar panel and has never run down even though the coop is in dappled light most of the day. Having the door open and close automatically allows us to get up a little later on the weekends or stay out after dark without worrying that the chickens are going to be cooped up and antsy or vulnerable to all those things that go pounce in the night. After two years, I had to buy a new battery for it ($35), but other than that it’s worked like a charm. I reset the program every few weeks as the light changes winter to summer, to be sure it won’t be closing before everyone goes in. It has been a very worthwhile investment.
I have Silkie chickens and blue swedish ducks and of all the searching I have done to build my coop for easy cleaning, your information is the best I’ve seen. And thank you for the pictures.
My husband will be so happy when incorporate some of your time saver ideas. Maybe we can finally have dinner together.
What a wonderful, funny post, full of great tips. Thank you!
I don’t suppose you could provide a follow-up, with a how-to-build-it instructions, or at least photos that show the construction. I get tantalizing hints from the photos in your post, but I am not enough of a wood-worker to be able to take it and run with it.
Any additional info you’d be willing to provide… I would much appreciate. I would even pay for a set of plans with a parts list if you have such a thing.
Can you please share more about the filtration system for the duck pool?
I need to get a nipple watering system sorted in my coop and I love the PVC pipe feeders, they would make so much more room in the coop, especially in winter!
I added those self adhesive vinyl floor tiles to the coop floor in my coop and they have made it sooooooooo much easier to clean out the poop. I added more glue and some silicone sealant and I can hose it out if needed.
Thank you for sharing this post, Erica. I can see some coop upgrades coming for my flock soon!
P.S. I love the shredded paper in the nest boxes, I never thought of that!
I was wondering about you’re concrete floor – did you install it after the coop was built? How ? I’m thinking I may have to go this route because rats ew.
Do you have some sort of electric fencing wire running round top, as cherry tree is above run?
Something we do is use a cement mixer to mix the chicken food. Always the same portion per drum mix it and dump it into a tote so it can be scooped in the feeders. When we have specials locally on food for the hens and don’t have the time to mix it we put it in an old freezer, that is laid down, that no longer works. Just take out the shelves and the insert for the door. Just put back the seal. Best way to keep the mice out of my food. We do that for dog and goat food too.
We ( and our 12 chooks ) love the two treadle feeders that we use to keep the vermin away from the food by opening when the chickens stand on the platform.
They hold a weeks worth of food.
I have put some small composting corals in the covered chicken run that the chickens adore. My little workers help break up the compost and have lots of fun doing it.
Where did you get the floor mats? Why are the sizes?
Where did you get the floor mats?
Looks like the kind they have at Costco. Those are large and heavy duty.
We used a similar idea to your water tub for turtles in our high school vet science program. Used a rubbermaid style stock tank (I think the size used for watering sheep). We also got a large external filter designed for very large aquarium tanks. Put in a log supported by bricks for them to climb out on. Works very well and rarely need to clean tank, just the filter. Turtle poop can be pretty messy, like ducks, but the filter handles it. I’ll get the name in September when I am back in the animal lab..
Could you get a flat PVC cap and drill several large holes in it so they could reach food thru holes?
I too would love to get more info on the filtration system. Anyone who raises ducks knows that is the biggest chore. Enjoyed your post.
I only have 5 hens and that is work enough in my backyard set up. Dang, ducks sound like a giant pain. What are the rewards?
Love the info you’ve shared.What I liked most was the little bit about the curtains and chandeliers!
HIGH FIVE ✋ sister!
I’ve use a clear panel IN the metal roof to act as a skylight. I’ve never had to replace them, but they could be easily replaced. The natural light in the coop made all the difference in the wet, grey PNW climate. I’ve made it a practice for the last 40 years.
Thank you for sharing all this wonderful information! I’ve just moved and will be building a new coop. All of your ideas are great! And I will definitely be using a lot of them! I wanted to share a great way to keep your nesting boxes and eggs 😉 clean. I noticed you have paper shavings in yours. I use artificial turf :). I cut pieces of artificial turf to size and place them in my nesting boxes. You can pull them out and shake them daily and if they get super dirty you can hose them off and let them dry in the sun. My ladies and I love them!
I am also curious about the cement floor. Is it the floor to the run, or just the floor to the coop part? From what I can tell from the Garden Coop instructions, the coop is elevated off the floor of the run, so I can’t quite picture how to make that part cement. But the all weather mats do look like they’re on cement, and those are just in the coop part, right? Not the run? Thanks, I’m trying to design a coop and want to take all of your advice into account!
Erica, I don’t use the pellet stove fuel pellets. They have chemicals in them. There are pellets that are for barns and bedding. They work the same without the chemicals.
Great read! We love chickens here on our nursery! You cant beat the eggs and easy going maintenance. Thanks for sharing
This year I have started filling my nest boxes with all the flowers I deadhead as well as any herbs I cut back. My favorite is the monarda and I use calendula, roses, marigolds and more. The boxes smell wonderful and I think the flowers and herbs help with parasite control.
We built our 5X8 foot walk in coop using free and recycled materials, and spent less than $100 total for concrete for the floor, and shingles for the sides. We make fun of the *fancy* pre-fab $500 designer coops which will barely hold 3 chickens, and deteriorate in one Oregon winter! We use sand on the floor of our coop, and it’s sooooo easy. I scoop that into a 5 gallon bucket using a kitty litter scoop, and scrape the poop boards every morning using a 6 inch sheet rock knife. There’s a minuscule amount of sand with the poop, and I make a compost tea, and use it directly on my garden within a week — I’ve only burnt my plants once in two years of doing this method. (9 full size chickens, poop collected from 1 week, 5 gallons of water, onto a different garden bed each week). Young plants will get a diluted solution. The sludge/sand at the bottom of the bucket gets dumped in a area of the garden that I’m ammending.
Just a couple of thoughts – you may really like the hemp litter that has come out due to it’s amazing absorbancy and low dust – and where you have stapled the hardware cloth what you can do is use a washer or penny and put a screw through it. It holds more area down and creates more surface tension – it will last longer too. Great coop!
This is an amazing post !!! I tend to obsess with planning to create the best I can ???????? and I am moving to a place where I can have chickens – new members to my family. Yay! I am so looking forward to it and I have taken all hints to ❤️ ! Friends have asked me what I will do when they stop laying. To which I replied “They will go into retirement…just like me.” Thank you for your thoughts and time.
Wow, thanks for the read. We’re gathering ideas to boast our chicken coop this spring and will definitely incorporate some of these ideas. We’re also in the PNW to so one of biggest questions is what type of plants grow best with the chickens in a mostly shaded area? I plan on growing some blackberry and possibly salmonberry bushes for us (and the chicks, lol). Again, thanks for thr read
Could you show a picture of what your sawdust pellets look like please? Or maybe a link to a product so I can see what they are? I’d like to try this idea, as line shavings just aren’t working for me.
What is your duck pond filtration system?
HI Erica, I am so pleased that this post found me as I have been gathering most of these ideas over the years that I have experimented with coops and chickens. Now the time has come to put those ideas into practice and it is so good to hear and see your experience with them. I have already built the frame and inside have a wormfarm set up in a bath.Perching is over the bath to catch the droppings and compost them immediately.There is a wire netting lid over the bath and a bucket to catch the liquid manure/worm juice under the bath. If this all will be totally successful has still to be seen, but it was something I wanted to try and I am very pleased so far. Next are the nesting boxes. I am planning the ones you describe but at the moment they still lay their eggs in plastic half baskets propped up against the wall and covered with some sheet material, which works well, but I too want to access the eggs without having to go into the coop. So here I am on my way to a permanent chook solution here in Diamond Harbour. Thank you for your help from my chickens and me.
What is the “very effective filtration system” you use for duck pond?:)
Some really good ideas…thx for sharing! ps. I always wondered about those coops with curtains and flowers..how in the heck do they keep this up? My girls would be swinging from the chandeliers..!
Wow!!! Thank you so much for these ideas and information! I realize we have so much in common by the end of this article. We homeschool two kids as well as having backyard chickens!