Last week I talked about building my wall-mounted DIY clothes drying rack from a Freecycled baby play pen. Several readers expressed their concern that my rack as-built wouldn’t allow quite enough airflow to ensure prompt drying.
I addressed those concerns temporarily by propping the rack when in-use away from the wall using a fruit tree branch spreader. Who knew those things were so versatile? The greater angle of the rack allowed the drying items a lot more airflow.
Good temporary fix, but definitely temporary. Now, I believe I have perfected (or at least substantially improved) the original clothes drying rack concept.
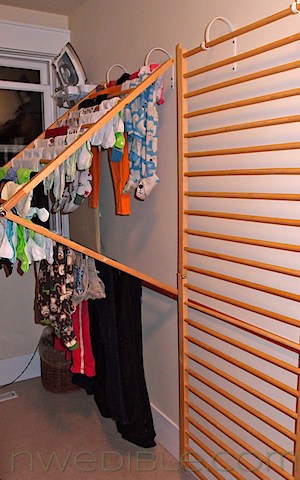
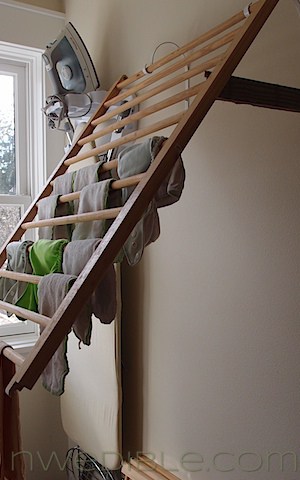
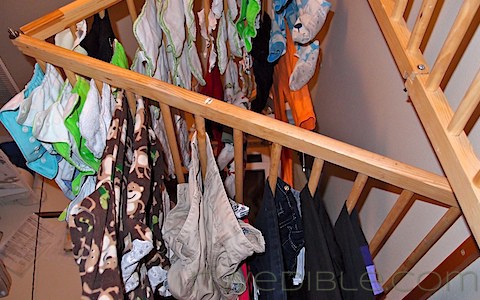
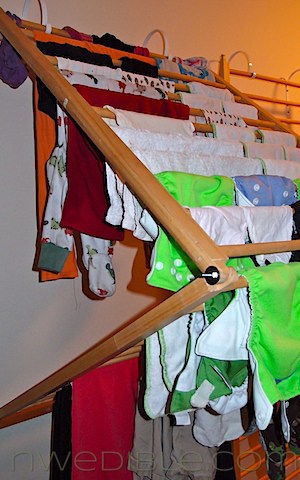
In its new form, each rack is made from two baby jail panels hinged together. When not in use, the racks hang flat, a few inches off the wall. When in use, they fold up to form a two-tiered, sideways-V-shaped rack.
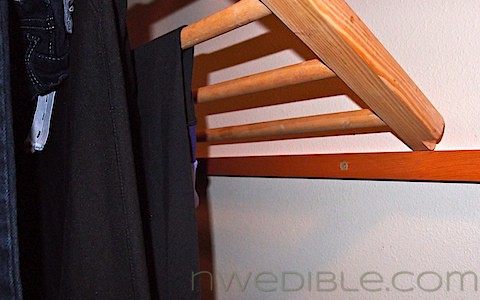
I installed a small piece of leftover 1×1 trim from the garage at the right height to serve as a ledge for the in-use, folded rack.
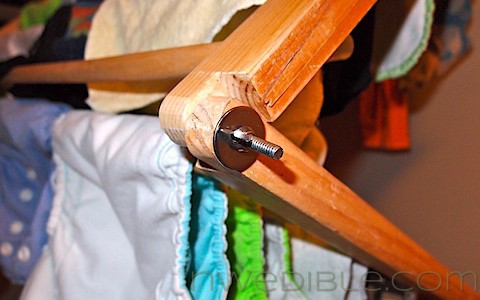
The baby jail panels were designed to screw together. I took advantage of this design feature by slipping a bolt through the pre-existing holes and securing the fastener with a washer and wingnut.
Because of the acute angle, the clothes drying on the rack have a lot more air flow and don’t crowd each other as they hang down.
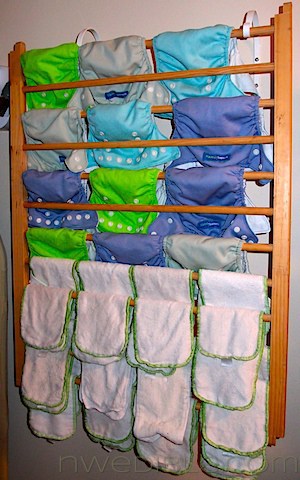
There is a ton of space on this thing – I got an entire load of diapers and half a load of pants and other assorted clothes hung up on one without even bringing the second unit into play. I think between the two racks I could have 2-4 loads worth of items drying at once.
Even though this rack projects into the working space of the laundry room when set up, I can drop it into it’s flat configuration against the wall if I need to throw another load in the washing machine. And here’s the thing: I can collapse the rack while the clothes remain on it. When I leave after starting the wash, I just prop it back up into that sideways-V shape and drying resumes.
Total cost for this project was about $3.00 for the expense of four bolts, washers and wingnuts. Everything else was free or already on hand.
Read all about the first-run version of the DIY Wall Mounted Drying rack to learn more.
307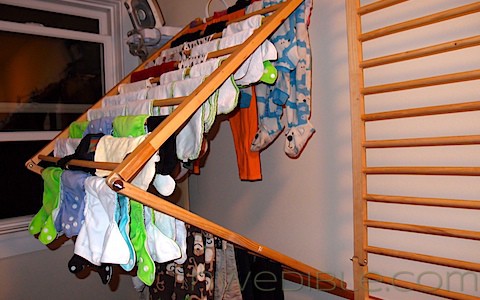
You should patent this and get a company to mass produce it….seriously
I’m gonna do this with my child’s no longer used crib parts….
So many cribs go into landfill due to broken parts,this is a great way to recycle them as well
Just bought one at a garage sale with the same idea – now I know how to do it! Thanks for your posts!
I’m not particularly “green”, I started recycling because pizza boxes and milk cartons were taking up too much space in my trash can. BUT this clothes drying rack is a matter of practicality. The run for my dryer vent is so long moisture gets stuck in it, threatening water damage. When I had it cleaned out, the man cleaning it had never seen a vent so clogged up, so it is also a fire hazard. I’ve been having to vent my dryer into the house and every few loads clean lint off the mesh covering, plus vacuuming out the run. I started line drying jeans because it took so long to dry them. I’ve been adding more and more clothes to the line and realized that in the summer things on the line dry as fast as things in the dryer because I vent the heat out of the house due to increasing summer temperatures. I feel like I’m at war with my dryer!!! Enter this baby jail post….immediately I thought to use an old baby crib I had. So my Dad and I got to work on it this afternoon and I’ve already hung clothes on it. I didn’t read all the comments about mildew and the original stain on the wood getting into the clothes. So I’ll have to keep an eye on that. But I can spray paint the wood with a sealer and keep the room ventilated. PS I’ll probably use the other spare parts from the crib for climbing bean plants! Yay!
What a GREAT IDEA!!!
I have made a post about it on the blog:
http://todiyornottodiy.blogspot.pt/2013/05/grades-de-bebe-estandal.html
thanks for sharing such great ideas!!
TO DIY OR NOT TO DIY
I LOVE THIS IDEA! Ingenious, I’m so glad I came across this. I have son who is fixing to outgrown his baby items, and I am going to do this.
This is a grand idea! I don’t have the room to do it indoors, but I don’t see any reason why it wouldn’t work as well outdoors, mounted on a fence or blank section of house wall.
This is wonderful! You are insanely industrious. We live off grid and in a TINY house, so drying clothes in a dryer is sort of out of the question without our beast of a generator rumbling in the background. I have one of those wooden fold up clothes dryers, but being in an itty-bitty space that sucker just takes up so much room. I’m going to look into my wall options for putting one of these together. Thanks for the idea!!
Hello.. This I genius and am in the process of gathering materials for this! I have exhausted local options for this type of plant hooks. Where did you find them? Please help!! 🙂 thanks in advance!
Update: I ended up buying a 6 pack of these hooks in black from Amazon (figured I will use the extra two for hanging baskets outside) we ended up using both long sides of crib rail, we cut and hinged about 3 or 4 slats up from the bottom. We installed a 1 x 2 pleat board so when the bottom is folded up it rests on that to provide air flow. Thank you so much! I have been using this daily for cloth diaper drying! It has helped so much and love, love, love it!
I forgot to say we used flat hinges on the backside of the rails, we actually bought a shutter hardware kit, because it was cheaper than buying the hinges separately. Hope this helps anyone who is using a crib!
Wow… just found this and you are the one I would want to be stuck on a desert island with. Great thinking.
I love this idea, so much so that it’s on my pinterest board and I am trying to convince the husband to go junk shopping this weekend. 😉 I love this. And I have the wall to put it on too! 🙂
Rhonda Morin
Amazing! I love it!
What a brilliant idea! Simple, elegant, good looking and it works. William Morris eat your heart out!
Your idea & modifications-clever, useful, eco-friendly
Hi, after reading this amazing article i am also cheerful to share
my familiarity here with colleagues.
Grande ideia! Genial!
Love this idea, planning to use it when I move into my new home
whoah this weblog is wonderful i like studying your articles.
Stay up the good work! You recognize, a lot of persons are looking round for this information, you can help them greatly.
The best ideas are often staring you in the face. Well done on a brilliant idea.