So this year I got in touch with my Limey heritage (Hi Grandma!) and decided to try sowing my peas indoors, under light, in an, ahem, long section of Yankee gutter. Today it is almost exactly three months after my initial pea sowing, and I thought I’d let you know how the grand experiment worked.
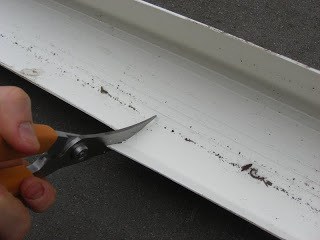
First things first, I bought a section of gutter. It came in 10′ lengths and was cheap – like $7 or so – at my local hardware store. My seed-starting set-up is 4 feet wide, so the first thing I did was cut the guttering into 4′ lengths. I used poultry shears to cut through the gutter plastic, but that’s just because I have a nasty habit of grabbing whatever is at hand that might reasonably have a chance of getting the job done. I’d recommend a hack-saw to do the job right.

I used blue painters tape to seal up the ends of each section of gutter. I did not drill any drainage holes because I didn’t want any roots climbing out and making it difficult to slide the seedlings, soil and all, into their eventual, permanent home.

My 2, 4-foot long lengths and the baby leftover 2-foot long section.

In mid-February (Feb 10th, to be precise) I filled the gutter lengths with potting mix. I mostly use good ol’ Miracle Gro. It is what it is. It’s inexpensive for the volume I use and I get good consistent results. Buy what your budget and conscience will allow. I planted my peas – Sugar Snap Pole – two inches apart in a double row down the length of the gutters. I plant my peas and beans on tight spacing. It seems to work out.


I popped the peas under lights and waited. I kept a close eye on soil moisture, being careful not to overwater due to the dearth of drainage holes. About a week after sowing, they were up and going:


I am here to say that it does not work like that. That 4′ length that’s already in the ground in this picture? That took 10 minutes (and a lot of nervous sweat) to get in the ground. I may have waited a bit too long to transplant, but the peas did not want to just ease out. They were recalcitrant. You know that move that magicians do, where they pull a tablecloth out from under a fully-set table, brimming with full wine glasses and fully set plates, and nothing falls over? Basically that’s the move I had to do to “slide” the peas into the ground.
The angle of the gutter here plus a series of jerking motions is what it took to get those peas into the ground.

The end result was peas that looked a little beat-up, but, hey! they were in the ground. At this point I was swearing up and down I’d never try this crazy stunt again because it just wasn’t worth it to pea-wrangle in the freezing cold of early March.


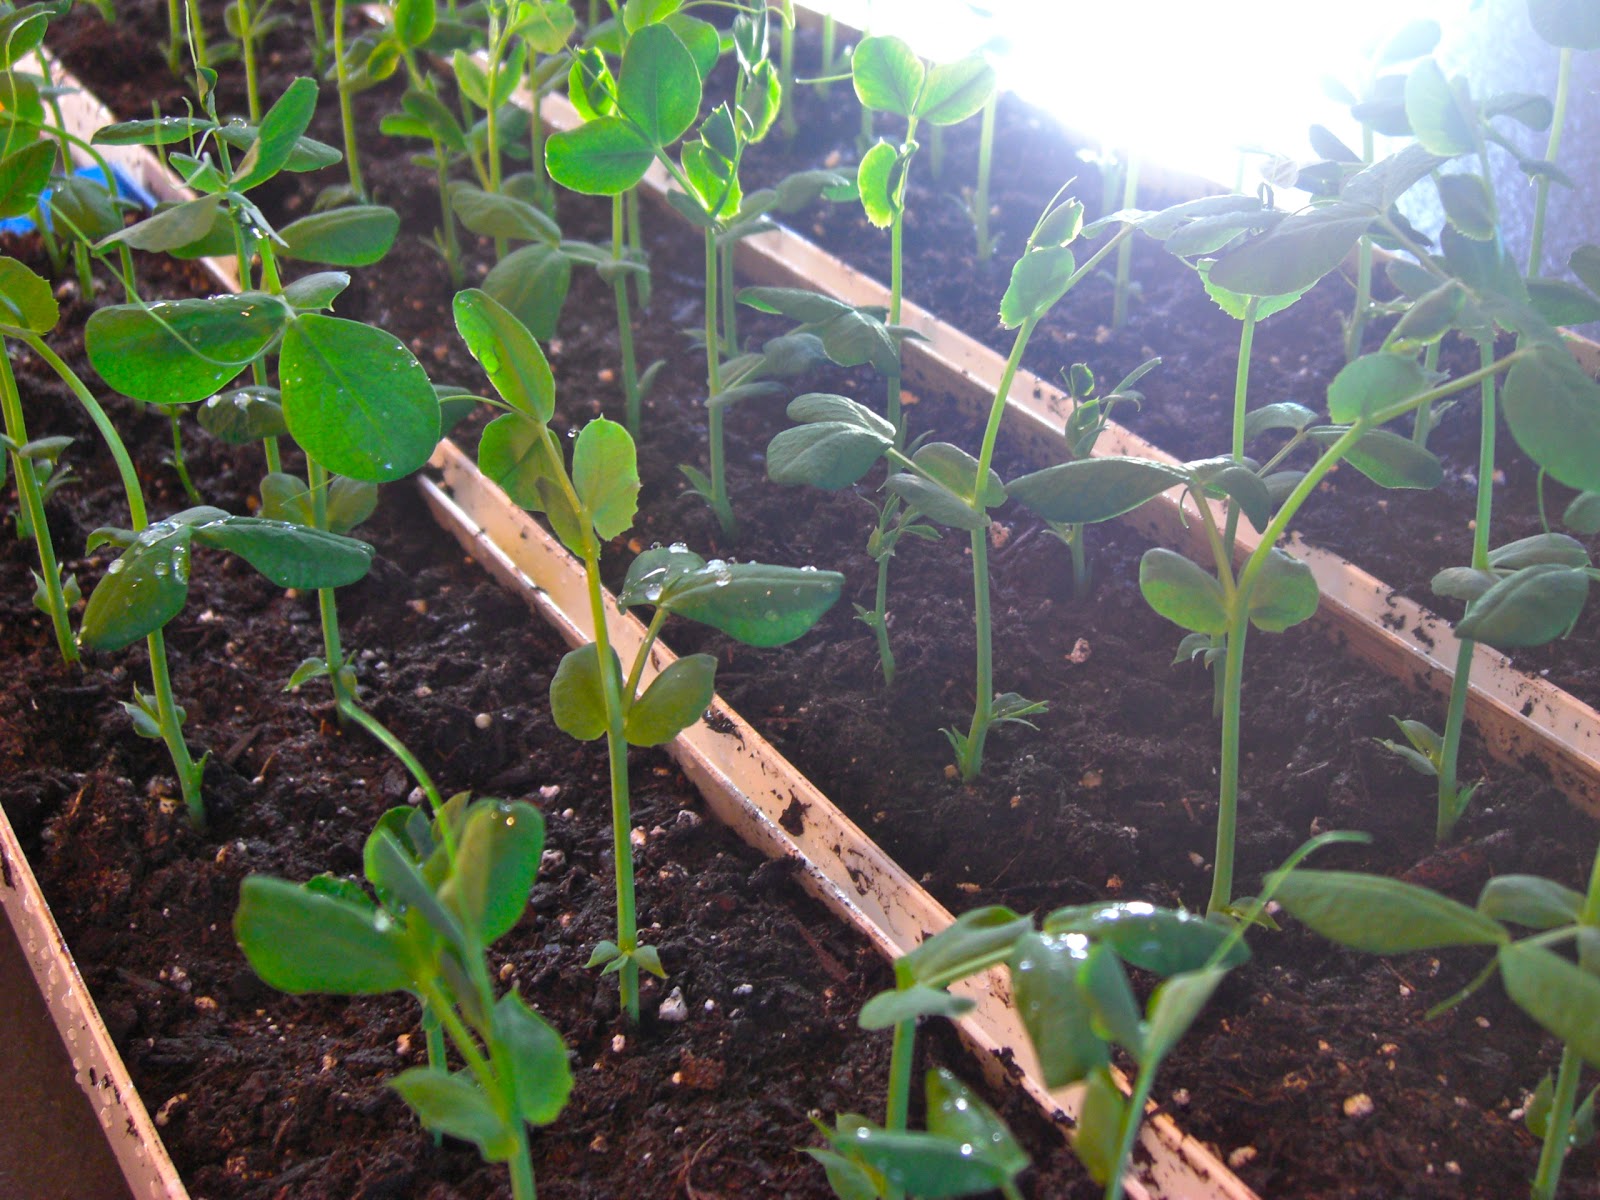
Well, what a difference 3 months makes. The peas have been in the ground for a bit over 2 months. They really took off in April and have been growing like crazy. This picture was taken May 11th, and the peas are almost to the top of the support hoops, which means it’s time for me to improvise some sort of support for their continued growth. These aren’t bush peas, they are the far-superior (to me) pole variety, and they’ve got 4 feet more of growth in them before they’re done.

I’m also rather proud of the stand of lettuces in this bed. This bed is so pretty right now to my eye that I have to force myself to harvest the lettuce. Food production is the whole point of this endeavor, but I find it a bit hard to ruin the pretty living quilt of Butterhead and Frisee and Romaine and Red Looseleaf that has knitted together so effectively.

So there you have it: the peas are thriving. They are well, well ahead of where they would have been had I waited to direct seed. This has been a long, slow, cold spring (quantifiable, record-breaking crappiness), and I have heard many tales of rotted peas and failed germination. In light of how much trouble my fellow gardeners have had getting their spring peas up and going with the direct seed method, I have to say this length of guttering technique has some serious benefits.
I totally wish I had done this! We have had unseasonably hot weather so my peas are growing lackluster at best. Somehow I needed to be able to see the future and put these puppies out in March (when it usually still snowing).
We've had a cold, rainy spring in norther WV. I got frustrated and direct sowed my peas anyway. For whatever reason, they are coming along really well. Next year, I'll try some with this method!
Yankee gutters….who knew? Thanks for the post.
OK, that is probably the most awesome thing I've ever seen! Those British really have wacky-great ideas! I also want to try their technique of storing potatoes in a clamp.
I keep seeing articles about planting in gutters, and haven't tried it yet, but those peas look fantastic, so perhaps I'll give it a go after all. I also hear this works well for radishes.
Wow! I LOVE this idea. Thanks for experimenting and sharing your results. I'm going to try this next year. I'm growing shelling peas (Maestro) and snow peas (Schweizer Riezen) which have purple flowers! Both are from Uprising Seeds in B'ham. They are coming along well, but are nowhere near where yours are. Your garden looks beautiful!! Can't wait to see a virtual tour 🙂
Ha! I was just thinking about how I could do peas better next year…. our weather has been erratic this year and my peas did not do as well as I would have liked. Thanks for the great post… I will try this next time!
It's so cold here that ours haven't even germinated even though they've been planted out for nearly a month. I think they may be a wash-out this year. (It's been raining so long I've just about given up. I'm thinking of selling out and moving to an apartment. Maybe in another hemisphere.)
Ok, I love this! great post!
I direct seeded my peas end of April and cloched them to keep them dry – watering just enough of course. It seemed to work well, and they're obviously not as huge as yours but coming along nicely. About 3" tall now.
I might try your method next year though, I've got extra gutter hanging around! (and a hacksaw hehe)
I direct-sowed mine maybe a month ago (?) and they are just now needing the trellis to go in. I am also bitter that my lettuce and spinach starts are pale imitations of yours. And I thought I fixed the soil! We'll see what happens when and if the sun ever shines here.
Good work! Clever idea… and yes, it does look so pretty…
I like this idea and will try this soon as I start my edamame. Any thoughts on ways to easy sliding it out? My mind instantly jumped to a strip of cotton along the bottom. Hold one end of the cotton and pull the gutter the other way.
Mr Yan – I think some variation on this is a great idea!
Gutter-peas are classic and have been meaning to try it myself. Currently I sow my pea seeds individually in empty toliet paper rolls and plant them out rolls and all when it's time. The problem with sowing them direct with me is that rodents get at them…I'll come back the day after sowing and find precise little holes dug over every seed! 😉
I have to second the comment by Mr. Yan… maybe line the trough with a strip of burlap or other 'natural' fiber, run it up the sides and over a little bit, then just secure one end to a stake at the end of the row when it goes outside, thereby having a tab to help coax it out of the guttering. It can be left right in the ground to break down and also to provide structure for the roots to hold on to.
Thoughts?
Lady B – I have old burlap sacks. I’ll try it and report back.
What about gutter shaped dividers every foot or so to shove the peas out in sections?Probably good cardboard would last as long as it was needed.
I was intrigued by this last year after I read it and wanted to try it for myself. I didn’t have any guttering, but I did have several lengths of 4″ black ABS pipe left over from repairing the upstairs plumbing. I split these lengthwise and did as you suggested. They peas grew quite well and when the time came this week to slide them out into the garden, it went without a hitch. 4 feet of compost and peas starts slid right into the trench I had made in the garden. No roots were disturbed in the transfer, either. The inside of these pipes is very smooth and doesn’t have any angles to create friction. A bit of duct tape over the ends made for quite serviceable end caps.
Let’s see, free use of materials I already had, duct tape (man’s true best friend), no cost, worked well…can’t see any downside here. I would recommend it instead of the guttering. Too bad “sewer pipe” isn’t as cool to say as “a length of guttering.”
Your blog came top of my google search when looking for info on sowing peas in guttering. What a wonderful blog, thank you so much – I’ll enjoy reading it after a day in the garden! I then found another site with info which may help you when transferring stuff to the garden – “When planting from the gutter you will need two people, one at either end. First, in the garden, make a trench the same depth and length as the pipe, scooping out the soil with a trowel or draw hoe. Water the pipe well to bind the compost, then slide the seedlings from the guttering into the U-shaped trench, pushing lengths about 45cm (18in) long at a time. Slide one section in, then push the next forward to the mouth of the pipe, and so on.” I found it here – http://www.telegraph.co.uk/gardening/3340762/Goodbye-seed-trays-hello-gutter.html. Thanks Erica, happy gardening, Sylvi
I’m thinking this might work with beans too? Any thoughts or experiences with this?
I’m going to have to give this a try. We love fresh peas and this may give us the edge we need. Thanks for sharing.
Erica, so here we are in 2014 and you were going to comment on burlap modifications. How did it go? Have you done this again?
YES! Burlap is the trick – line gutters with burlap, start as described, and to transplant pull entire kit and caboodle out into your prepared drill to transplant. Worked like a charm, the burlap made it TONS easier. I’ll be doing it with the burlap liner every year.
Wondering if you could use shorter lengths of guttering so transplanting can be done by one person. Especially for arthritic, Raynauds-prone hands working alone in cold weather.
Hi Sanj
I’ve done this the last two years and my lengths of guttering are about 4 foot and I manage them alone, but don’t have arthritis etc. I’m sure you can use any length you like. The burlap sounds a good idea but I’ve found I manage fine with cutting away the tape from one end and shaking the guttering a bit to get the compost and contents moving. I have to have the guttering at quite a steep angle to get it started. SUCH a good idea to start the peas in guttering in the greenhouse. Happy gardening!