So, you start a lot of seeds and you’re running out of money for seed starting mix. Right-o. Story of my life.
That’s what prompted me to investigate DIY bulk seed starting options, and I’m so glad I did. This is a huge money saver if you are a big seed-starter!
The cost of seed starting mix is primarily in the mixing. Which is to say, if you are willing to spend a little time turning together a few basic ingredients, you can make your own seed starting mix in bulk for way less money than the pre-made stuff costs.

Basic Seed Starting Mix
Here’s the basic proportions for a good, all purpose seed starting mix, suitable for starting vegetables, herbs, flowers…whatever.
- 2 parts sphagnum peat moss OR coconut coir – for moisture retention
- 2 parts finely sifted finished compost, vermicompost or a blend – for nutrients
- 1 part perlite – for drainage and to reduce weight
- 1 part vermiculite – for drainage, moisture retention and to reduce weight
- For each 1 cubic foot of peat moss used, add 1/2 cup (6.5 oz.) finely ground dolomite lime to balance the acidity of the peat moss (see footnote).
- For each 1 cubic foot finished mix, add 1/4 cup balanced, organic slow release fertilizer (such as 5-5-5).
Ingredient Breakdown
Let’s look at each of these ingredients in turn.
Sphagnum Peat Moss OR Coconut Coir
Sterile, inexpensive, acidic and great for holding moisture, this product is typically sold by the compressed bale. Bales are usually 3.0 or 3.8 cubic feet. Peat moss is carved up from ancient bogs, and most U.S. sold peat moss is mined from Canada.
Reasonable people disagree about the sustainability of peat moss. The peat moss industry would like to assure you that there is lots and lots of peat in northern Canadian bogs. Other reliable experts feel very differently.
I don’t think buying a bale of peat moss is the greatest environmental sin most of us will ever commit in our lives, but concede that there are good arguments to find a substitute for this product.
The most common substitute is coconut coir, which has it’s own set of sustainability issues and may not promote strong seedling growth as well as peat moss. If you prefer to use coconut coir, get the horticultural grade, finely ground kind and substitute 1 to 1 for the peat.
Peat moss and coconut coir are pretty equivalent, price-wise, but peat moss is widely available and coconut coir can be harder to find in bulk. At the time of writing, a 3.8 cubic foot bale of peat moss is $12 locally. Online, I’m seeing fine coconut coir available in 2.5 cubic foot bales for about $11 plus shipping, which can be substantial.
Compost and/or Vermicompost
Compost supplies background nutrition to your seedlings once they are up and growing, reduces the amount of peat moss used in the mix, and helps to prevent soil-crusting which can limit seedling emergence. Vermicompost seems to have a beneficial effect on seedlings, and some studies suggest it reduces damping off disease.
Homemade or purchased compost, either is fine, so long as the compost is well and truly finished and is screened to remove any big chunky bits. Both homemade vermicompost and most backyard-made compost are alive, and as such will contain the good and the bad of soil life.
It’s possible to introduce a ton of seeds, and possibly pests and pathogens to your seed starting with unsterilized compost. If you use vermicompost with a lot of tomato seeds in it, for example, and then sow tomato seeds, you may very well end up with volunteer tomato seeds instead of the varieties you intended to sow.
The cost of compost can vary greatly depending on where you get it, how you buy it, and what characteristics you want from your compost. The homemade stuff is free, of course. (Yay free!) A bag of reasonably good quality finished compost purchased by the bag costs about $4 a cubic foot where I live. Use your own best judgement when deciding if commercial, sterilized compost or homemade compost is the right choice for you.
Perlite
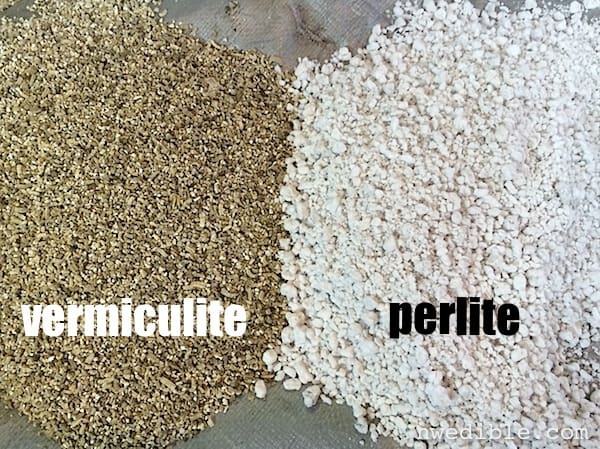
This lightweight soil amendment is used to improve drainage and lighten potting mixes. It looks a bit like ground-up styrofoam but it’s actually a totally natural product made by heating a silica-rich volcanic rock. At high enough temperatures the moisture in the rock vaporizes and the perlite rock “pops” just like popcorn, expanding into this fascinating, puffy, lightweight, white pebble.
Perlite doesn’t hold much water, so it promotes a nice balance of moisture and air at the root zone. You have to handle it fairly gently, because the drainage promoting and aeration benefits of perlite are diminished if it gets squished and loses it’s puffy nooks and crannies. I bought my perlite in 2 cubic foot bags at the big-box store for about $17.
Vermiculite
Similar to – and easily confused with – perlite, vermiculite is another silica rich rock which expands when heated into long tubes. These worm-like tubes are how vermiculite (literally, “worm-breeding rock”) got its name. Manufactures crush vermiculite into flakes, then super heat those flakes so they expand into crazy rock worm pieces. The expanded vermiculite is then crushed further or screened to get pieces of consistent sizes.
Vermiculite has similar drainage promotion, soil-lightening and aeration benefits to perlite, but it also holds moisture well and releases it to surrounding soil. This helps moderate the moisture levels in the seed-starting mix and reduces the need to babysit your seedlings with the watering can. I bought vermiculite in 2 cubic foot bags for about $21.
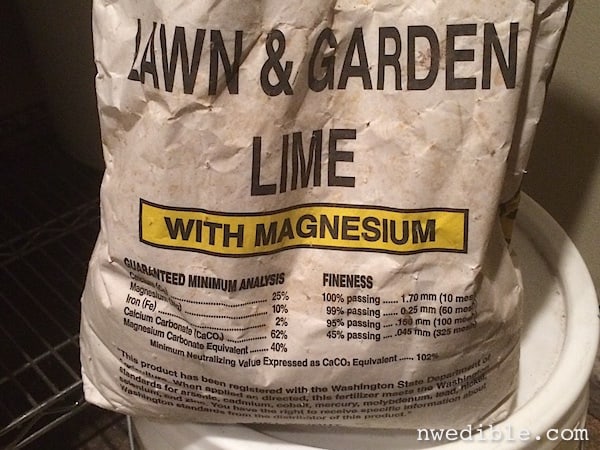
Dolomite Lime
Dolomite is a good source of calcium and magnesium, and shifts the pH of the peat moss from strongly acidic to the barely acidic pH most plants prefer. Use finely ground powdered dolomite lime to get the fastest-acting pH adjustment. It should look kinda like greyish flour, not like steel-cut oats.
If you use peat moss, the dolomite lime is essential for the best results. If you use coco coir, sharp sand, or some other substitute for the peat moss, the lime isn’t necessary. A giant 40 or 50 pound bag of lime will run about $5 and last you basically forever.
Slow Release Fertilizer
In combination with the compost, this adds background fertility to help your plants grow nice and consistently so you don’t have to babysit them with foliar feeds all the time.
I recommend something that’s specifically formulated as slow release for your big batch, and then if you notice your plants look hungry, you can feed them a little bit of fast acting fertilizer, like blood meal, as needed.
Dr. Earth makes a good basic 5-5-5 blend that I’ve used in the past, but if you have a fertilizer brand you like, the name on the bag isn’t that important. Price varies widely.
Is It Cheaper? How Does The Math Play?
 You can make a giant batch of this seed starter mix with:
- 1, 3.8 cubic foot bale of peat moss
- 4 cubic feet of commercially prepared compost
- 2 cubic feet perlite
- 2 cubic feet vermiculite
- 2 cups of dolomite lime
- 3 cups of organic slow release fertilizer
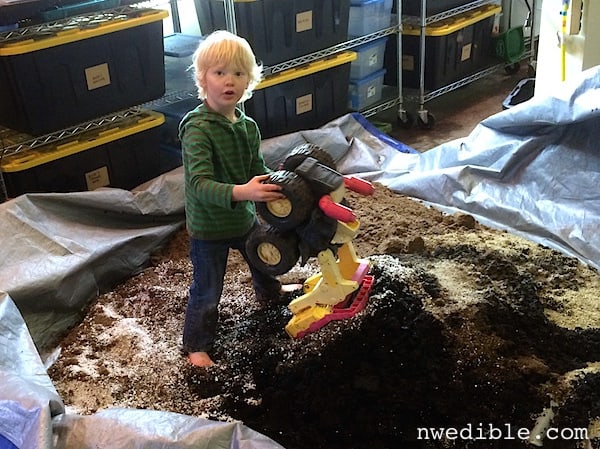
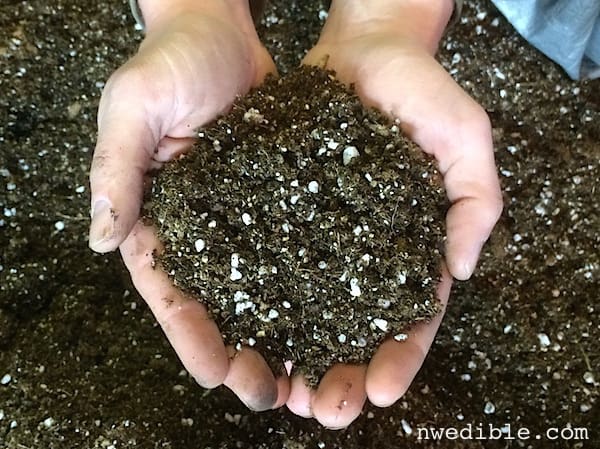
You’ll end up with about 12 cubic feet of finished seed starting mix and spend about $70 (less if you use homemade compost).
12 cubic feet is a lot (4 year old shown above for scale) so don’t go making a batch this size unless you start a lot of seeds. It works out to about 360 quarts of seed starting mix.
A similar commercial product, like Gardener’s Supply Organic Seed Starting Mix, costs about $10 for a 6 quart bag.
DIY Seed Starting Mix
- Per Quart: 19 cents
- Per 6 Quarts: $1.17
- Per 360 Quarts: $70
Commercial Seed Starting Mix
- Per Quart $1.66
- Per 6 Quarts: $9.95
- Per 360 Quarts: $597
Verdict: $70 vs. $597! DIY Wins Big!
Footnote: About Added Dolomite Lime
I knew from the texture of this mix that seedling roots would love it. It’s moisture retentive but light, so it supplies that crucial blend of air and water that plants need to balance.
The big question mark was how much dolomite lime to add. The peat moss is very acidic by itself – so much so that it would stunt or even kill seedlings grown in it. Lime is needed to moderate this acidity, but how much?
I wasn’t sure, so I checked out what the experts do.
Cornell University pretty much invented the Peatlite potting soil blend used by plant growers all over now. Their basic seed blend calls for:
- 10 pounds dolomite lime per half-cubic yard (13.5 cubic ft) of peat moss. So that’s…
- 12 oz. dolomite lime per 1 cubic foot peat moss
Utah State University goes a little lighter on the lime.
In their basic greenhouse mix, they use:
- 800 grams, or 1.76 pounds dolomite lime per 6 cubic foot peat moss. So that’s…
- 4.6 oz. dolomite lime per 1 cubic foot peat moss.
It’s important to note that in both cases, the only other ingredient in the Utah State or Cornell mixes is perlite, which doesn’t affect pH, so we can safely extrapolate that these numbers represent the lime necessary to buffer a given quantity of sphagnum peat moss.
Peat moss varies in it’s pH, but I don’t have a full soil testing lab at my disposal, and I needed a starting place. My first instinct was to simply split the Cornell-Utah State difference, and go for a nice, round 8 oz. per cubic foot of peat moss.
As it turns out, that’s an inconvenient amount to measure by volume, being just a bit over a half cup, but less than 3/4 cup.
Since this mix contains other bulk ingredients, including compost and vermiculite, which also help to buffer the acidity of the peat moss, so I thought it prudent to err on the side of less lime and easy measuring, and rounded down to an even 1/2 cup of finely ground dolomite, which works out to about 6.5 oz.
Then, I used this mix and watched my plants.
I wanted to see how they germinated, leafed out and grew. Across the board I’ve been very pleased. There’s no sign of nutrient tie-up, which happens when the pH range is off. The plants have good color, nice strong growth – I’m a happy plant mama.
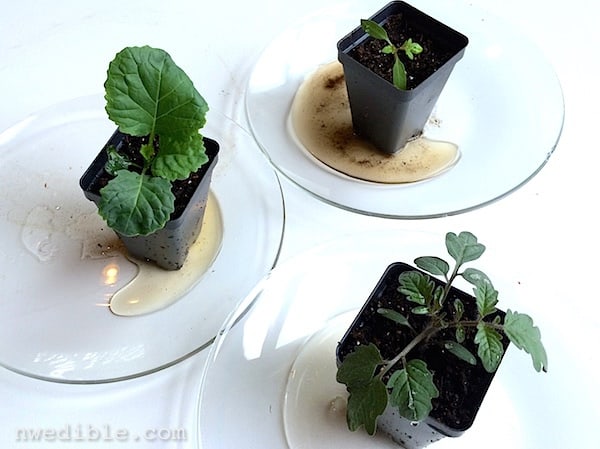
But just to be sure, before I shared this mix, I performed a not-very-scientific pH test of the leachate of some of my seedlings. I kinda following the instructions here. I say kinda, because I did one stupid thing that skewed my results.
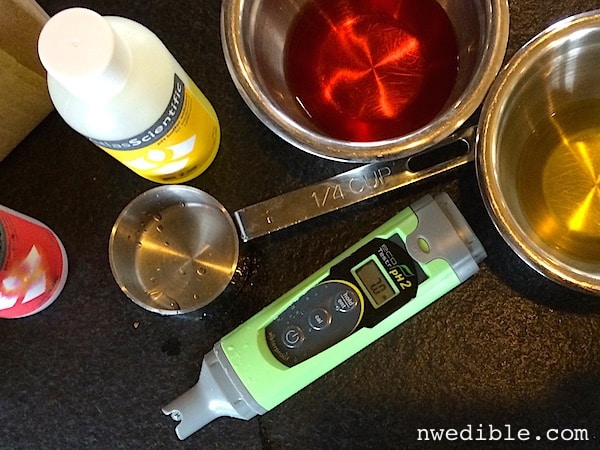
I watered my seedlings, let them sit for a few hours, then poured several tablespoons of tap water over three different seedlings set on a glass plate. The leachate dripped through, and using my just-calibrated pH tester, I measured the pH of the liquid.
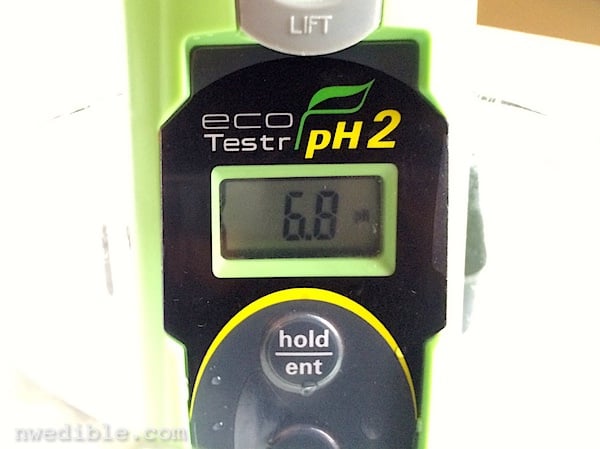
Consistent 6.8 on all three samples. Very slightly acidic. Not too bad. I’d prefer a slightly lower pH, but I can live with it. Then I realized my natural tap water runs alkaline and I really should have used distilled water for this test. D’oh!
I didn’t have any distilled water, so I pH tested my tap water, just for reference. It was 7.4, or slightly alkaline. That confirmed what I’d thought – my leachate pH results were skewed a bit upwards by my tap water, and the pH balance of my potting mix was just fine.
The seedlings certainly think so, and I’m saving a ton of money starting them!
24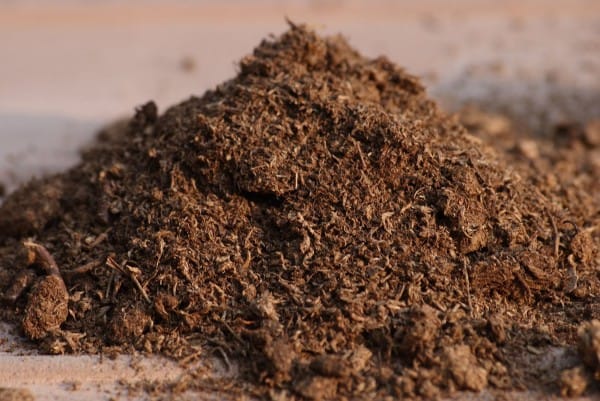
Hi, I just wanted to know how long this mixture would be ‘good’ – could I make a large batch now and use it for the next five years? Thanks!
Hi Lauren,
That’s my plan. 🙂 I’ll be honest: I haven’t kept this mix for five years, so I don’t have direct experience with that timeframe. None of the components of this mix should degrade for several years, as long as they are kept very dry. Once the mix is moistened, I’d use it within a few months. I transferred this giant batch into a bunch of big plastic tubs I had and stacked them in the garage. I only use one tub at a time. I intend to use mine until I run out, even if it takes a couple years. Signs of potting mix that’s off are mold, or an unpleasant sour smell. A basic “dirt” or “compost” smell is fine.
I got a soil blocker for Christmas, do you think this mix would work well with that? I like the $avings!
Hi Evangeline,
I just tested this mix with my soil blocker. Like all soil-blocker soils, you have to get it relatively moist when first compressing the blocks. But they hold together perfectly. Here’s a picture:
Thanks!
I’ve been using soil blocks for years and follow a soil mix recipe from Elliot Coleman. The ratios look very similar to this one, so I bet it would work great.
I was excited to read the title of the posting, and then immediately saddened to read about both peat moss and coconut fiber. Surely we can make a lovely seed starting mix with materials a bit closer to home! I live in a Pacific Northwest forest, with plenty of light fluffy duff under the trees. Has anyone experimented with this? If I were to, do you have any suggestions? Thank you…..
A photography mentor of mine had a very large rubber stamp made (I’m older than Birch Bark, but a bit younger than dirt) that simply said TRY IT. Folks would send him a “will this work?” letter… he simply stamped it and returned their letter 🙂 Please share your findings… maybe Erica will publish you…
P.S. if you Google this request you WILL find every answer from “yes, go for it” to “really nasty ‘no’s'”
I love these breakdowns, they are so helpful! I have put off making my own mix, even though I suspect it’s cheaper, just because sometimes you need ONE thing you don’t make yourself, ha. Plus I only go through a bag or two a year… so I rationalized the cost savings would take a while.
Anyway I went and checked my bag–I get 2.8 cubic feet (per google 71 dry quarts) for 20 bucks, which is ~28 cents a quart… so now I don’t feel so bad! This was Jiffy Pro-mix, basically w/ the same ingredients (roughly). At our local garden supply store organic and regular versions were even the same price, which is nice.
Awesome! And I totally know what you mean about not DIY’ing everything – that’s how I feel about automatic dishwashing detergent. It’s a total B-U-Y, not D-I-Y for me. 🙂
Sooooo.. if we start seed with a commercial mix that doesn’t have any nutrients (like you’re getting out of the compost), should we look at amending the soil in the trays with a light dose of liquid fertilizer?
Once the seedling has true leaves, yes. This is one reason I’m not a fan of most commercial seed-starting blends. I believe the lack of background fertility is a big time drawback for home-scale gardeners. For supplemental fertilization, I like liquid fish emulsion.
Very nice write-up. Yes, very similar to Eliot Coleman’s mix. One caveat I have been made aware of is to wear a respirator (or stay upwind if outside). The dust floating off ALL these products has the potential for harm.
Great tip. I didn’t, but I will wear a dust mask in the future – no reason to risk a lung disease for potting mix.
We are taking commercial crop on cocopeat slab under strict IPM measures in Saudi Arabia. Quite promising results.
I hope that as coir becomes more popular that it’s easier to obtain larger quantities. If I hear of a good source, I’ll be sure to pass it on to you.
Great article! I’ve mixed my own for 25 years now, it’s great to be able to fine-tune more drainage or less based on the type of seed you are sowing. One note, I know you don’t like the lack of soil “fertility” in commercial seed sowing mixes, but honestly that’s the whole point! It’s intentional to limit the really huuuge problem of damping off and tiny seedling diseases. That is really the one sole thing that actually makes it a seed starting mix and not a regular potting soil: lack of biotic fertility. You are also a little too wet with that mix, so just deleting the compost will give you healthier seedlings without all that bacteria, and better roots with proper drainage. They really don’t need that huge boost of nutrients at that young stage.
One more tip is that you can use a combination of peat & coir to help balance ph a little, if you need to (peat is more acidic, coir is less). Good growing!
Do you heat your mix to sterilize?
Eliot Coleman has been growing for 40 years and says he never sterilizes his soil blocking materials.
This is probably going to sound like a really dumb question, but… why not just use good garden soil?
(I should say that I’ve started my seeds for the past 6 years in pretty much whatever I had soil-wise, and I didn’t notice a huge difference in results. I usually start a few hundred seedlings indoors, and I have a 1/3 acre garden.) I’m super cheap and don’t like to spend any money that I don’t have to, but if there’s some huge reason to use seed starting mix, and I’m missing it, I am willing to change my tactics.
Hi! I’m getting ready to dive in and use this recipe! Just one question…I have a bag of worm castings. I know you have compost/vermicompost here. Can I use the worm castings for this purpose? I figured I’d ask before I get started. Thanks!
Should be fine – worm castings are great!
Thank you now I understand why my Cole crops did not grow they came up but refused much bigger thank you for the edification I will now add The appropriate amount of line thank you once again
This is just terrific! Thanks for this very informative piece on the cost and benefit of DIY seed starting mix. I will certainly try this recipe out this season. I am putting together a budget and if these numbers are current to pricing today, I’m very eager to plug them in!! Thanks again…!:-)