I made 6 gallons of liquid soap so you don’t have to.
You know about Dr. Bronner’s Liquid Castile Soap. It’s been an all-in-one, all-natural cleaning solution for generations of hippies, greenies and all manner of natural living advocates. Dr. Bronner’s is great, but it’s not the cheapest cleaner out there.
So, these were my goals: to create a cost-effective, basic liquid soap that most people could make with the gear they have around the house and commonly available oils.
I wanted a recipe that was reliable, safe and performed similarly to Dr. Bronner’s in home and body care recipes. The result should be enough finished soap to make this worth the DIY hassle, but not so much soap that it would be overwhelming to store or use in a reasonable timeframe. My goal was a total of about 1 gallon of finished liquid soap.
Two weeks and 6 batches of liquid soap later, I think I’ve gotten it down. Wanna make your own liquid castile soap? Here’s how I do it.
1. Assemble Your Stuff
Like any true soap, liquid castile soap is made through the chemical reaction of fats and a very strong alkali called lye. This reaction is called saponification; when it’s complete the fat and lye are totally transformed into a new thing we call soap.
Tools You’ll Want To Make Liquid Castile Soap
The process of making liquid soap is make a zillion times easier if you have:
- A large crock-pot (6 quarts or larger, please). If you don’t already have a crock-pot, check the thrift store first. I have an older version of this crock pot. It’s fine. I think they are all about the same, honestly.
- An immersion blender – I like the kind with a stainless blender attachment.
- A reliable digital scale that can measure both ounces and grams. I have this kitchen scale. It’s been really good.
Any time you’re working with lye, use only heavy-duty glass or stainless bowls. No aluminum, please, or you’ll find both your soap and your vessel quite destroyed.
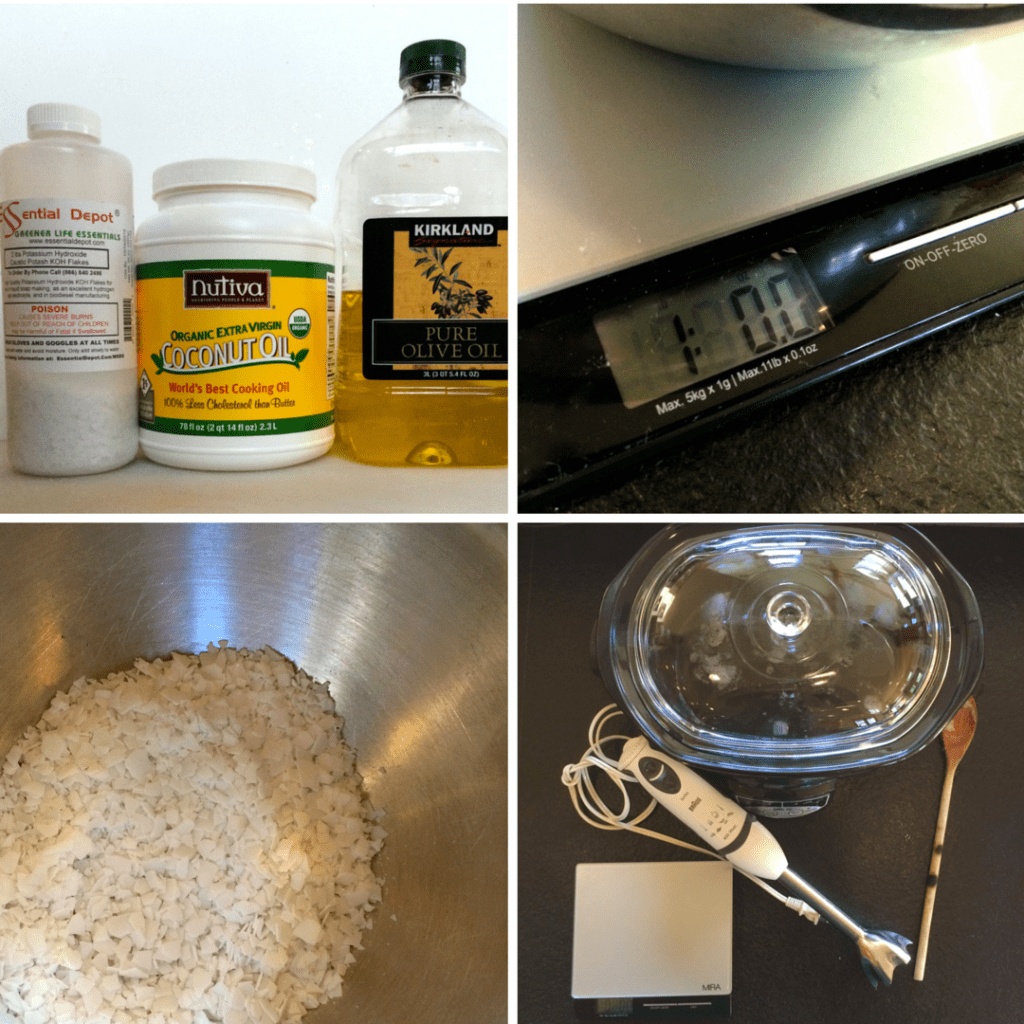
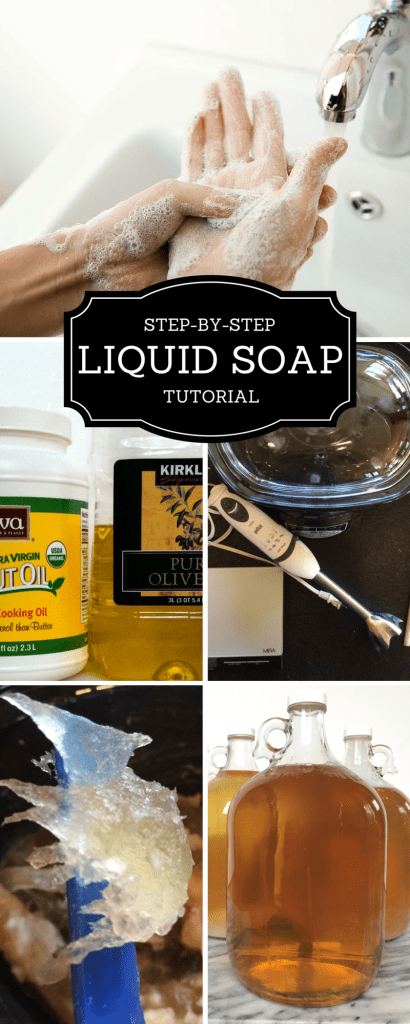
Essential tools: crock pot, immersion blender, digital scale.
Lye For Liquid Castile Soap
Liquid soap is made with a type of lye called potassium hydroxide. This is the lye you want.
Potassium hydroxide is different from sodium hydroxide, the drain cleaner lye used to make a hard bar soap.
These two lye saponify differently, are used at different rates, and result in different textured soaps. So, even though both are called lye, sodium hydroxide and potassium hydroxide are not interchangeable in soap recipes.
- Potassium hydroxide saponifies fats without forming hard, opaque crystals so the resulting soap can be diluted to a liquid consistency without getting gloopy.
- Potassium hydroxide tends to give a more bubbly lather, highly desirable in liquid soaps.
- Potassium hydroxide is only about 90% pure as compared to nearly 100% pure sodium hydroxide, and this must be accounted for when you create a liquid soap formula. (See more about this in the Lye Calculations for Liquid Soap sidebar)
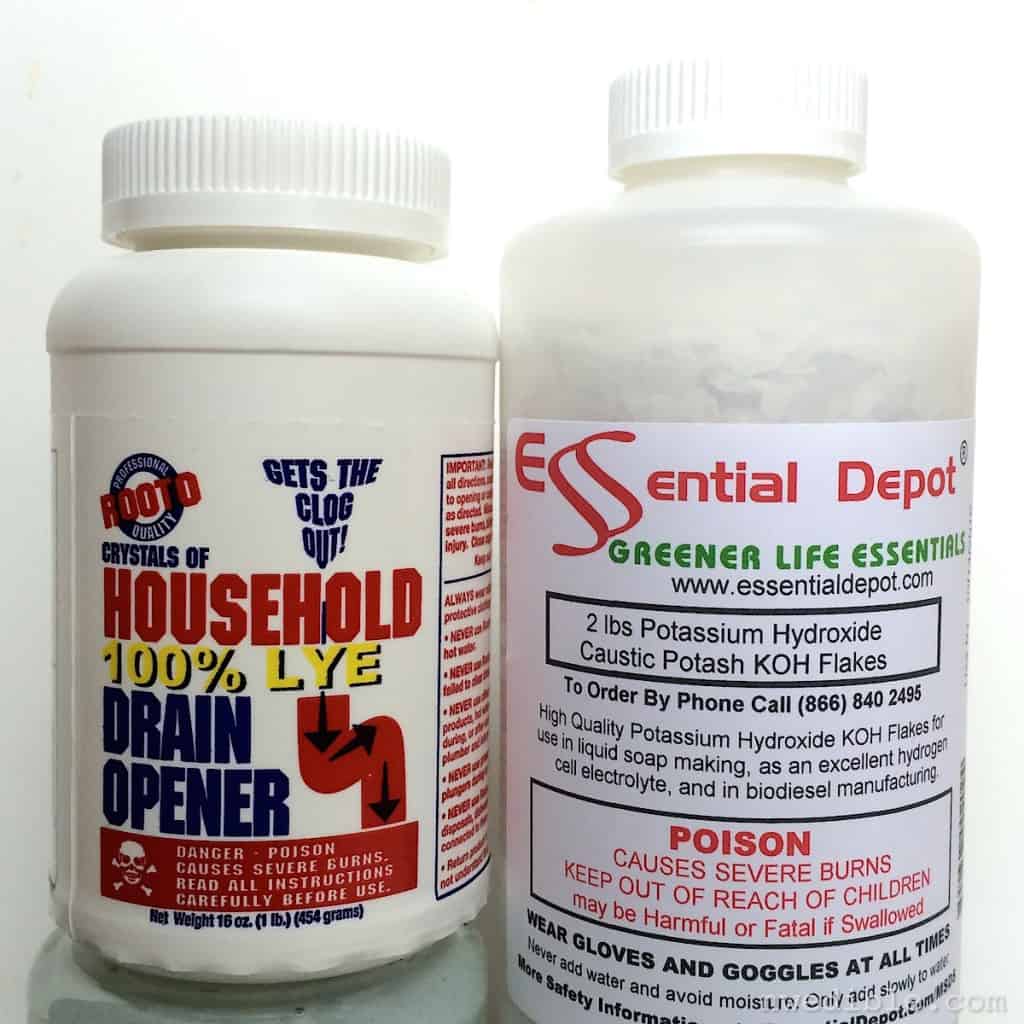
Sodium hydroxide for bar soap on left; Potassium hydroxide for liquid soap on right.
Oils For Liquid Castile Soap
Castile soap is made exclusively with vegetable oils. There will be no lard, tallow, or other animal fats in a Castile soap. Traditionally, a Castile soap was made with 100% olive oil, but modern Castile-style soaps, including Dr. Bronner’s, blend in other vegetable oils, like coconut.
For my liquid soap, I used a 60/40 blend of easy-to-find olive and coconut oil. That’s what you’ll see in this tutorial.
- Olive oil is mostly long-chain fatty acids. Olive oil soaps have a fine, moisturizing lather that’s gentle on the skin but can feel slimy on its own.
- Coconut oil is full of medium-chain fatty acids which create a soap with strong cleaning ability and big, well-structured bubbles. Coconut oil soaps can be drying because they grab and hold oil – i.e., clean – really well
Put coconut and olive oil together and you get, in my opinion, a nice, all-purpose liquid soap with good bubbles. The result is a cleanser that is strong enough to tackle greasy grime in your kitchen while still being skin-friendly.
2. Prepare The Oils and Lye Solution
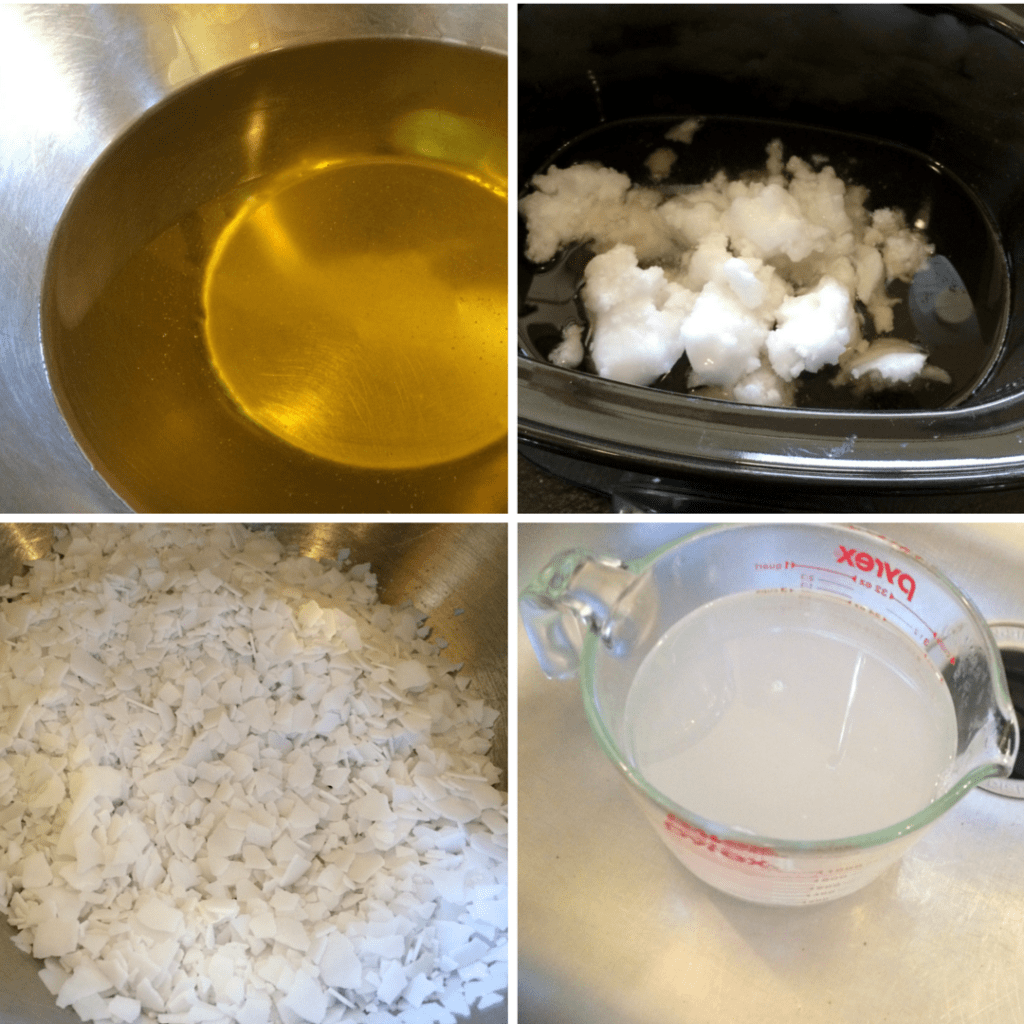
Measure all ingredients carefully. No one wants a Fight Club situation.
Carefully measure the olive oil and coconut oil into your big ol’ crock pot. Turn the heat to high to allow the coconut oil to melt.
While the oils are warming, carefully measure the water into a stainless steel bowl or pyrex pitcher. Set the container of water in your sink.
Put on your safety gear: heavy rubber gloves, goggles, etc. Measure the potassium hydroxide lye flakes into a small stainless or heavy duty glass jar. Carefully tip all the lye flakes into the water. Never add the water to the lye – always add the lye to the water.
The lye-water mixture will bubble, hiss and look generally terrifying. This is normal. Don’t stick your face over the lye mixture or breathe in the lye fumes. The lye flakes will dissolve quickly – give them a careful stir if needed to encourage this.
3. Stick Blend Your Soap To Trace
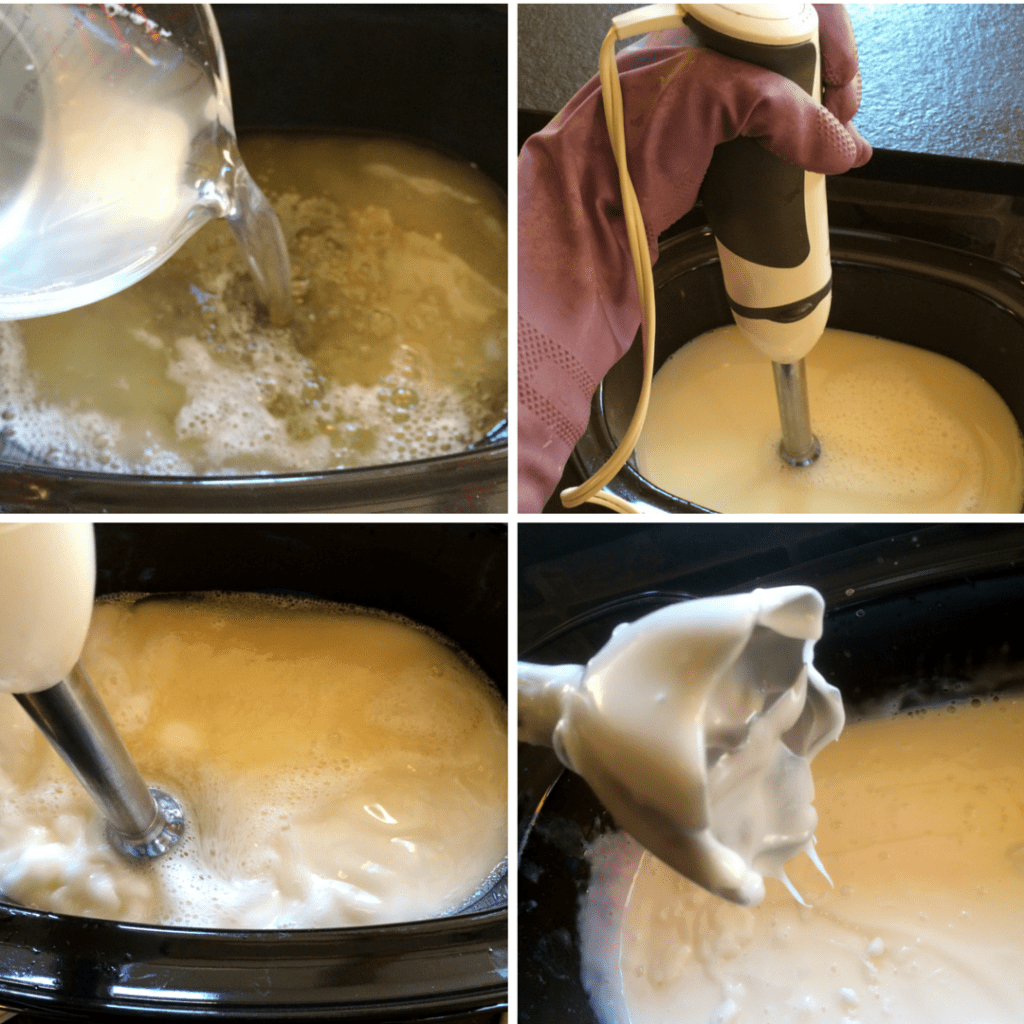
Stick blend to thick trace – look for a texture like Elmer’s glue.
You’re still wearing your gloves and stuff, right? Good – it’s time to bring the oil and alkali together to create soap, glorious soap.
When the lye is fully dissolved, carefully tip the lye-water mixture into the warm, melted oils in your crockpot.
Get out your immersion blender. Blend the soap mixture on medium until it turns uniformly creamy and begins to thicken slightly. This should take about 5 to 10 minutes.
Now, go do something else, but don’t stray too far. For the next half hour or so, come back to the crock pot every 5 minutes and give your soap a good blending with the immersion blender. Every time you show up for blending duty, you’ll notice your soap paste gets thicker, paler and more bubbly.
Keep periodically blending until your soap reaches a thick trace – you’re looking for a texture like Elmer’s glue – and it’s no longer practical to use your immersion blender in the soap.
4. Cook The Soap Paste

Give the soap paste as much time as needed to get to the fully gelled, translucent stage shown lower-right.
At this point we begin to “cook” our soap paste. With your crock pot still on high heat, adjust the timer to 3 hours and set the lid on the crock pot.
As the soap cooks, it will become increasingly translucent, moving from a runny white liquid to a puffy taffy texture to, eventually, a yellowy-clear, thick gel. This is normal. I think of these stages as:
- runny cream
- cake batter
- Elmer’s glue
- puffy white taffy
- confused semi-gelled blob thing
- translucent gel
During this cook period, we’re going to take the soap from Elmer’s glue texture to finished, translucent gel. The soap paste in the crock pot will mostly tend to itself during this time.
To keep the gel progressing evenly, periodically fold your soap paste over on itself and stir it around with a sturdy wooden spoon (very sturdy – I broke a spoon on soap batch #4) or high-heat spatula.
As the soap cooks, it will get puffy as the air bubbles trapped in the soap heat up and expand. Eventually, the paste will start to look more translucent. If your crock pot has hot spots, you may see some chunks of fully gelled soap even if the bulk of the soap paste isn’t ready.
That’s all ok.
Just aim for a good fold-over and stir about every 30 minutes or so, or more often if you can. After 3 hours, check your soap paste. When your paste is done it should look quite a bit like amber – translucent and golden.
Don’t rush getting to this stage – if your soap needs more time at the end of the 3 hours, take the time to cook the paste for longer – nothing bad will happen to the soap paste.
5. Check Clarity
Once the paste looks fully gelled and translucent throughout it is ready for the next stage.
At this point, the soap will probably be fully saponified and ready to dilute. But better safe than sorry, so before we commit to dilution, we’re going to do a clarity test.
Clarity (in combination with carefully measured lye) is a very good test of full saponification. If your soap paste makes a cloudy dilute soap, it is not done cooking. Cloudy soap* can indicate non-saponified oil (too much of this can make your soap go bad) and potentially non-saponified lye (this can cause chemical burns).
If, however, the diluted final soap is translucent enough to read through, your soap paste has finished cooking.
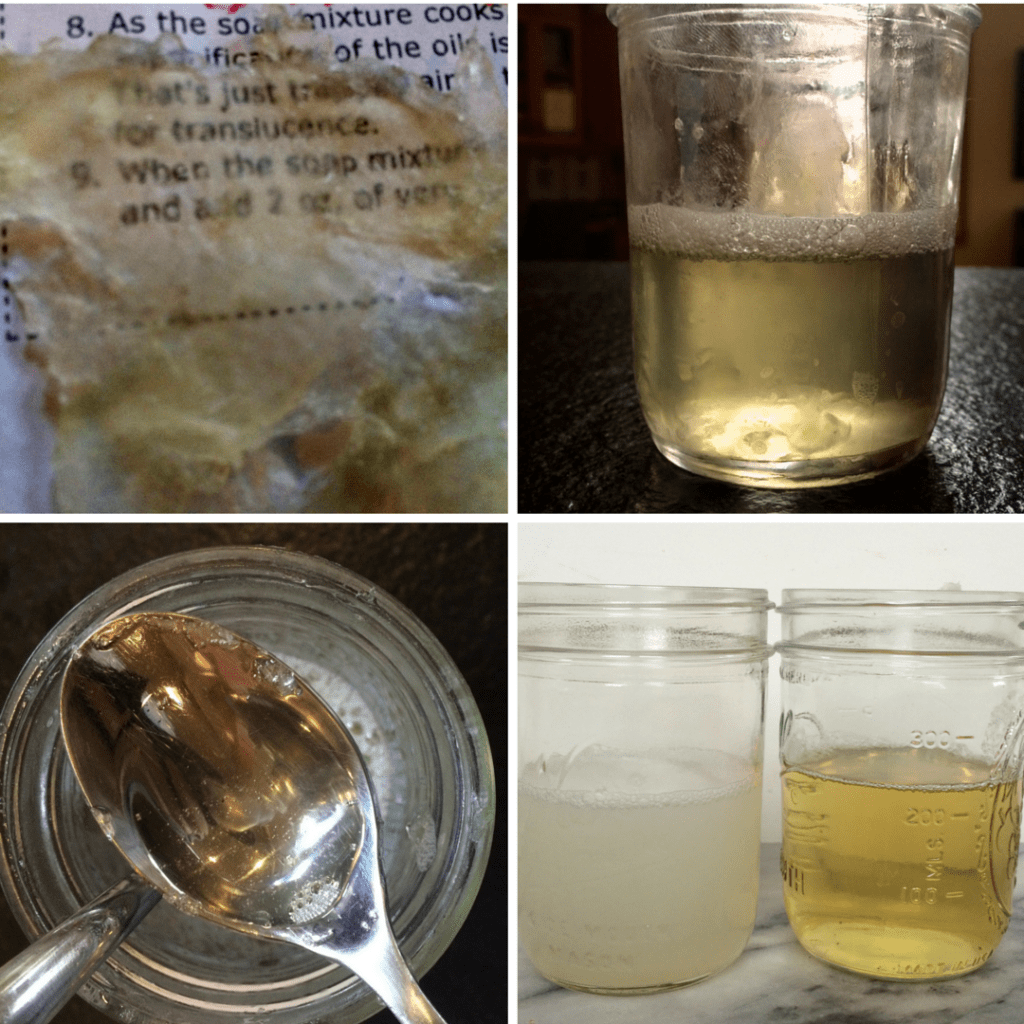
Lower-right: cloudy, unfinished soap on left; translucent, finished soap on right.
To Test Soap Clarity
- Measure out an ounce of soap paste (about a golf-ball sized blob will do it).
- Add 4 oz (1/2 cup) of boiling or very hot water to the soap paste. Stir gently until the soap paste is totally dissolved.
- Allow the dilute soap to cool.
- If the soap is opaque, or if a scum of oils floats to the surface, continue cooking your soap paste for another hour or two before re-testing.
- If the dilute soap is clear or slightly pearlescent (the soap won’t be colorless, just translucent), proceed with dilution.
*Alternate Oils and Clarity
If you change up the oils in your soap – and particularly if you use tallow, lard, palm, or other “hard” fats – you may end up with a soap that never becomes completely clear.
There’s nothing you can really do about this, as I understand it – it’s just a matter of the type of fatty acids in certain oils.
The coconut and olive oils used in the formula given here should cook out to a fully gelled soap paste in between 3 to 6 hours, depending on the temperature of your crockpot, how often you stir, etc.
6. Dilute the Soap Paste
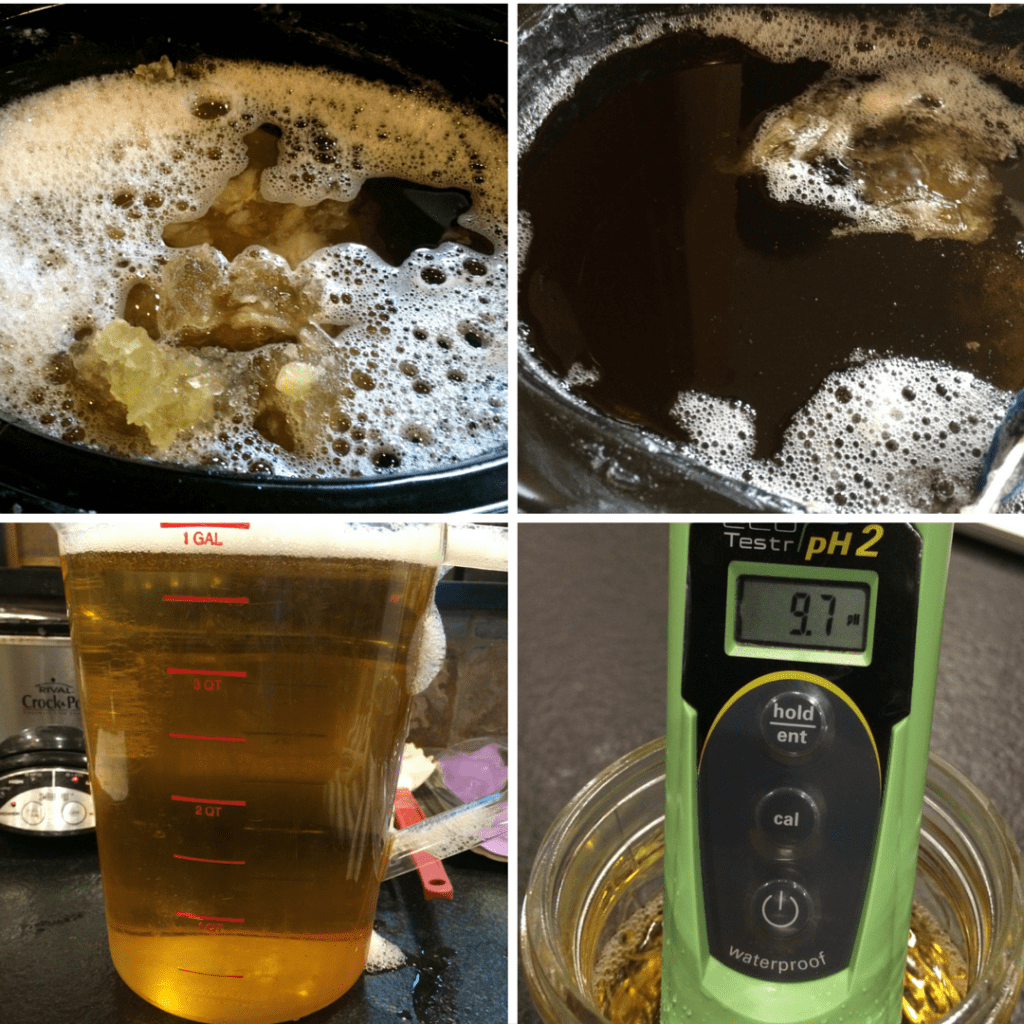
The melting process is very slow.
Once the soap paste has fully gelled, proceed with dilution. Like the cook phase, dilution of the paste is a sloooowwww process, but the soap will pretty much take care of itself.
Add 10 cups distilled* water to the soap paste in the crockpot. Break up the soap paste into the water into smaller blobs of paste as best you can but don’t worry about the paste dissolving yet.
Turn the crock pot heat to keep-warm, lid the crockpot and give the soap paste all day or overnight to dissolve. If possible, every hour, or as you happen to think of it, give the soap a stir to help it along. (If you’re sleeping during this phase, don’t worry about stirring!)
If, after 8 hours-ish, you’re still seeing a lot of chunks of soap, or you see a skin forming at the top of the soap, add in another cup of distilled water and let the soap continue to dissolve. Repeat with the final cup of distilled water if needed.
When your soap is fully dissolved with no chunks of soap paste remaining, it’s ready to bottle.
*Is Distilled Water Necessary?
I call for distilled water for three reasons.
- I have no idea what the pH and mineral content of your water is. Mine is 7.4 – pretty neutral – and soft like a baby’s butt. You might have tap water so full of minerals it’s practically gravel, with a pH of 9.5. That’s just way too much starting variation for a soap recipe that doesn’t ask for pH testing and buffering.
- Impurities in water – mostly those aforesaid minerals in hard water – can cause soap to do funny things. Clumping and particulate are possible.
- There is a miniscule possibility that contaminated tap water could introduce spoilage organisms to your soap on dilution.
The most important reason is (1) – so if you have a way to test the final pH of your soap, such as a pH meter or phenolphthalein pH testing drops, and feel confident adjusting your soap pH with a citric acid or borax buffer if necessary…well, then honestly you probably don’t need this soap tutorial at all! 🙂
I have made this recipe with my own near-neutral, soft water without issue. Hard water folks might find tap water trickier to work with from an impurity standpoint.
7. Bottle and Adjust Quantity
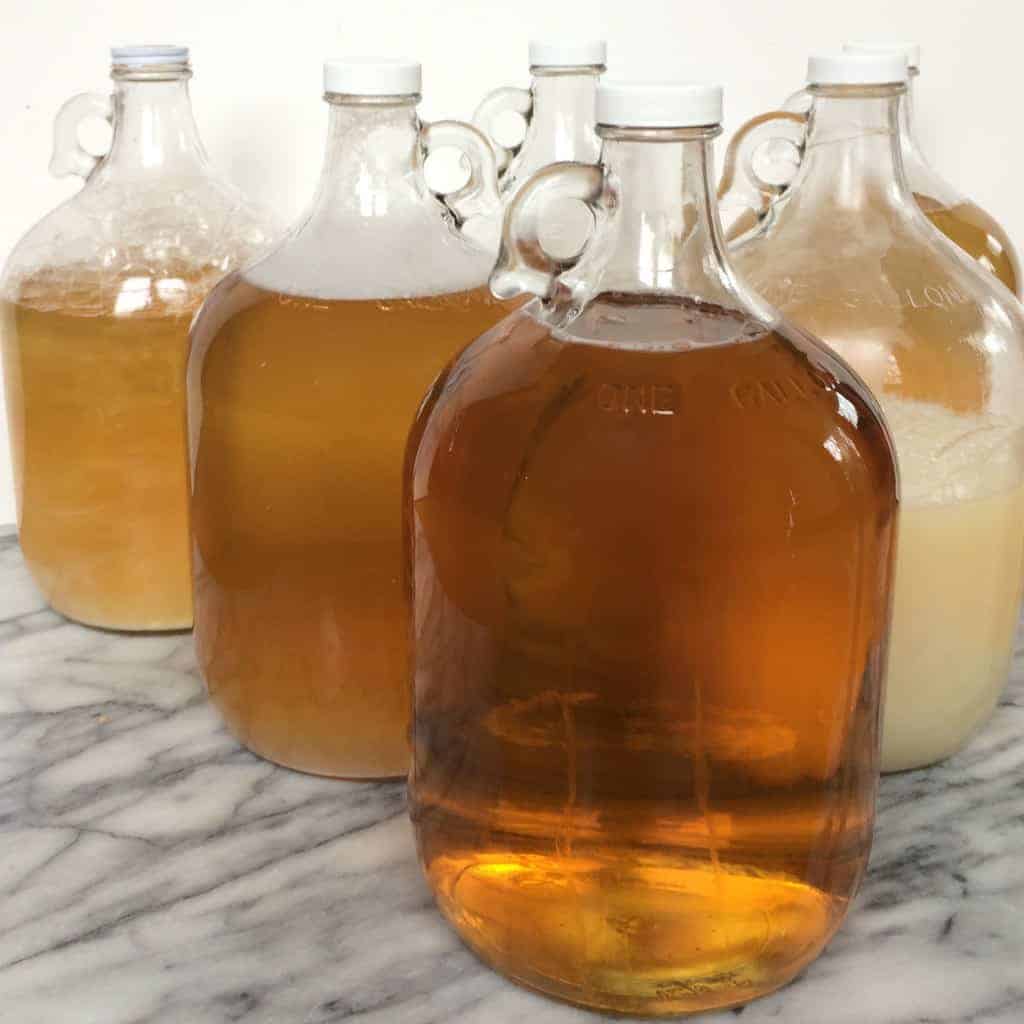
I have a lot of soap now.
Before bottling, I like to strain my soap to catch any bits of scum or soap paste that hasn’t fully dissolved. This is optional, but it doesn’t add much time.
Ladle or carefully pour your dilute soap into a perfectly clean and dry 1-gallon glass or plastic jug. Old apple juice, milk or vinegar are good for this – just ensure any reused container is thoroughly cleaned.
Your soap should be just about the right volume to fill your jug with maybe a pint or so left over for topping up soap pumps around the house.
But, because of different cook times for the soap paste, evaporation, how much water you added, etc, your soap might be a bit low. If that’s the case, just top up your soap with a bit more water until you’re at that 1-gallon mark.
Lye Calculations For Liquid Soap
You cannot simply swap one oil for another in a soap recipe.
If you prefer to change up your base oils or your base oil quantities, make sure to run your modified formula through a reliable soap making lye calculator to determine how much potassium hydroxide (often referred to by it’s chemical notation KOH) you will need to use.
Assuming you are using commonly available KOH flakes, you have to account for the fact that your lye is only 90% pure. If you have gotten your hands on some kind of industrial, super-high purity KOH you’re on your own when it comes to your lye calculations.
Good lye calculators like Soap Calc will have an option for 90% KOH. Use that formulation with a 3% superfat.
Again: you must run any variation or modification of a soap recipe (any soap recipe!) through a soap calculator to ensure safe and complete saponification. This is for your safety!
What’s The Cost?
As of the writing of this post, my cost for a batch of this soap using organic oils was as follows:
- Coconut Oil – $10.25 for 16 oz = $0.64/oz * 16oz = $10.25
- Olive Oil – $17.75 for 34 oz = $0.52/oz * 24 oz = $12.53
- Potassium Hydroxide Lye – $12.99 for 32 oz = $0.41/oz = $3.90
- Total = $26.68
Using bulk oils from Costco and the ingredient cost drops to about $18.
So, a batch of this soap should come in at about $20 – $30, depending on where you get your ingredients and if you opt for organic or otherwise more expensive base oils. That’s between one-third to one-half the cost of Dr. Bronner’s.
Printable Recipe For Liquid Castile Soap
DIY Liquid Castile Soap
Ingredients
- 24 oz weight (680 grams) olive oil
- 16 oz weight (454 grams) coconut oil
- 9.35 oz weight (265 grams) Potassium hydroxide lye flakes
- 32 oz (4 cups | 907 grams) distilled water, for lye-solution
- 10 to 12 cups distilled water, to dilute, plus extra as needed
Instructions
Make The Soap Paste
- Add the olive oil and coconut oil to a large, (6 quart minimum) crock pot. Turn the crock-pot on high.
- While the oils are warming, put on your safety gloves and goggles, and carefully measure the potassium hydroxide lye into a stainless steel or pyrex bowl.
- Measure the water into a medium stainless bowl or pyrex pitcher. Set the container with the water into your sink, then very carefully tip the lye flakes into the water. Stir to dissolve.
- When the oils in the crockpot are warm, carefully tip the lye solution into the oils. Leave the crockpot on high.
- Use an immersion blender to blend the oils and lye solution together. Immediately after adding the lye solution to the oils, blend for about 5 minutes, until the mixture looks uniformly opaque and begins to slightly thicken. For the next 30 minutes, come back and blend the soap paste about every 5 minutes. The mixture will get thicker and thicker, progressing through an icing texture to something like Elmer's glue.
Cook Soap Paste
- When the soap mixture becomes too thick to blend with an immersion blender, lid the crock pot and cook the soap mixture for 3 hours on high.
- Every 30 minutes or so, come back and fold and stir the soap paste with a heat-resistant silicone spatula or heavy wood spoon to ensure the soap paste cooks evenly.
- As the soap cooks, it will become increasingly translucent, moving from a runny white liquid to a puffy taffy texture to, eventually, a yellowy-clear, thick, translucent gel.
Test Soap Clarity
- After 3 hours, or once the paste looks fully translucent and gelled throughout, check the soap with a clarity test.
- Measure out an ounce of soap paste (about a golf-ball sized blob will do it). Add 4 oz (1/2 cup) of boiling or very hot water to the soap paste. Stir gently until the soap paste is totally dissolved.
- Allow the dilute soap to cool. If the soap is opaque, or if a scum of oils floats to the surface, continue cooking your soap paste for another hour before re-testing.
- If the dilute soap is clear (it needn't be colorless, just translucent), proceed with dilution.
Dilute the Soap Paste
- Add 10 cups water to the soap paste in the crockpot. Break up the soap paste into the water as best you can but don't worry about the paste dissolving fully.
- Lid the crock pot and turn the heat to warm for 8 hours or overnight. If you happen to walk by, give the soap a stir to help it along but don't worry if you can't.
- After 8 hours, if you notice chunks of remaining soap or thick skin of soap forming even after the chunks of soap dissolve, add another cup or two of water to further dilute the paste.
Bottle Soap
- When your soap is fully dissolved with no chunks of soap paste remaining, ladle your dilute soap into a perfectly clean and dry 1-gallon glass or plastic jug.
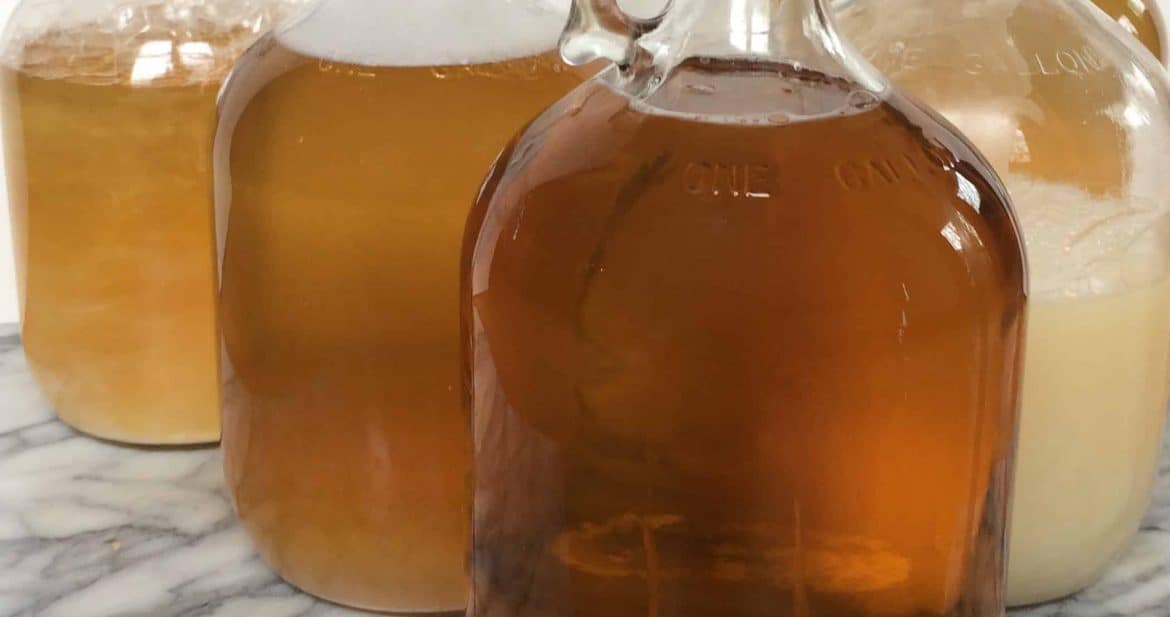

Hi. Great article!
I am making my own liquid soap for some time but until now I only used already pre-made castile soap base made from sunflower and coconut oils. I mix the soap base with coco glucoside, carrier oil, little bit of glycerin and vitamin E and then dilude with water as necessary. My problem is that when I add carrier oil into the mix like Almong or Argan the soap will turn milky white. I want to eliminate that. Any idea?
I’m thinking to start making my own and better quality soap base like yours so I don’t have to add extra oils afterwards just to keep my soap transparent. Do you think I could make a soap base similar to yours but with added Argan oil? Like 55/35/10 of Coconut, Olive and Argan oil. Will the Argan oil retain its good quality and properties throughout the process?
Thanks
How will this recipe work for foam soap
I have read some articles about adding glycerine instead of water to miss the Potassium hydroxide. They say it will mix much quicker, does anyone know you just substitute glycerine for water at equal parts?
Thanks for the detailed post. I was a little intimidated with Lye and the mysterious origins of soap. But now, I’m looking forward to making my own soap! (as well as your other posts on sent and utility uses)
BRAVO!!!
Hi, this recipe worked great for the 1st part, we were whizzing thru thought we were going to be done by 2:15pm, however it is now 7:45pm and the consistency is exactly the same.. it’s at the stage before fully gelled blob! I’ve done a couple of clarity tests and it turns cloudy almost instantly. What would everyone recommend? Many thanks ?
I’ve made this recipe and it was Awesome!!! The second attempt I clicked on the pin and didn’t bother to visit the site as what I thought was the recipe pops up right away…..This recipe is WRONG very, very WRONG and it wasted a ton of oils and my time….. The recipe when you visit the website is great but beware do not follow the recipe that pops up when you click on the pin?. So disappointed……